
Webhooks send selected form values to an HTTP endpoint before or after Kali Forms processes a submission. Use them to connect a form to an internal service, automation platform, or custom application without adding arbitrary PHP to the form.
Before you begin
Collect the receiving service’s endpoint URL, required method, data format, field mapping, and authentication requirements. Use a test or staging endpoint first.
Do not place credentials in body fields. If an endpoint requires a secret, use Authentication secret or a request header, and limit form-editing access to trusted users.
Create a webhook
- In WordPress, go to Kali Forms > Forms and edit a form.
- Select Settings in the builder navigation.
- Select Webhooks.
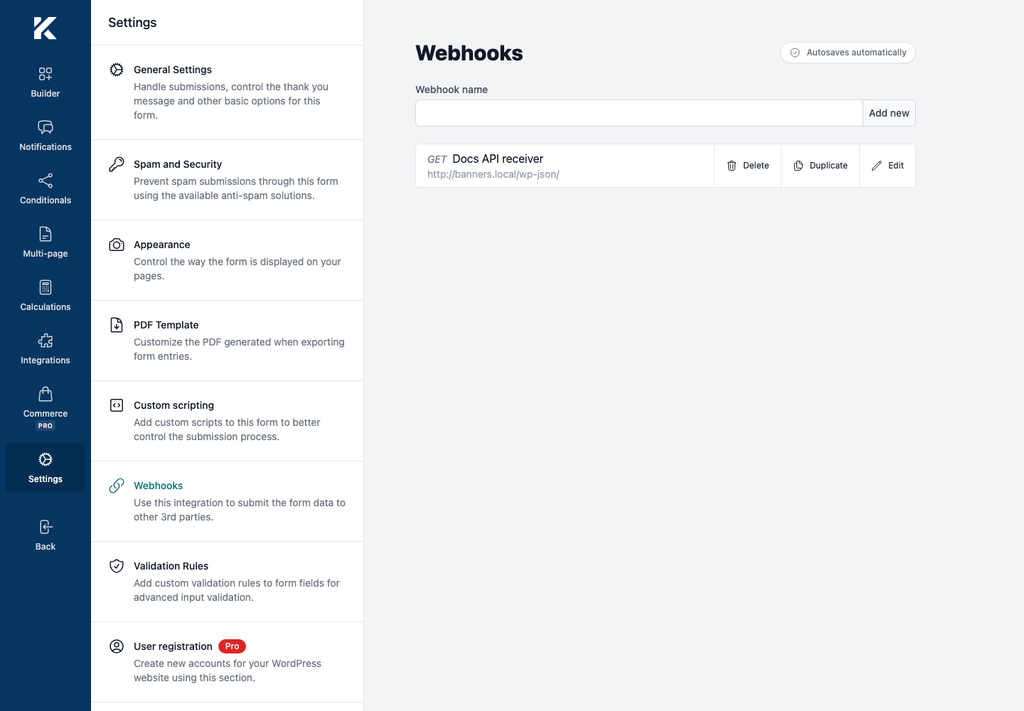
- Enter a descriptive Webhook name.
- Select Add new.
The webhook appears in the list. Select the list item or its edit action to open the configuration.
Configure the request
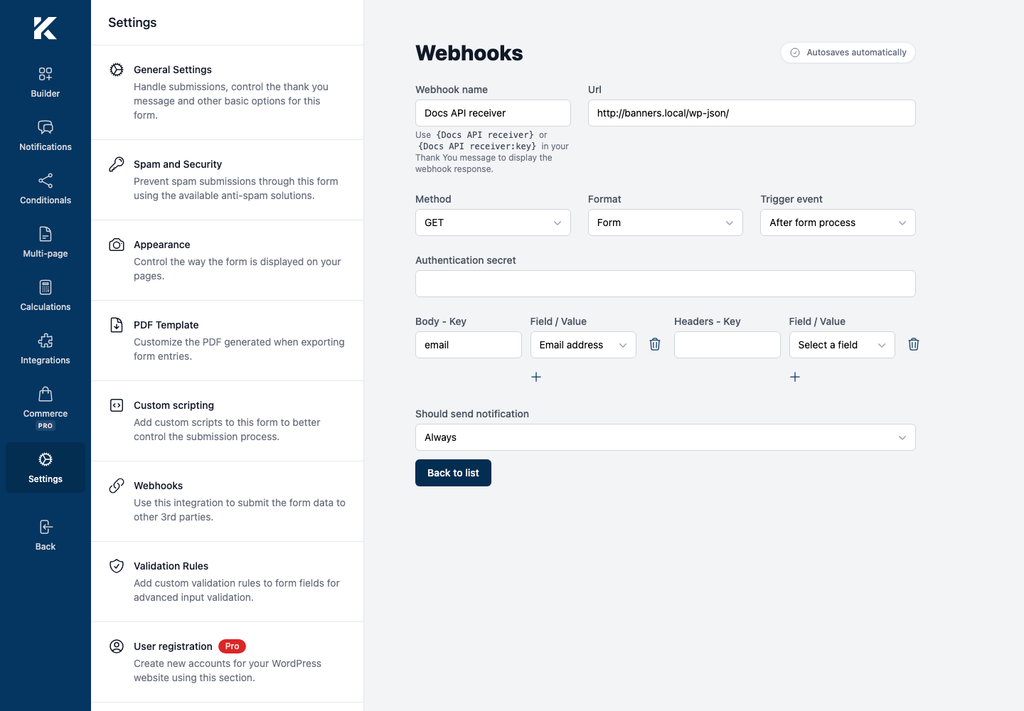
- Enter the complete endpoint in Url.
- Select a Method:
GET,POST,PUT,PATCH, orDELETE. - Select a Format: JSON or form-encoded data.
- Choose the Trigger event:
- Before form process sends the request before normal submission processing.
- After form process sends it after processing.
- If required, enter an Authentication secret.
- Under Body – Key, enter the key expected by the receiving endpoint and select the form field that provides its value.
- Review the custom-header limitation below before using Headers – Key.
- Leave the conditions set to always, or add conditions that limit when the request is sent.
Changes in the editor are saved automatically after a short delay.
Understand the request
For JSON requests, Kali Forms sends the mapped body as JSON and uses application/json; charset=UTF-8 for methods with a request body. Form format uses application/x-www-form-urlencoded; charset=UTF-8.
Kali Forms adds these headers:
X-App, identifying the Kali Forms Webhooks extension version;X-App-Event, containing the selected trigger event;X-Kali-Auth, when Authentication secret has a value.
Custom header names are prefixed with X-. An Authorization header is the exception and is sent under that standard name.
For a GET webhook, mapped values are added to the URL query string instead of a request body.
Use the webhook response
The editor shows response placeholders after the webhook has a name. Use {Webhook name} for a scalar response or {Webhook name:key} for a value from a JSON object in a thank-you message. The name must match the webhook name exactly.
Response placeholders are available only when the request succeeds and the receiving service returns usable content. Design the thank-you message so it remains understandable when a remote service is unavailable.
Test safely
- Save the form and submit non-sensitive sample values.
- Review the receiving service’s request log.
- Confirm the method, headers, body keys, and values.
- Test both matching and non-matching condition paths.
- Confirm that a slow or unavailable endpoint does not create an unacceptable submission delay.
The automated fixture sent a form-encoded test GET request only to the same WordPress site’s read-only REST index. It verified persistence, sanitization, and successful request dispatch without contacting a third party.