
The Newsletter integration adds a submitted contact to a mailing list in Mailchimp, MailerLite, Kit/ConvertKit, ActiveCampaign, SendFox, MailPoet, Brevo, Moosend, Campaign Monitor, or GetResponse. Kali Forms still displays a Revue option, but Revue shut down on January 18, 2023 and cannot be configured.
Before you begin
Prepare the following:
- an active account at the selected provider, except for MailPoet, which runs as a WordPress plugin;
- a list, audience, campaign, or form at that provider;
- an API credential with access to read lists and create or update subscribers;
- a form containing at least an Email field and a clear consent control where consent is required;
- the provider’s required billing, sender, or compliance setup.
Never subscribe an address without the owner’s consent. Explain what the visitor will receive, keep proof of consent where required, and honor unsubscribe and deletion requests.
Obtain the provider credential
Use the credential type that matches the label in Kali Forms > Newsletter:
| Provider | Credential and official setup |
|---|---|
| Mailchimp | Create an API key in the account’s API key settings. Mailchimp warns that an API key grants full account access, so store it like a password. Mailchimp Marketing API quick start |
| MailerLite | Go to Integrations > MailerLite API, generate a token, and copy it when shown. Tokens are bearer credentials tied to the user who created them. MailerLite API getting started |
| Kit/ConvertKit | This Kali Forms build asks for a V3 API key and V3 API secret. Obtain both from Kit’s legacy developer settings. Kit marks V3 as legacy; a V4 API key is not interchangeable. V3 authentication, V3 status, V4 upgrade notes |
| ActiveCampaign | Copy the account’s API URL and the current user’s API key from Settings > Developer. Each user has a separate key. ActiveCampaign authentication |
| SendFox | In Settings > Connections > API, create an access token and copy it once. SendFox documents token creation as a paid-plan feature. SendFox access tokens |
| MailPoet | No external API credential is entered in Kali Forms. Install and activate MailPoet on the same WordPress site, then create the destination list in MailPoet. MailPoet lists FAQ |
| Brevo | In Brevo, open SMTP & API > API Keys, generate a key, and copy it when shown. Kali Forms 3.0.0 still labels the field Sendinblue API key. Brevo API-key authentication |
| Moosend | Open More > Settings > API key, then generate or copy the key. Moosend API-key guide |
| Campaign Monitor | Copy both the API key and Client ID from Account Settings > API keys. Campaign Monitor authentication |
| GetResponse | Generate an API key in the GetResponse API panel. GetResponse documents API keys as the primary authentication method and expires unused keys after 90 days. GetResponse API reference |
| Revue | Do not configure it. X’s official help page confirms that Revue was shut down and is no longer accessible. Revue shutdown notice |
Create a dedicated credential where the provider permits it. Give it only the access needed to read list metadata and add or update contacts.
Connect the provider to Kali Forms
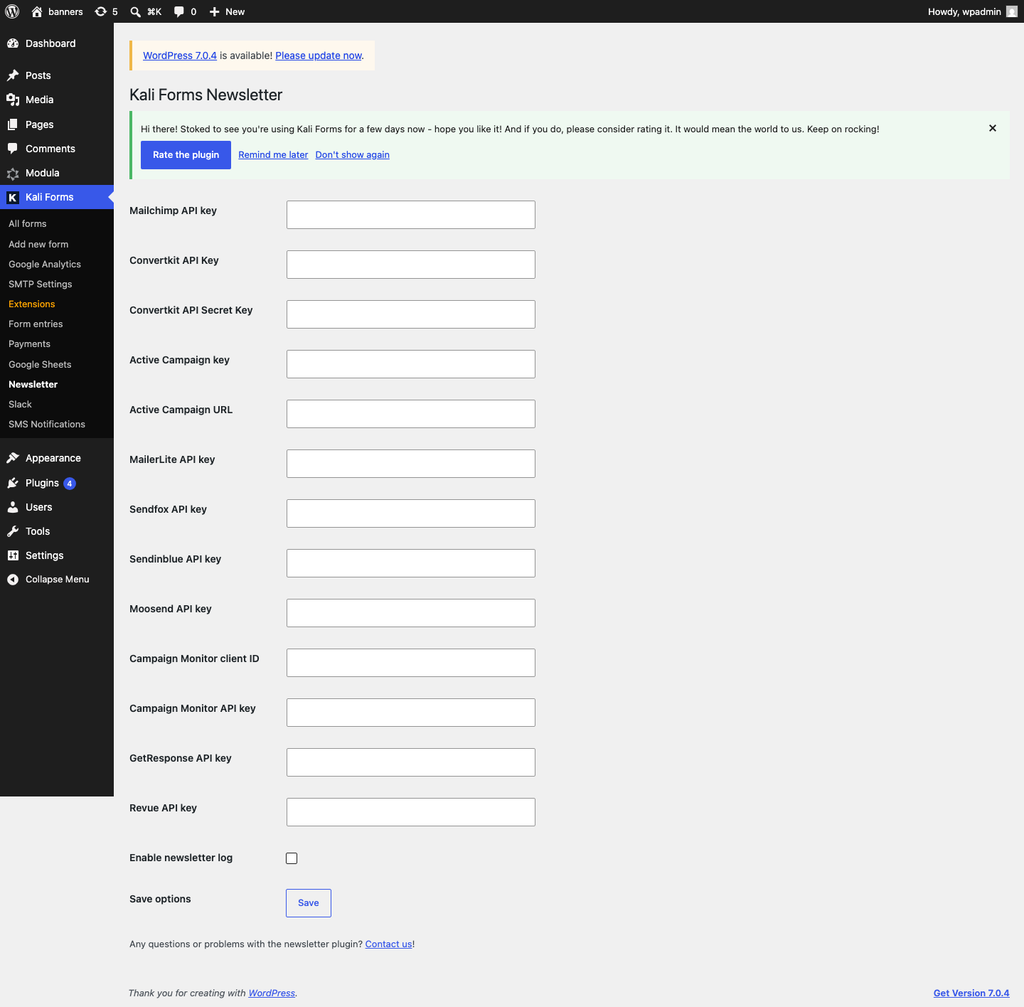
- In WordPress, go to Kali Forms > Newsletter.
- Enter only the fields for the provider you intend to use. Leave unrelated provider fields blank.
- For ActiveCampaign, enter both Active Campaign key and Active Campaign URL.
- For Kit/ConvertKit, enter both Convertkit API Key and Convertkit API Secret Key.
- For Campaign Monitor, enter both Campaign Monitor client ID and Campaign Monitor API key.
- Optionally enable Enable newsletter log temporarily while testing. Logs can contain contact or response data; disable and remove them when troubleshooting is complete.
- Select Save.
Configure the form
- Go to Kali Forms > All forms and edit the form.
- Open Integrations > Newsletter.
- Enable Newsletter integrations.
- Select the configured provider.
- Select the destination list, audience, campaign, or form returned by the provider.
- Map the provider’s required email property to the form’s Email field.
- Map optional first-name, last-name, and custom properties only when both the form and provider define them.
- Enter provider tags if that provider exposes a tags control.
- If the screen offers a condition, map it to an explicit consent checkbox and configure the accepted value. This prevents an unchecked submission from being subscribed.
- Wait for Autosaves automatically, reload the builder, and confirm the provider, list, mappings, tags, and condition remain selected.
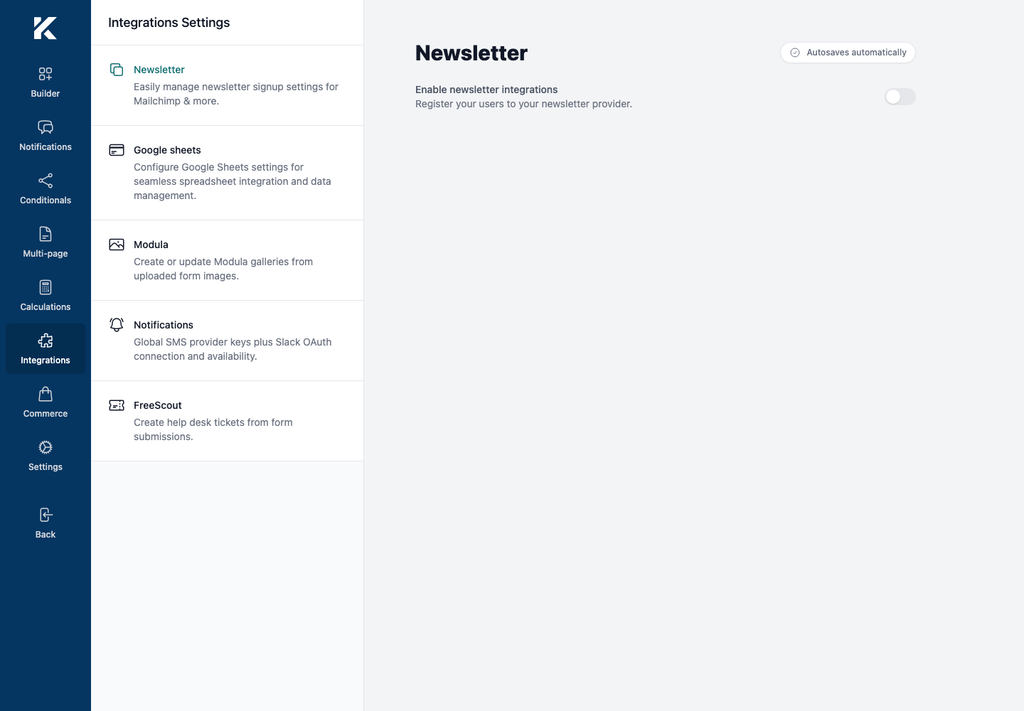
List discovery and provider field mapping are available only after valid provider setup. They could not be exercised in the credential-free verification environment.
Verify safely
- Use a staging form and an address you control and have authorized for testing.
- Submit once with consent selected.
- In the provider, confirm the contact is in the intended list and that mapped values and tags are correct.
- If double opt-in is enabled, complete the confirmation from the test inbox and confirm the status changes from pending to subscribed.
- Submit the same address again and confirm the provider updates or ignores the existing contact without creating an unwanted duplicate.
- Submit once without consent and confirm no contact is added.
- Delete the test contact and any Kali Forms entry after verification.
Secure, rotate, and revoke credentials
- Do not place API keys in article screenshots, support tickets, repositories, analytics, or browser recordings.
- Limit WordPress administrator access and protect backups because Kali Forms stores these credentials in WordPress options.
- Rotate a credential immediately if it is exposed or if its owner leaves the organization.
- Revoke or delete the old credential in the provider console, save the replacement in Kali Forms > Newsletter, and repeat the staging test.
- For MailPoet, remove or disable the integration and review the local subscriber list instead of revoking an external API key.