
The Google Sheets integration appends one row to a selected worksheet when a Kali Forms submission is processed.
What you need
- a Google account that can access the destination spreadsheet;
- a Google Cloud project where you can configure the OAuth consent screen and credentials;
- the Google Sheets API and Google Drive API enabled in that project;
- an OAuth 2.0 Web application client ID and client secret;
- permission to approve the scopes requested by the installed Kali Forms build;
- a spreadsheet containing a worksheet/tab and a header row that matches the intended mappings.
Google’s official workflow covers project, consent screen, client, and credential creation in Create access credentials.
Understand the requested access
Source inspection of Kali Forms Pro 2.0.0 confirmed that this integration requests:
https://www.googleapis.com/auth/spreadsheets— read, create, edit, and delete all Google Sheets spreadsheets;https://www.googleapis.com/auth/drive— read and manage all files in the authorized user’s Google Drive.
Google classifies these as sensitive and restricted broad scopes. See the official Sheets scope list and Drive scope guidance. This build does not request the narrower drive.file scope.
Use a dedicated organizational Google account with access only to the spreadsheets the site needs. Your organization may require administrator approval or Google app verification before broad scopes can be authorized.
Create the Google OAuth client
- Sign in to Google Cloud Console with an authorized administrator or project owner.
- Create or select a project dedicated to this WordPress integration.
- Open APIs & Services > Library.
- Enable Google Sheets API.
- Enable Google Drive API. Kali Forms uses Drive to discover spreadsheets.
- Configure the Google Auth platform or OAuth consent screen:
- enter the app name and support contact;
- choose Internal only when every authorized user belongs to the same eligible Google Workspace organization; otherwise choose External;
- declare the Sheets and Drive scopes listed above;
- add the account that will connect Kali Forms as a test user while the app is in Testing.
- Open Clients or Credentials, select Create client, and choose Web application.
- In Kali Forms, open Kali Forms > Google Sheets and copy the displayed Redirect URI.
- Add that URI to the OAuth client’s Authorized redirect URIs exactly, including scheme, host, path, and query string.
- Create the client and copy its Client ID and Client secret.
Google requires the authorization request’s redirect URI to match a configured URI exactly. See OAuth 2.0 for web-server applications.
On the local verification site, Kali Forms displayed:
https://website.com/wp-admin/edit.php?post_type=kaliforms_forms
Do not reuse that value on another site. Copy the URI displayed by the actual production or staging installation. Production OAuth redirects should use HTTPS.
If the consent configuration remains in Testing, Google limits it to listed test users and may expire authorizations after seven days. Review Google Auth platform publishing status.
Connect Kali Forms to Google
- In WordPress, go to Kali Forms > Google Sheets.
- Paste the OAuth Client ID into Client ID.
- Paste the OAuth Client secret into Client secret.
- Leave Enable debug log disabled initially. Enable it only for controlled troubleshooting because logs may expose spreadsheet or submission metadata.
- Select Save.
- Use the connection/authorization control that appears after valid credentials are saved.
- Sign in with the dedicated Google account.
- Verify the project/app name and requested scopes on Google’s consent screen, then approve only if they match the intended integration.
- Return to WordPress and confirm the page reports the Google account as connected.
Prepare the spreadsheet
- Create or open the destination spreadsheet using the connected Google account.
- Add a dedicated worksheet/tab, for example
Responses. - Add one header in row 1 for each value you will map, such as
Submitted at,Email address, andMessage. - Give the connected account Editor access to the spreadsheet.
- Avoid merged header cells and duplicate headers.
Kali Forms appends rows to the selected tab beginning at its A1 range. Google documents request limits and retry guidance in the Sheets API usage limits.
Map form fields to columns
- Go to Kali Forms > All forms and edit the form.
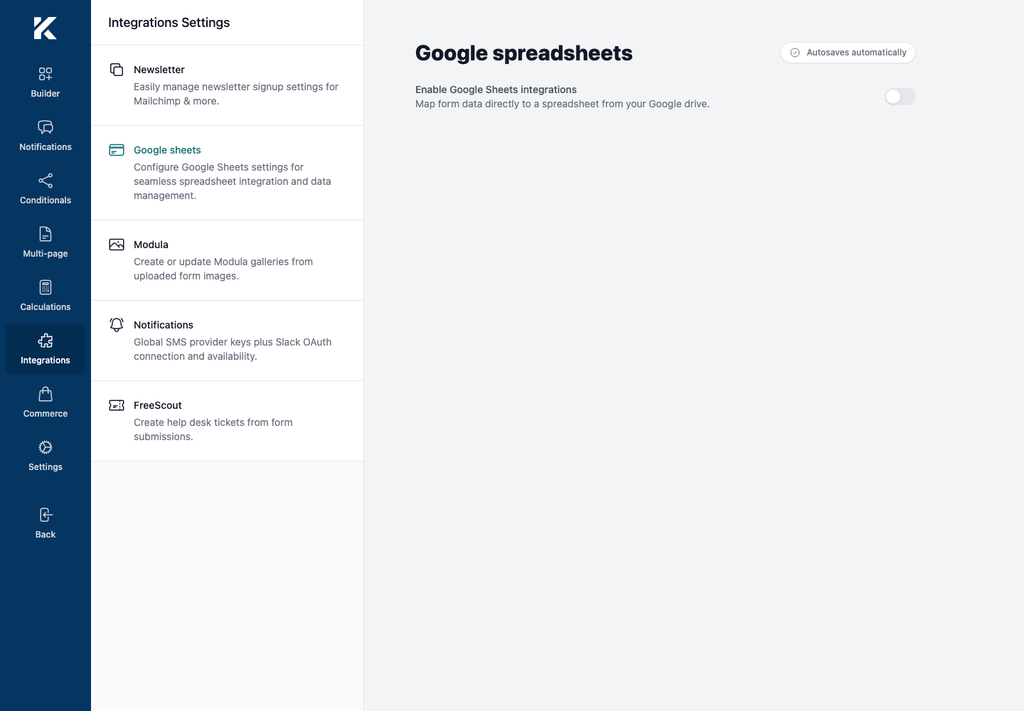
- Open Integrations > Google sheets.
- Enable Google Sheets integrations.
- Select the spreadsheet returned from the connected Google Drive account.
- Select the worksheet/tab.
- For each spreadsheet column, select the Kali Forms field whose submitted value should be appended.
- Map only fields needed in the spreadsheet. Treat submissions as personal data when they contain names, email addresses, phone numbers, or message content.
- Wait for autosave, reload the builder, and confirm the spreadsheet, tab, and mappings remain selected.
Verify safely
- Use a staging form and synthetic data.
- Note the last populated row in the selected worksheet.
- Submit the form once.
- Confirm exactly one new row appears and each value is under the correct header.
- Submit a second value containing safe punctuation and non-ASCII characters to check encoding.
- Confirm no unexpected spreadsheet or Drive file was modified.
- Delete the synthetic rows and any saved Kali Forms entries after testing.
Do not use a live customer submission as the first test.
Disconnect and revoke access
- Disable the form-level integration before revoking access so new submissions do not repeatedly fail.
- Use the Google Sheets disconnect control in Kali Forms to remove its locally stored OAuth token.
- In the Google account, remove the app’s third-party access.
- In Google Cloud Console, rotate or delete the OAuth client secret if it was exposed or the integration is retired.
- Remove the dedicated account’s access to the spreadsheet when it is no longer needed.
The client secret and OAuth refresh token must never appear in screenshots, repositories, logs, or support messages.