
Add more than one notification when a single form submission must send different messages to different recipients. For example, send a detailed internal message to the site team and a separate confirmation to the person who submitted the form.
Before you begin
- Open the form in the Kali Forms builder.
- Decide who should receive each notification and what information each recipient needs.
- Configure the first notification before adding another one, so each card is easy to identify by its subject or message.
Add another email notification
- Select Notifications in the builder navigation.
- Under Add a new notification, select Email.
- Select Edit on the new notification card.
- Enter an Email subject that distinguishes this notification from the others.
- Configure its sender, recipients, email body, attachments, and triggers.
- Wait for All changes saved.
- Select Back to return to Form notifications.
Repeat these steps for every message the form must send. Kali Forms displays each saved notification as a separate card.
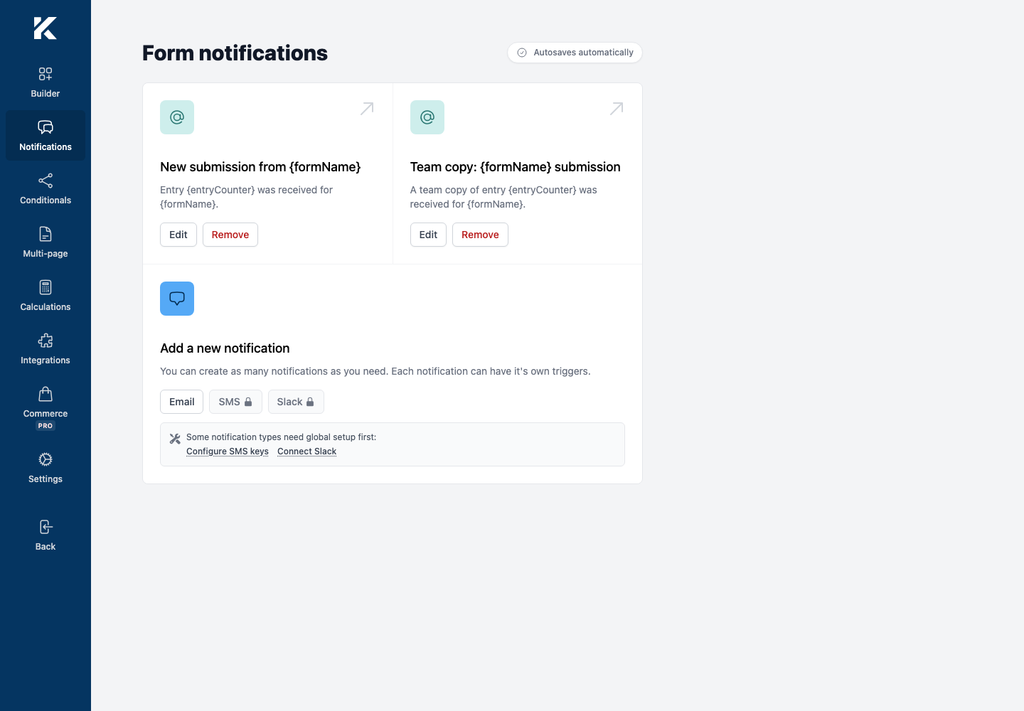
Give each notification one clear purpose
Configure recipients and content separately for each card. A typical setup uses:
- an internal notification sent to the site administrator or team;
- a confirmation sent to an email address collected by the form;
- an additional notification for another department only when its trigger conditions match.
Use a Smart Tag for a submitted email address only when the tag belongs to an email field. Review Reply to, Send copy to, and Send hidden copy to separately in every notification.
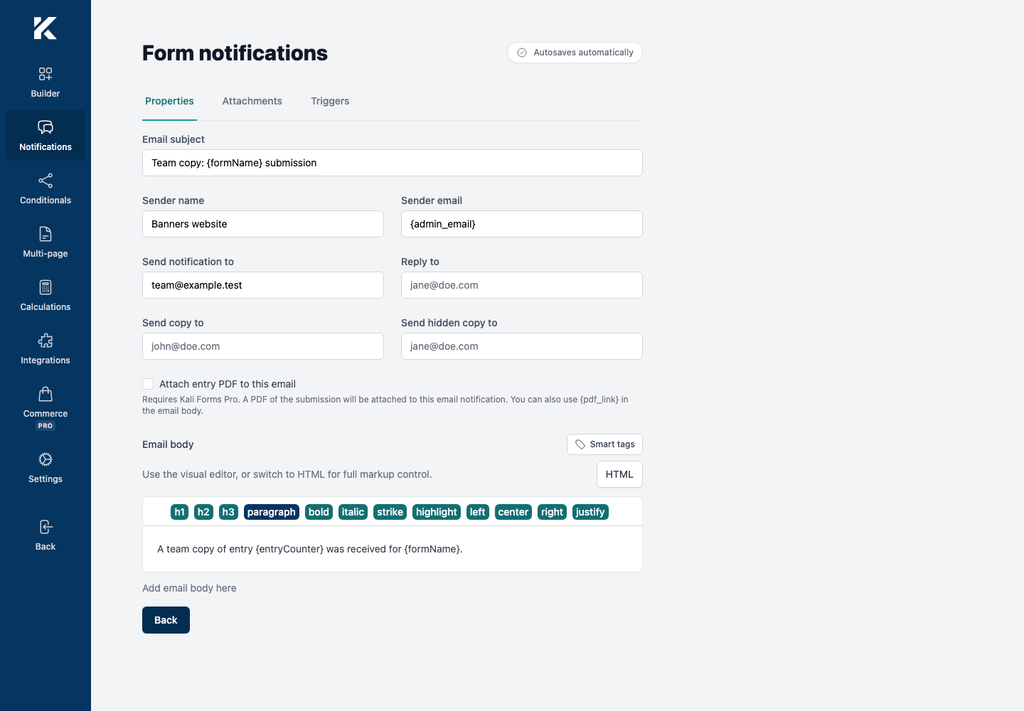
Edit or remove a notification
- Select Edit on a card to change only that notification.
- Select Remove to delete that notification from the form.
Before removing a notification, confirm that another notification still covers any required recipient or workflow. Removal is separate from editing the other cards.