
Configure an email notification to send form submission details to a site administrator, the person who submitted the form, or another recipient.
Before you begin
- Open the form in the Kali Forms builder.
- Decide which address should send the message and which address should receive it.
- Add any form fields whose Smart Tags you want to include in the subject, recipient fields, or message body.
Add or open an email notification
- Select Notifications in the builder navigation.
- Under Add a new notification, select Email.
- If you are updating an existing notification, select its Edit button instead.
Configure the email properties
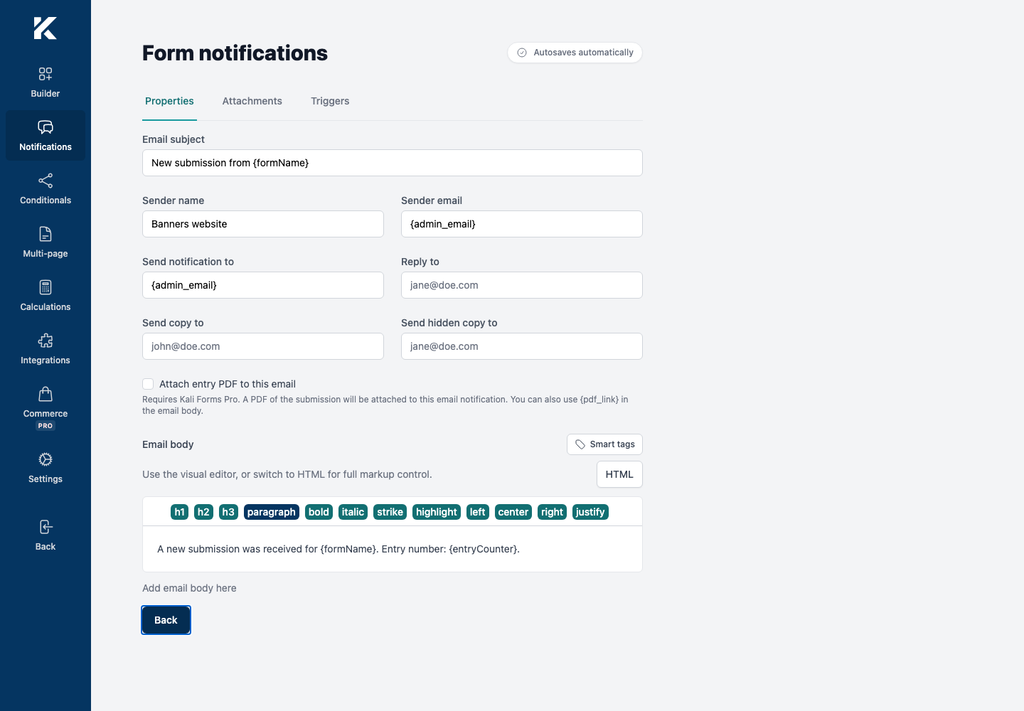
- In Email subject, enter a clear subject. You can include a Smart Tag, such as
New submission from {formName}. - In Sender name, enter the name recipients should see.
- In Sender email, enter the address that sends the message. Use an address that your site is authorized to send from.
- In Send notification to, enter the recipient address. Separate multiple addresses with commas.
- If replies should go somewhere else, complete Reply to.
- Use Send copy to for visible copy recipients or Send hidden copy to for hidden copy recipients.
Write the email body
- In Email body, enter the message recipients should receive.
- Use the visual formatting controls for headings, emphasis, and alignment, or select HTML for markup control.
- Select Smart tags to insert form and site values into the message.
Configure attachments
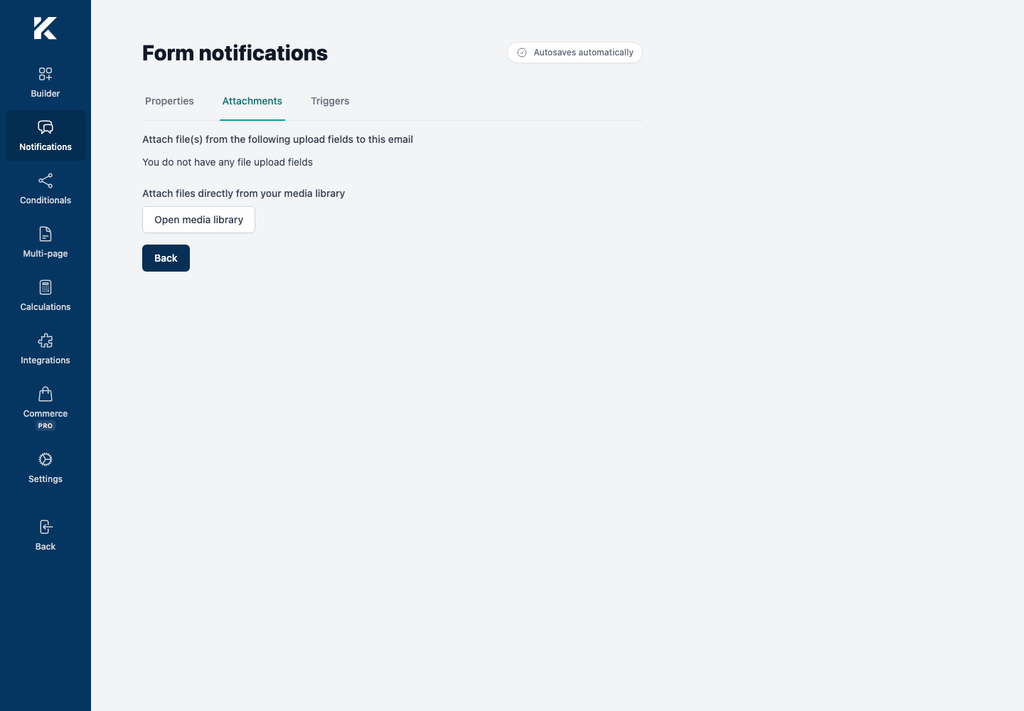
- Select Attachments.
- If the form has file upload fields, choose which uploaded files should be attached.
- To attach files from the WordPress Media Library, select Open media library and choose the files.
- Return to Properties when you finish.
Only attach files that every intended recipient is authorized to receive. Large files may exceed limits imposed by WordPress, the web server, or the mail provider.