

If you’re looking for a more efficient way to sell your products, then you’ve landed in the right place.
Owning a business requires a lot of hard work, and you will need to streamline each process. No matter which industry you belong to, a PayPal payment form will undoubtedly speed up the signup process.
PayPal is an international company that helps business owners receive money easily with the help of their platform. To start working with them, you’ll need to create a business account and fill in all the required information. To process a payment, Paypal sends money from the customer’s personal account to your business account, and so, you can transfer them into your bank account.
In this tutorial, you will learn:
- How to create a PayPal order form;
- Which is the best form builder that works with PayPal;
- How to install & use the No 1 WordPress PayPal form builder.
Table of contents
Why should you create an online registration form with PayPal?
There are many advantages to digitizing this process, but let’s see the most important ones.
- Save time – Online forms come with many features that will make your work easier. Most online form builders provide a drag and drop builder to let you quickly add fields to your forms.
- Customization – You can customize your digital forms as you please – add photos, GPS location, digital signature, files, and so much more.
- Organization – With online forms, you can organize your data more quickly and efficiently. Once you collected the necessary information, you can export it into an Excel file.
- Accurate data – Online forms can increase efficiency and accuracy. You can ensure that you will receive the data that you need by making the fields required to be fill.
- Styling – After you finish creating the registration form with PayPal, you can customize your form from over 10 template styles that our plugin offers.
- Adjustments – The amazing thing with an online payment form is that you can add product options such as price, descriptions, or even photos.
How to create a WordPress registration form with PayPal
This is a super easy process. You only need a powerful tool to help you create such a form, some robust functionalities, and you are ready to create your first registration form with PayPal for your WordPress website. Everything can be done with the help of Kali Forms because this is the best form builder that works with PayPal.
Install Kali Forms
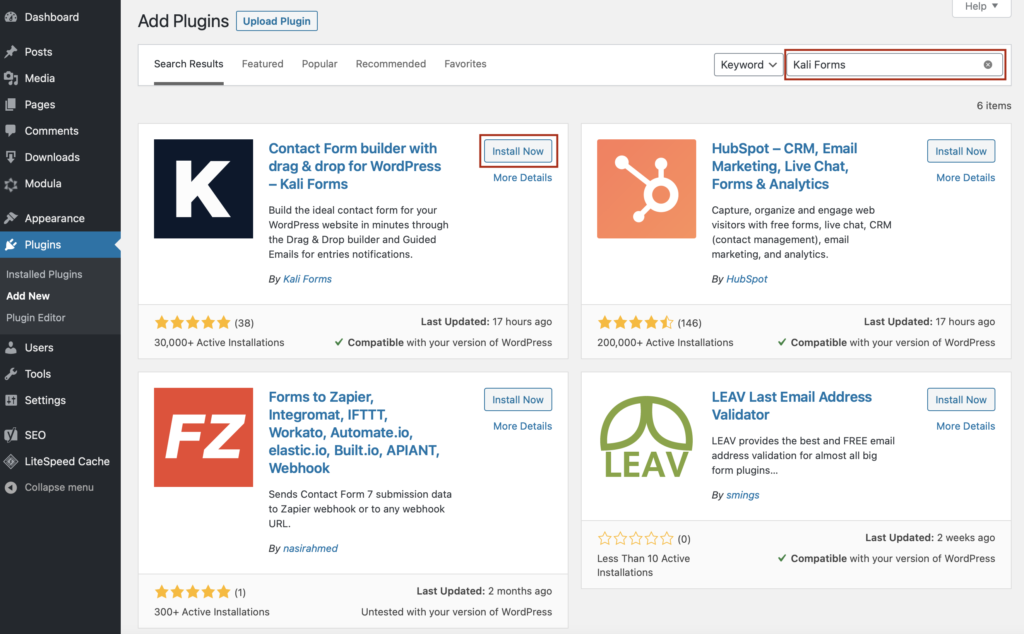
Most businesses own a website because it is an essential marketing tool. Well, if you don’t have one yet, I advise you to start building a website for your business. After you’re done with this, go to your WordPress menu > Plugins > Add New.

You will be redirected to a page with all freemium WordPress plugins. In the search bar on the upper right corner, type Kali Forms. Once you’ve found it, click Install Now.
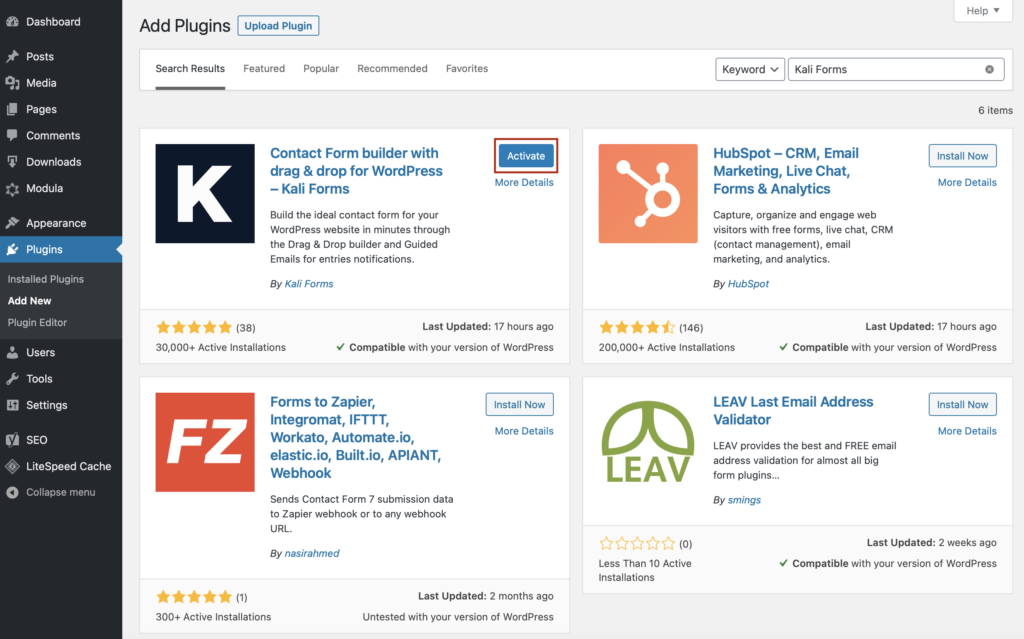
Just wait a couple of seconds and then click on Activate.
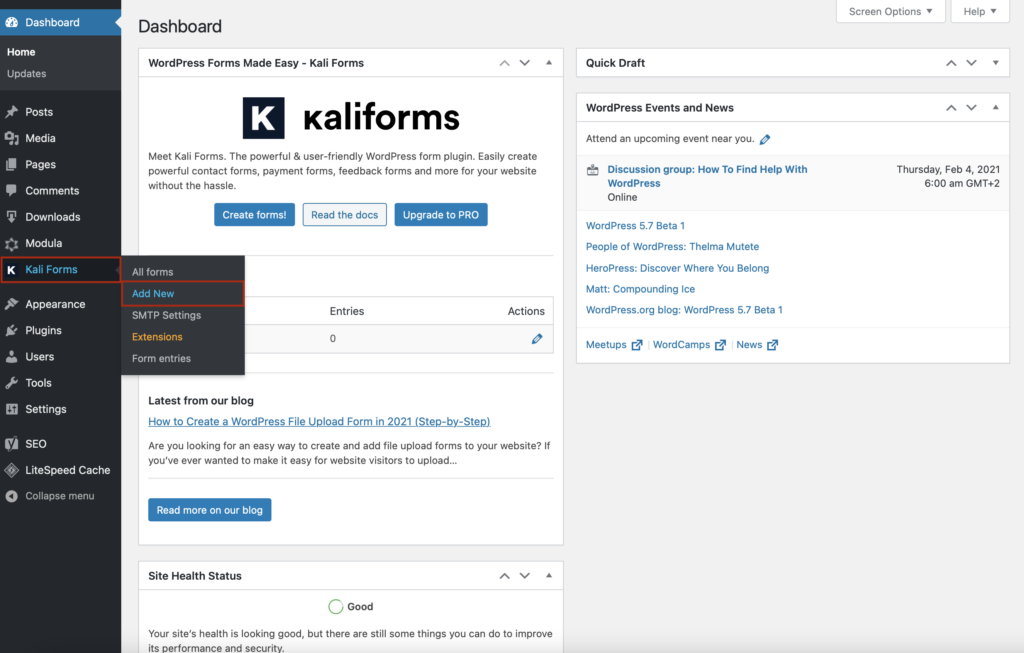
From now on, every time you want to create a form, whether it is a PayPal order form or any other one, go to the Kali Forms icon and click Add New.
Creating a new form
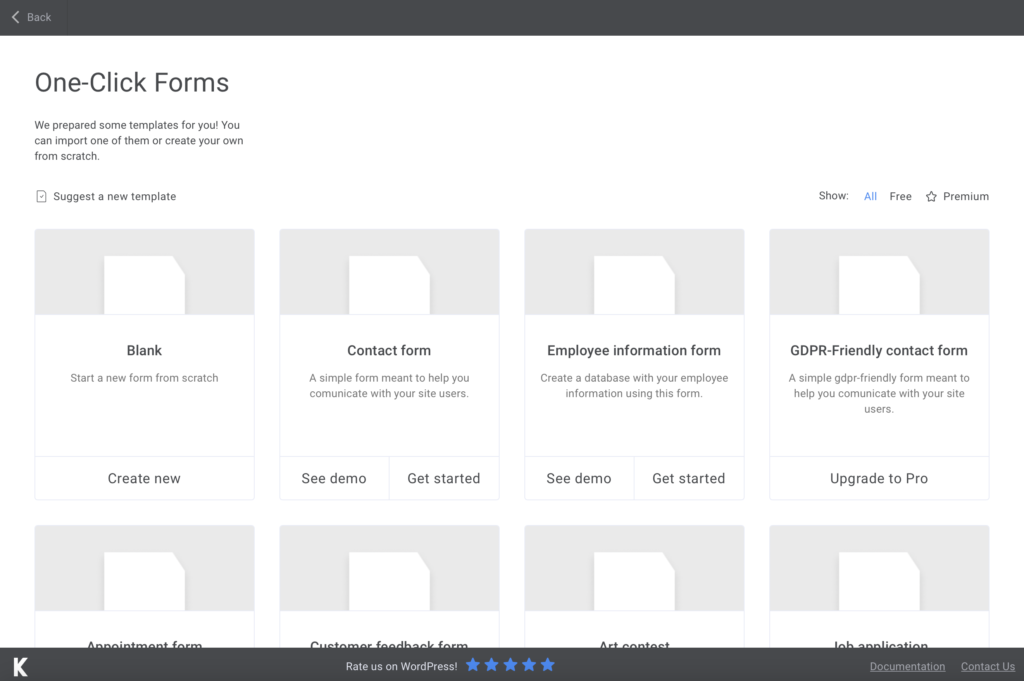
At this point, you will find yourself redirected to a page with a bunch of pre-made templates. We don’t need any of them right now, but you can definitely use them in the future. So, click on Create New and get started with your registration form with PayPal.
The first thing you should do is name your PayPal custom form, not to forget later. You can name it whatever seems appropriate.
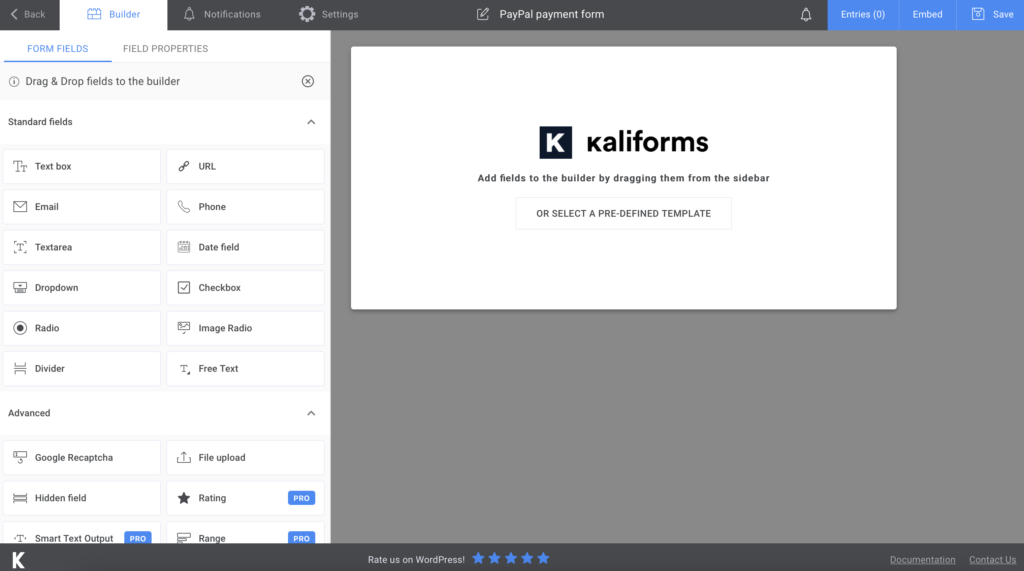
Adding form fields
Before we start creating our PayPal registration form, I want to let you know that everything here is customizable – you will see all options in the menu on the left of your page. You can assign every field a name, a description, or placeholders. You can also make them required to fill or not.
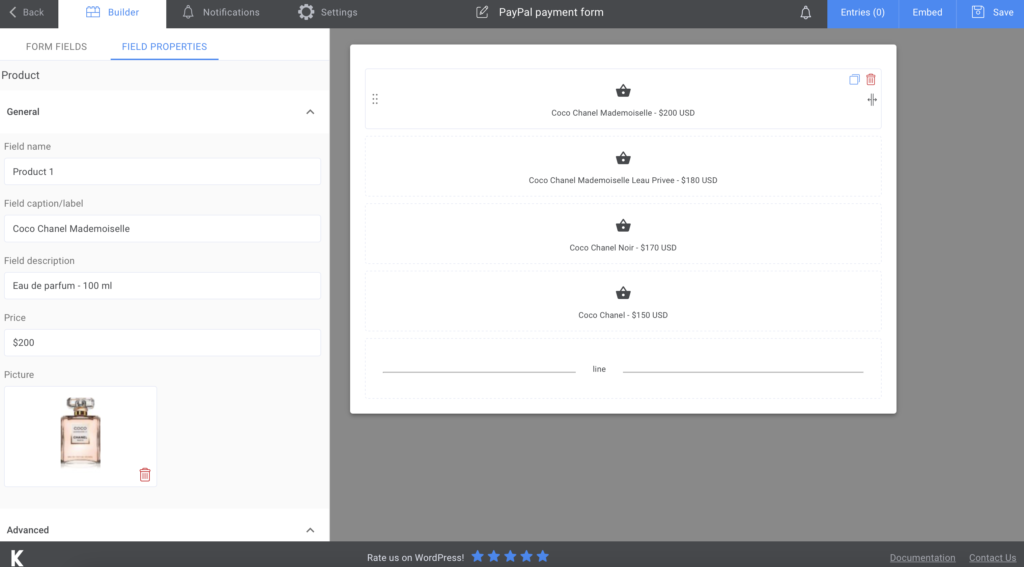
Now let’s get to the real deal and start creating the PayPal payment form. To begin with, I added four Product fields and field names, field caption, field description, price, and an image of my product. Then, I added a Divider to separated this section from the others.
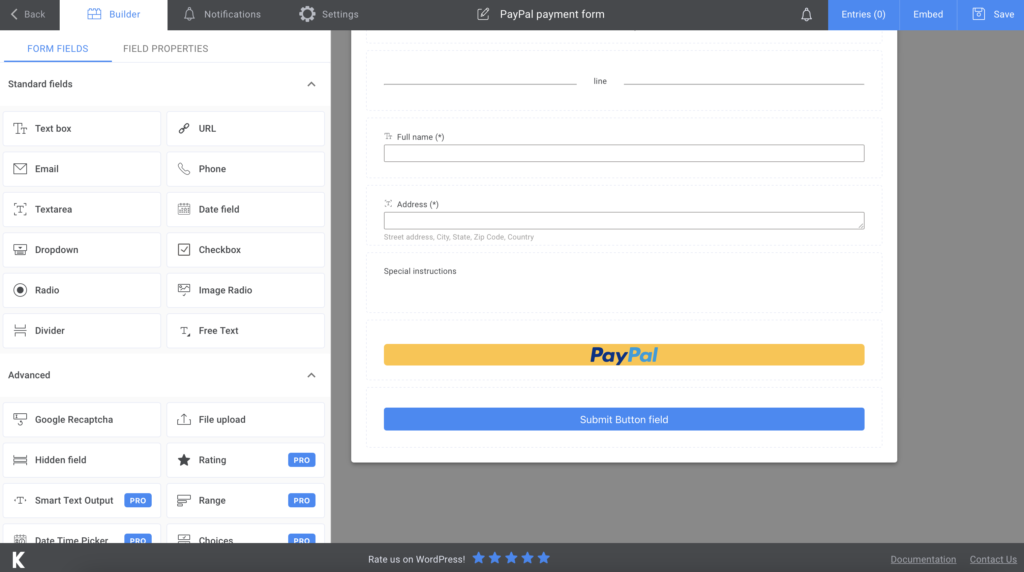
Further on, I added a Text box for customers’ full names, a Textarea field for their address, and a Free Text field if they have any special instructions/requirements. Then, I added a PayPal and a Submit button.
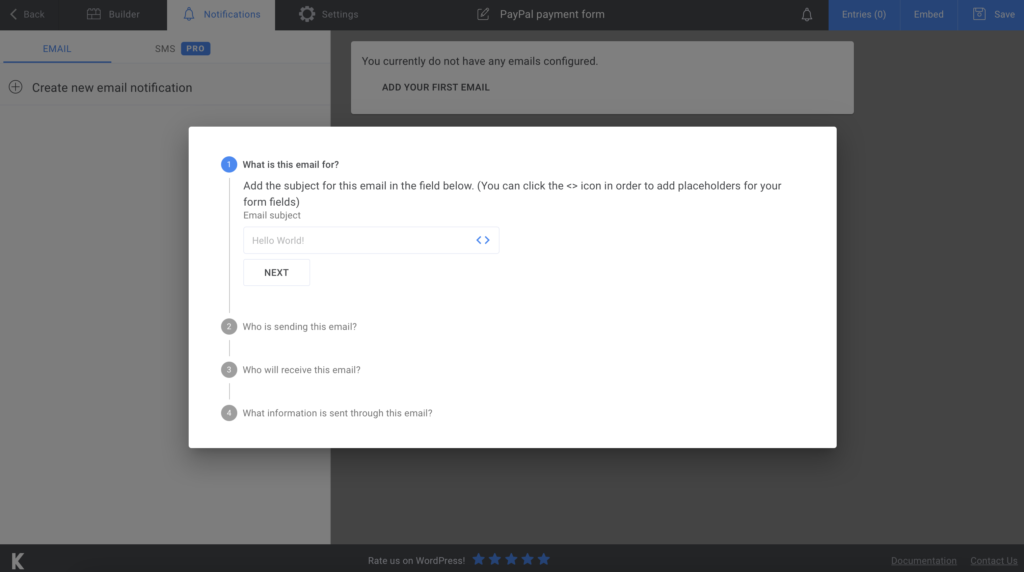
If you want to let your customers know that you received their order, you can email confirmation in the Notifications section. Moreover, if you choose the premium version, you’ll be able to notify your clients via SMS as well.
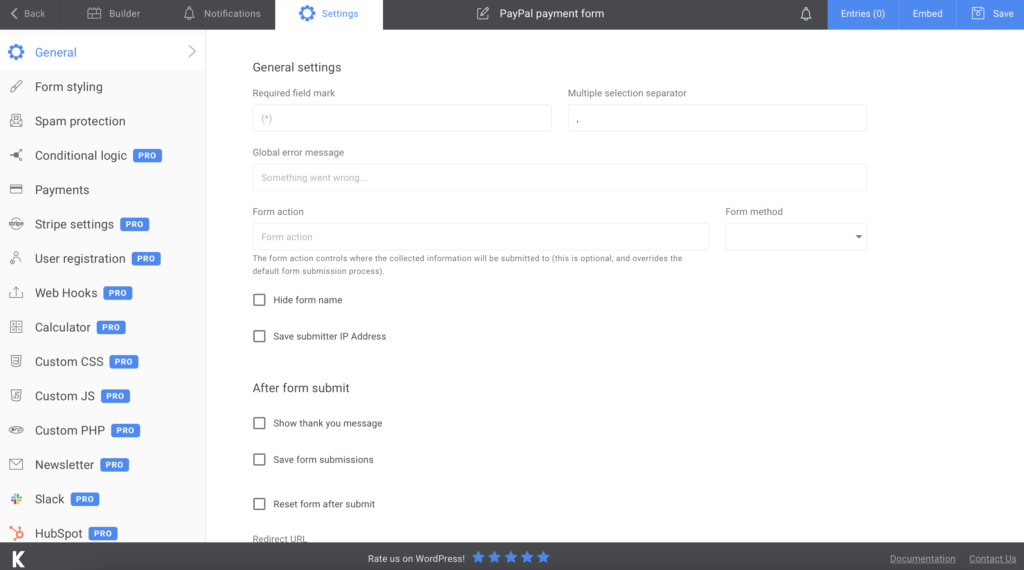
The last part is about the Settings section. Go there and set up the final details of your form – choose its style or opt to display a ‘’thank you message’’ after they press submit. However, if you upgrade to the premium version, you can take advantage of more features.
Add the PayPal registration form to your website
After you’re done creating and setting up your PayPal form, press Save, a shortcode will be generated, and all you have to do is copy and paste it on your website – you can create a new page for it or integrate it into an already existing one.
In addition, you can export all your data to CSV or Excel and store it somewhere safe.
Now that you are aware of how to create an online payment form, let’s take a look at a few examples where you can apply this information:
- Registration form for an online conference
- Online form to sell tickets to a sports event
- Concert ticket registration form
Summary

Now that you know how to create a PayPal order form with the help of the best PayPal form builder, you can create even more forms to enhance your website and make it more engaging. We strongly advise you to do so because this will increase your workflow, thanks to Kali Forms and its powerful features.


