

Are you in need of a more efficient way to handle concert ticket registration forms? Welcome aboard! We have everything you could need.
Organizing a concert requires a lot of hard-work – hire people or look for volunteers, find artists, choose a location, and so on. But when everything is settled, you will need people to attend your concert. So, building an online concert ticket registration form will make your work easier. You will be able to sell tickets more efficiently as well as create a database with your customers.
This article will help you see the benefits of online forms and how to create a concert ticket registration form using the most powerful tool. Let’s dive right in!
Table of contents
Why should you use an online concert ticket registration form?
You may or may not see the benefits of digitalizing this process right away, but rest assured that there are countless reasons why this is more efficient. Down below are stated a few of the most impactful ones.
- Save time – Selling concert tickets at the entrance has become old-fashioned and overwhelming. Creating an online registration form for concerts is more efficient for you and your customers. They won’t have to wait in endless queues, and you won’t have to worry that some people will give you a bad review because the tickets are over and they waited in vain.
- Database – Having a database with your customers will help you send newsletters, and you will organize a new event. This is how you build your community and get in touch with your customers.
- Feedback – Once the concert is over, you can ask your attendees for feedback on what went well and how you can improve your services. We also have a customer satisfaction survey form to ask for feedback.
How to create an online concert ticket registration form
This is an easy-to-use process that will take you through all the steps and spare you an incredible amount of time. All you need is a powerful tool to help you create a simple event registration form. Take advantage of Kali Forms and its powerful features to build online forms for your customers.
Install Kali Forms
To begin with, you will need a running website. If you don’t already own one, here you can follow a tutorial on how to create a website. Most businesses have a website for marketing purposes, so it will be a great deal for you to own one. It will take a while, but it’s worth it.
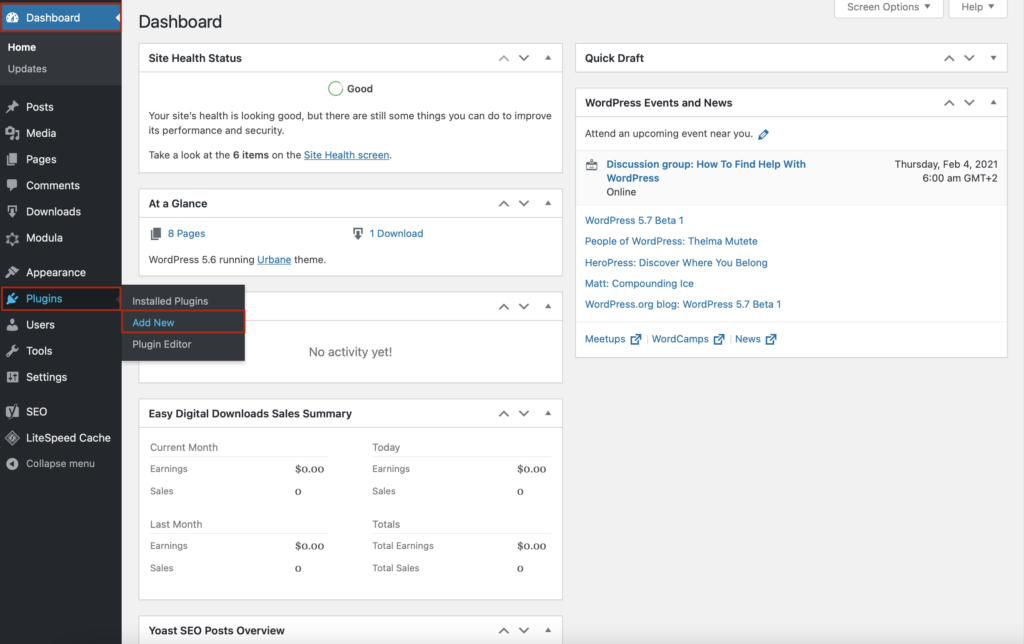
Once this step is over, go to your WordPress dashboard > Plugins > Add New.
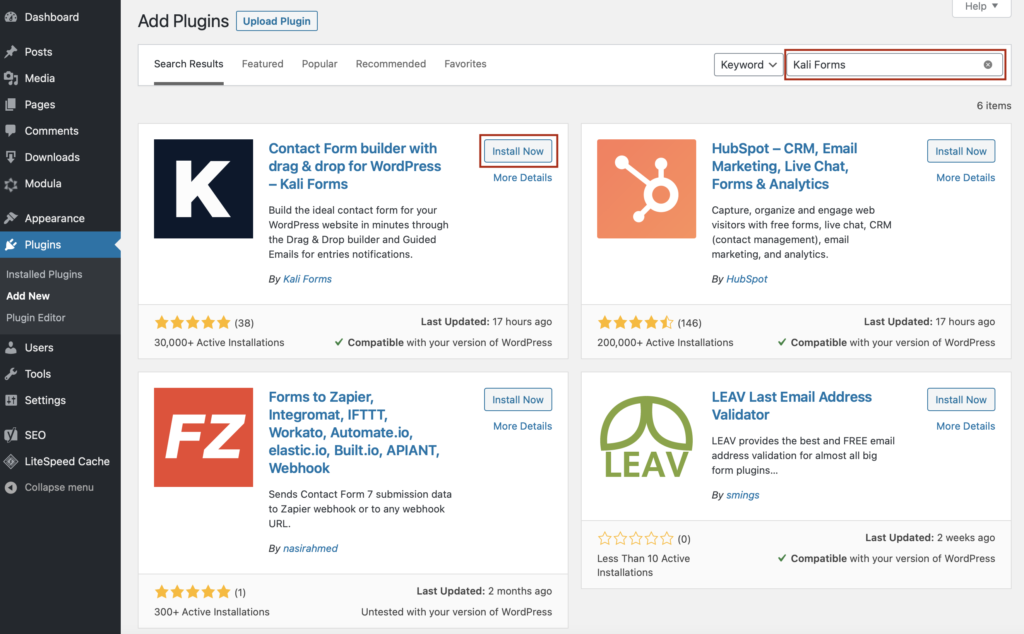
You will be redirected to a page with all freemium WordPress plugins. In the search bar on the upper right corner, type Kali Forms. When you find it, click Install Now.
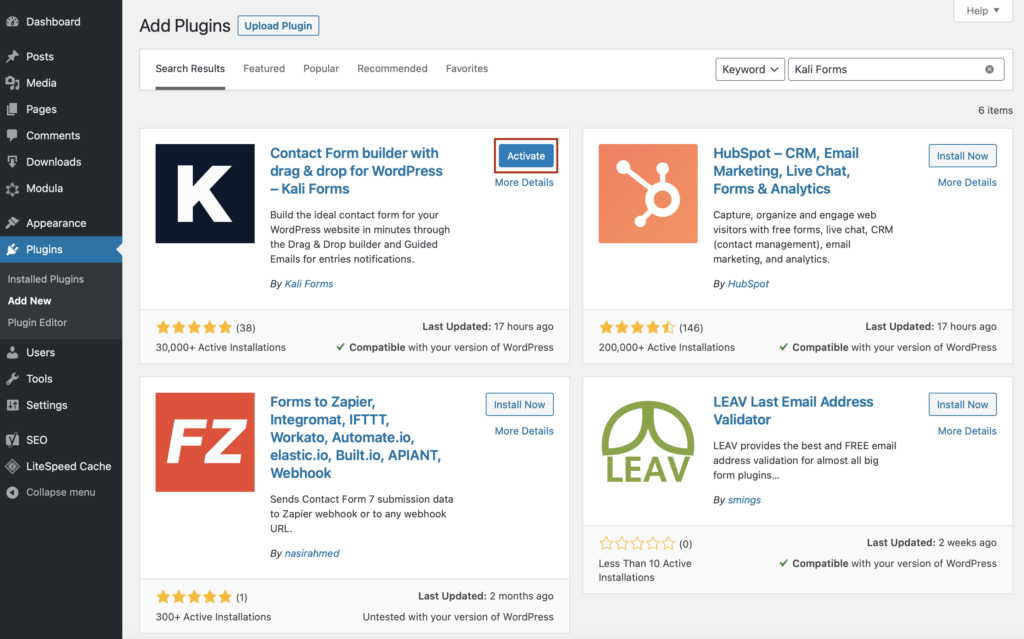
Just wait a couple of seconds and then press Activate. The Kali Forms plugin will pop up in your WordPress menu.
Creating a new form
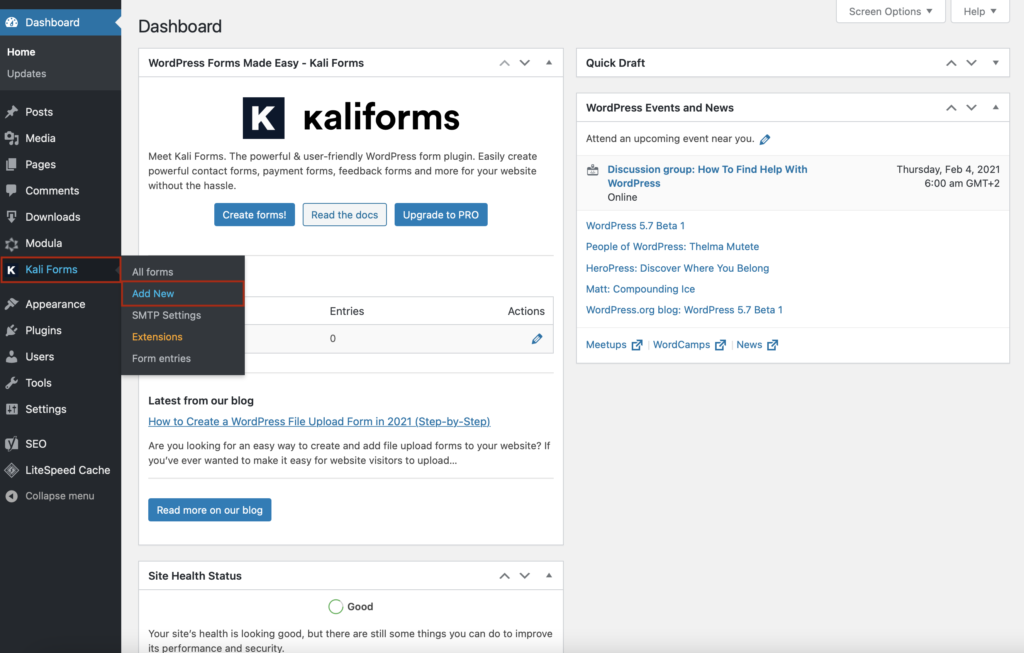
Whenever you want to build an online form for your website, just go to Kali Forms icon and click on Add New and start the process.
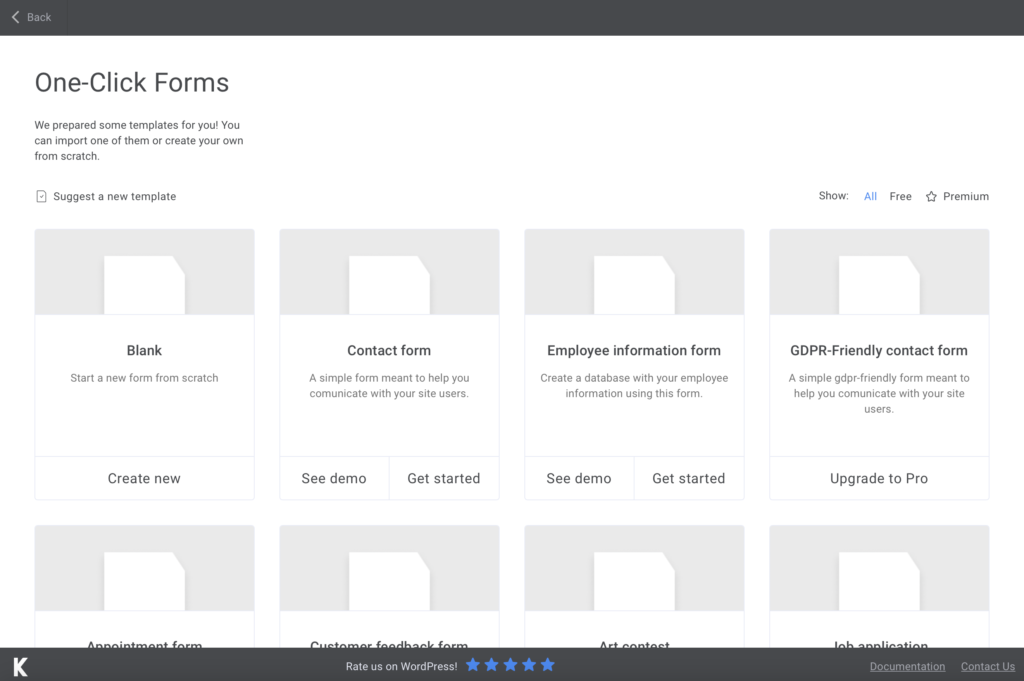
You will find yourself redirected to a page with pre-made templates. Well, there isn’t a concert registration form template, so that we will create one from scratch to see how it’s done. So, click Create New, and let the game begin.
I advise you to begin by naming your form to distinguish them and let your customers know what they fill in.
Adding form fields
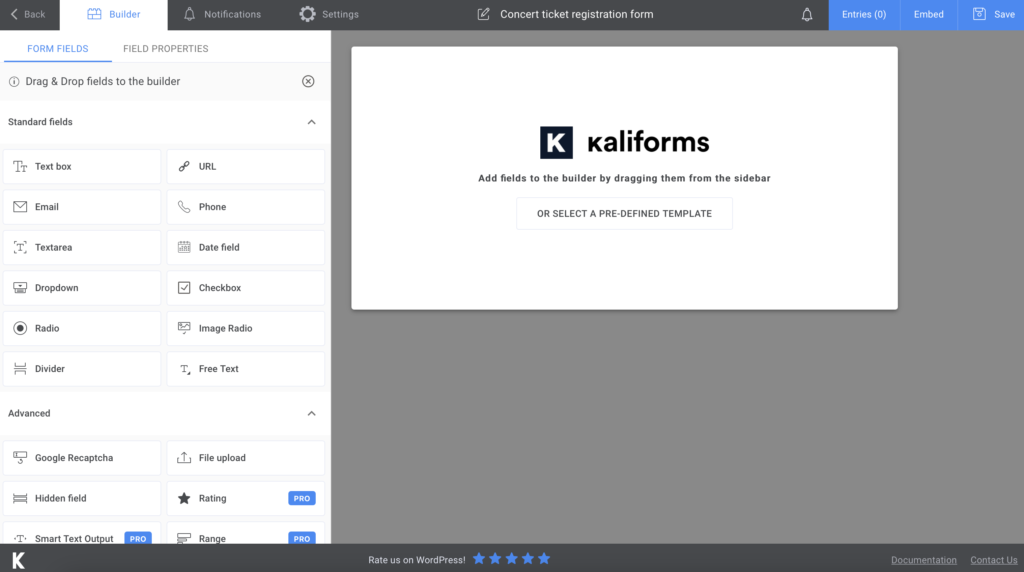
The best thing about this form builder is that everything here is customizable – name your fields, add descriptions and placeholders, make the fields required to fill, and so on. You will find on the left the menu will all form fields and field properties. Try every field and see which one meets your needs.
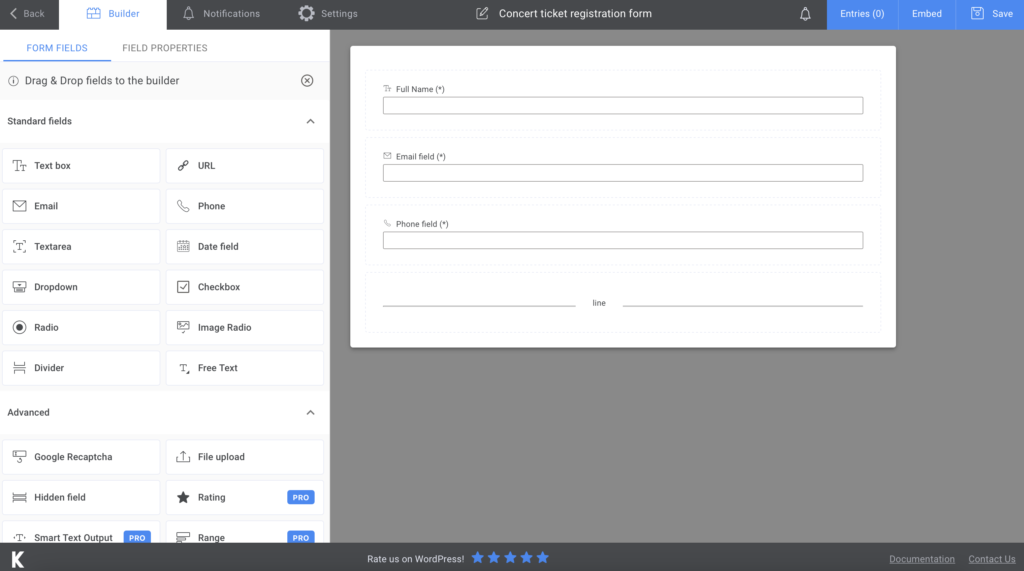
For our WordPress concert registration form, I started by adding a Text box for your customers’ full names, an Email field, and a Phone field to find out their contact info. Then, I added a Divider to separate this section from the other one.
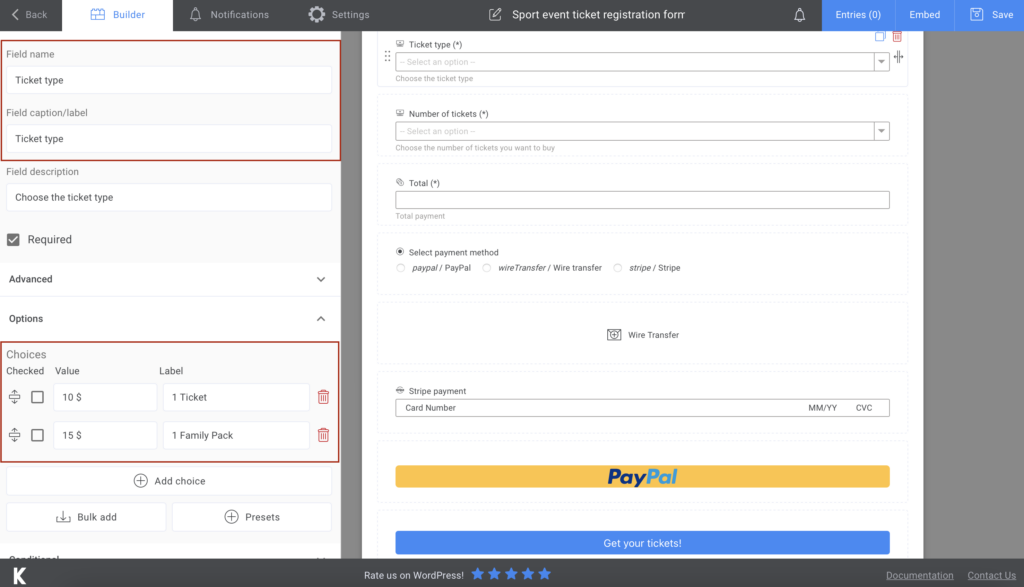
In the next section, I added a Dropdown for the Ticket Type. Click on it to see all the options. Then, you must give it a field name, a field caption and make it required to fill. In the Options section, you can add as many choices as you want.
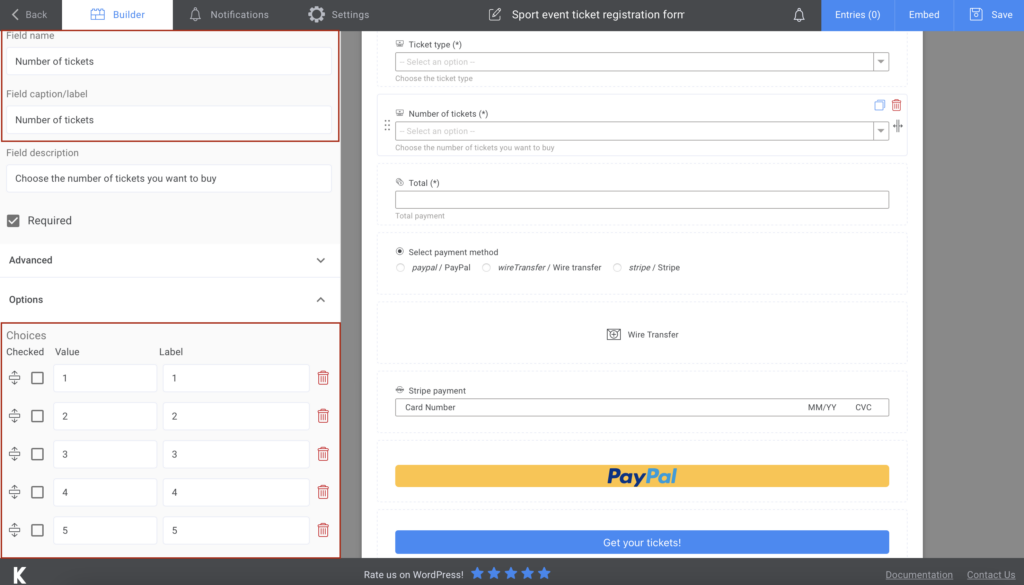
Next, add a Dropdown field for the number of tickets and follow the same process.
Since we added the number of tickets, we need a total. To add this field, we will use the Donation field. Again, please give it a field name and a caption.
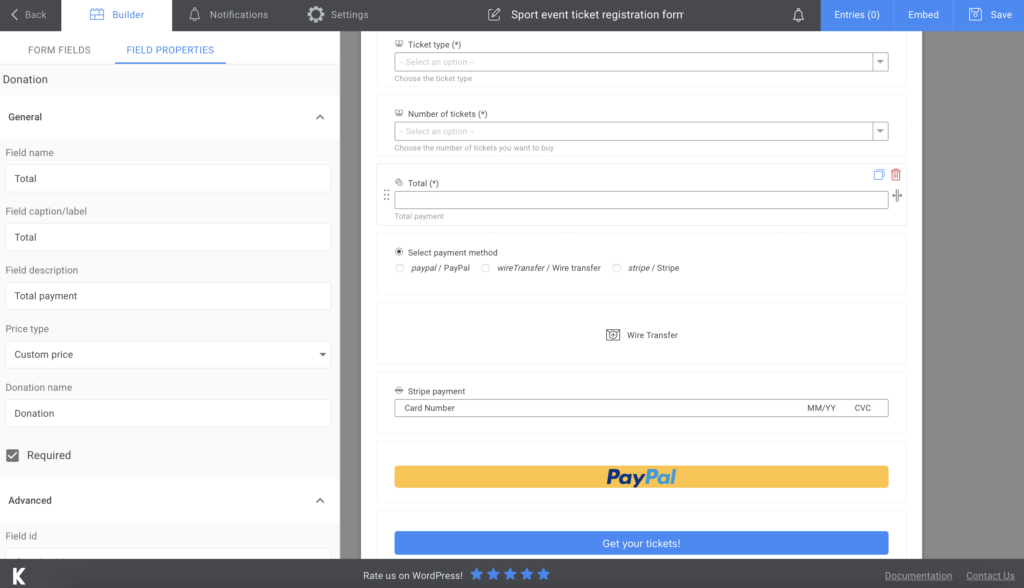
As you can see, you can choose between multiple payment methods, such as PayPal, Stripe, or wire transfer. Finally, add a Submit button with a “Get your tickets!” message.
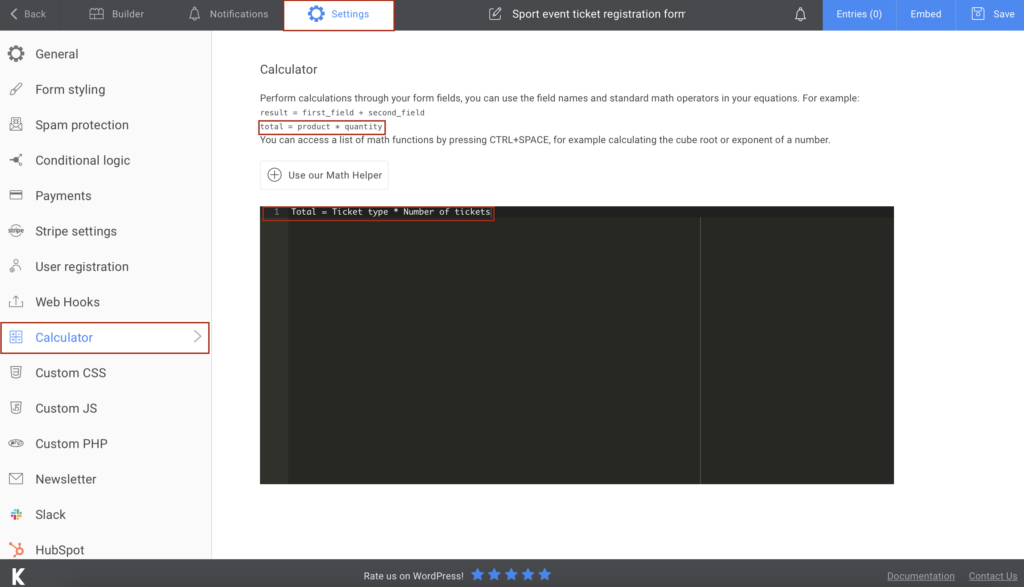
We’re not done yet! Go to Settings > Calculator and type in the dark frame the equation. As you can see, it is important to add a name to your field to calculate those two fields by their name.
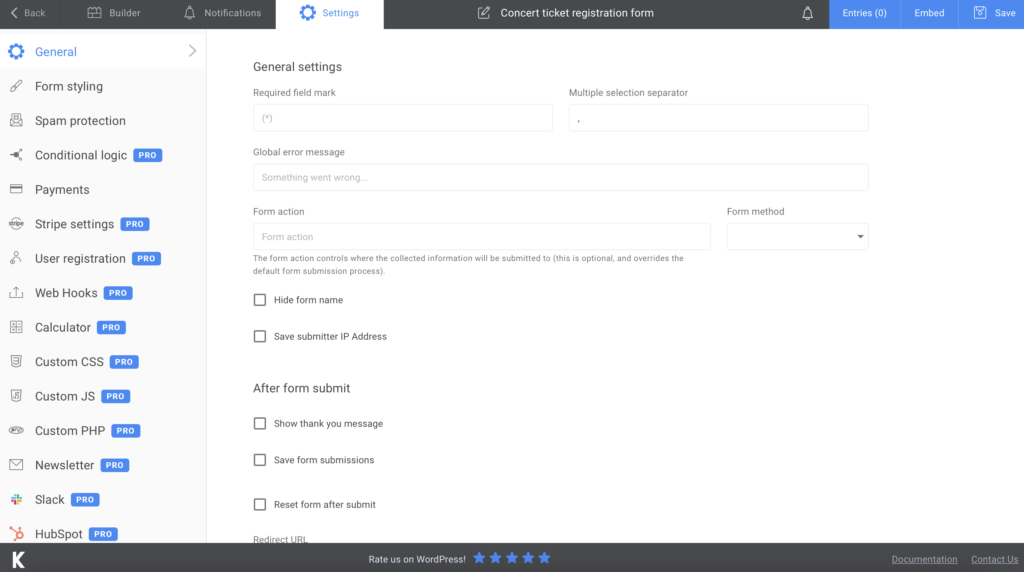
If you want to take advantage of more features, go to Settings. You’ll find a bunch of other customization options – choose your Form style or display a “thank you” message. If you opted for the premium version, you can connect your form to Slack, HubSpot, and send newsletters.
Well, this is how you create a concert registration form with payment. However, you can also create a free concert registration form without adding the payment fields.
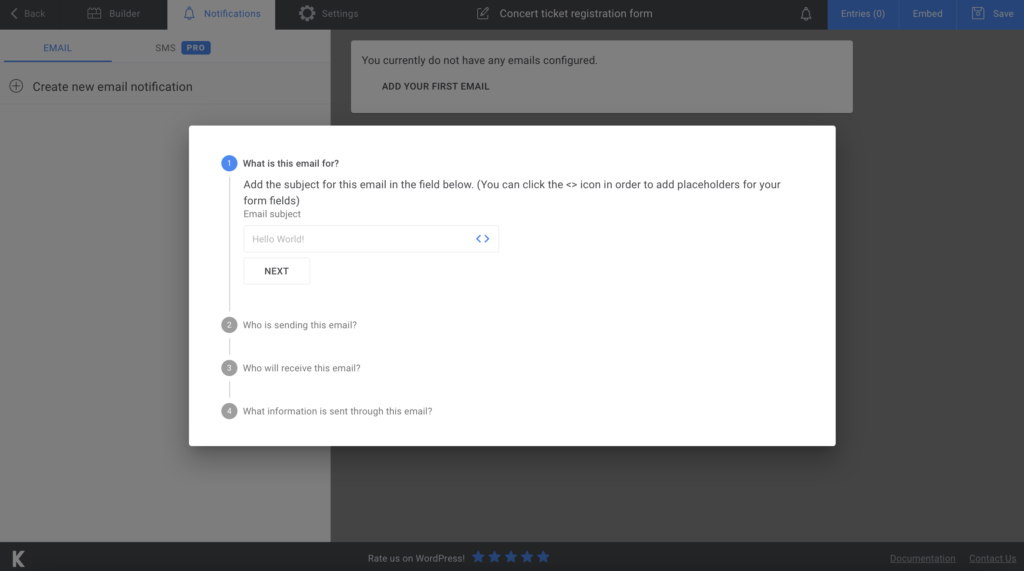
Let your clients know that you received their order and send a confirmation e-mail. How can you do that? Go to Notifications and follow the steps that are explained there. Moreover, the premium version will allow you to send SMS notifications. It’s up to you.
Add the concert ticket registration form to your website
After you’re done creating and setting up your form, press Save. A shortcode will be generated, and all you have to do is copy and paste it on your website – you can create a new page for it or integrate it into an already existing one.
There’s more. You can export all your data to CSV or Excel and store it somewhere safe. Easy as that!
Summary

See, it wasn’t that complicated. With Kali Forms’ help, I’m 100% sure that you will do a great job. Get in touch with all the features and customization options to create the most straightforward online forms.


