Do you want a faster event registration process?
People who organize events know the struggle of dealing with a huge line of people waiting to register for the occasion. Having event attendees stand there, sometimes for a huge amount of time just to get in can make you stressed and them angry. But what about finding a solution that can make everyone happy and save you a lot of time?
In this tutorial, you’ll learn how to create a free event registration form for your WordPress website so you can speed up at least a part of this arduous process.
| 1. Why should you use an online event registration form? |
| 2. How to create an online registration form |
| 3. Add the event registration form to your website |
| 4. Summary |
Why should you use an online event registration form?
You might have figured a few of the benefits so far, but let’s see what else you can get by digitalizing this process.
Save time
As I already said, the fact that you’ll save time is the strongest argument I could bring. As long as you get to eliminate the stress of making people wait and do something else in the meantime, you’ll see that this is an investment that’s worth it. You can also look at this from the participants’ point of view – there’s no need to come early or stay in line forever. You just have to fill the event sign-up form and it’s done.
Keep track of the people who are coming
There are always a few people who, for some reason, will not be able to make it. But, if you have a physical event registration, you’ll find out just before the event. Being able to know beforehand how many people are coming can save you some money as well – cut down on some of the things those people were supposed to receive if they don’t ask for a refund or something similar. Of course, there will always be those one or two that show up unexpectedly, even if the condition was to fill in the event registration form – but you can have backups for those.
Keep the information in a safe place
With GDPR being so hash these days, you have to store people’s personal information in a safe spot. Misplacing a paper can bring you a lot of trouble, so make sure you don’t have to go through this. Keep everything on your computer and never lose a single e-mail address because of too much paperwork to handle.
How to create an online registration form for an event?
This process is something you’ll definitely ace from the start. It’s very easy to understand and implement. You just need a running website and the help of the most user-friendly, responsive, and intuitive event registration plugin – Kali Forms. Let’s get to it and see how this works.
Installing Kali Forms plugin
The first step is to install Kali Forms on your website. If you don’t have a website, don’t worry – you can create one in a very short time following this cool tutorial that walks you through the whole process. After you’re done with this step, go to your WordPress menu and look for Plugins.
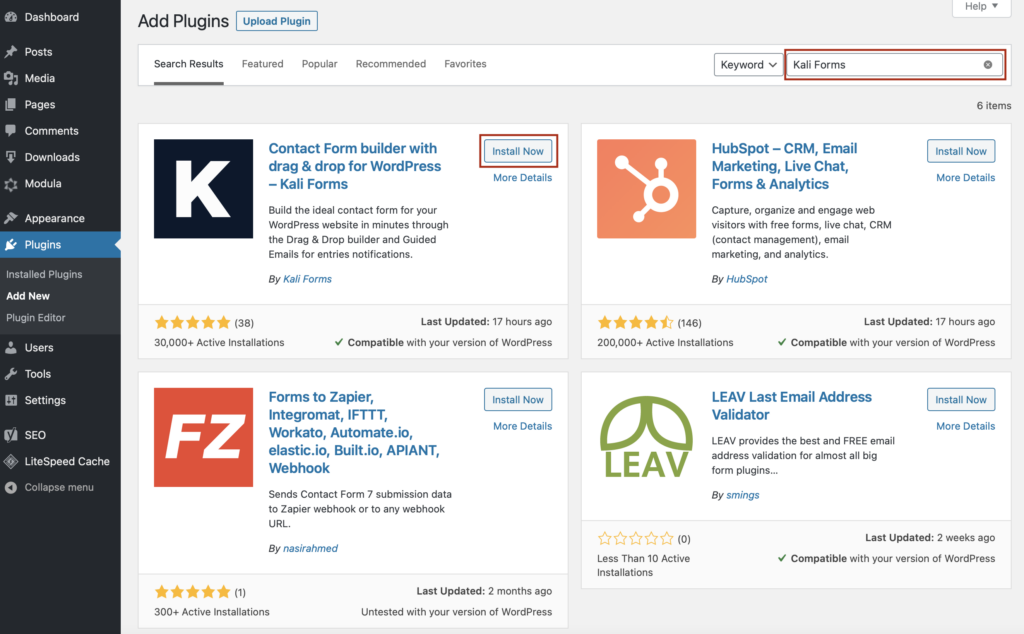
Click on Add New and you’ll find yourself on a page with a search bar in the upper right corner. Type the name of the plugin there – you should find it immediately. Press Install and wait for a couple of minutes.
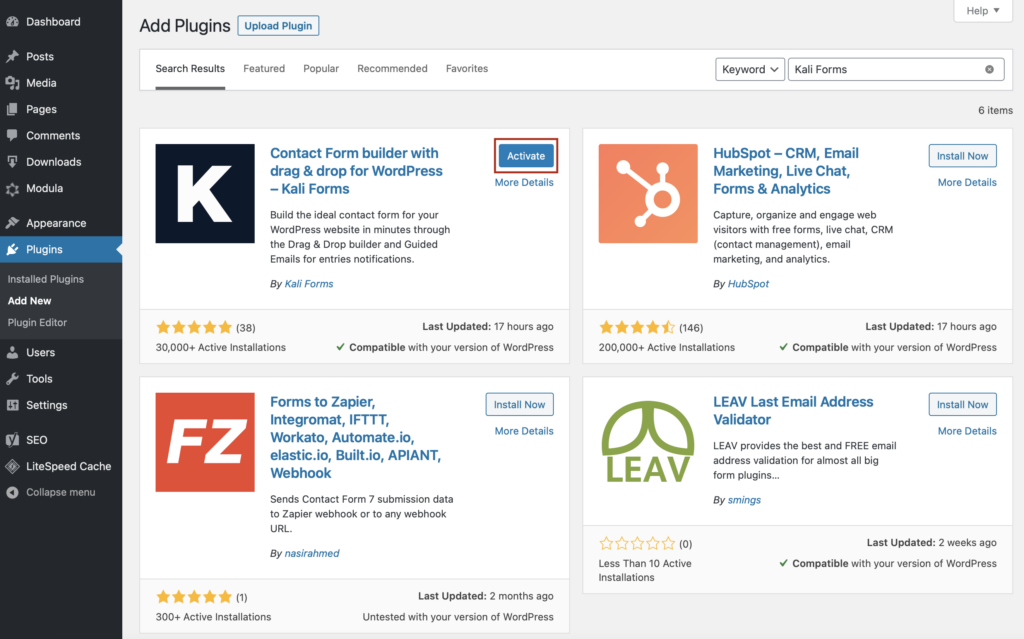
After the installation is done, you have to Activate the plugin. You’ll find the activation button just as shown in the picture below.
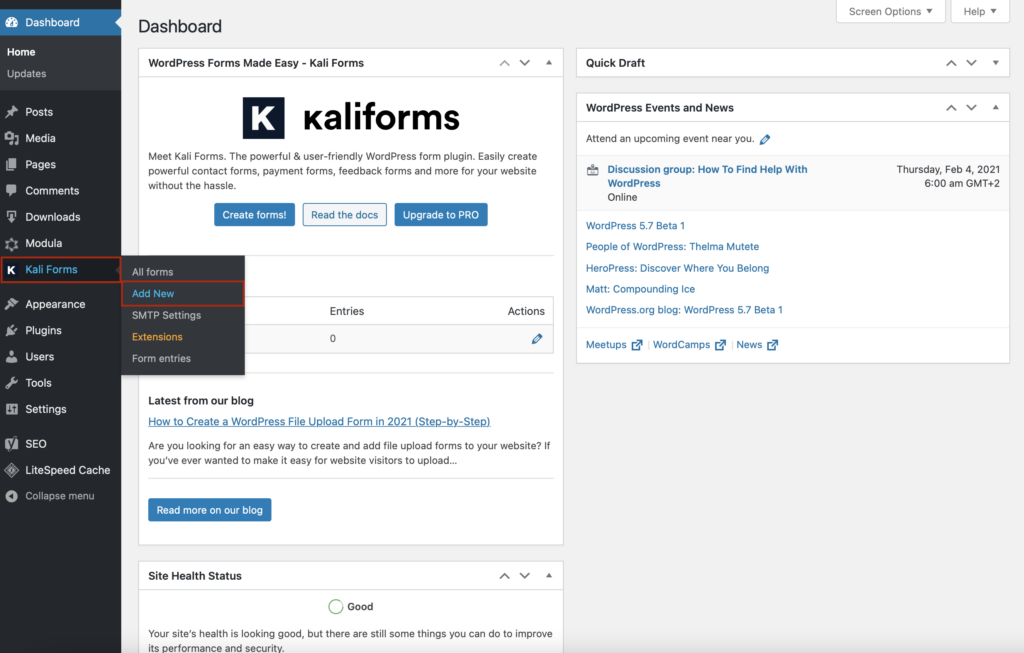
Everything is done now. Kali Forms found its place in your WordPress menu, so each time you want to create a form, just look for it and click on Add New.
Creating a new form
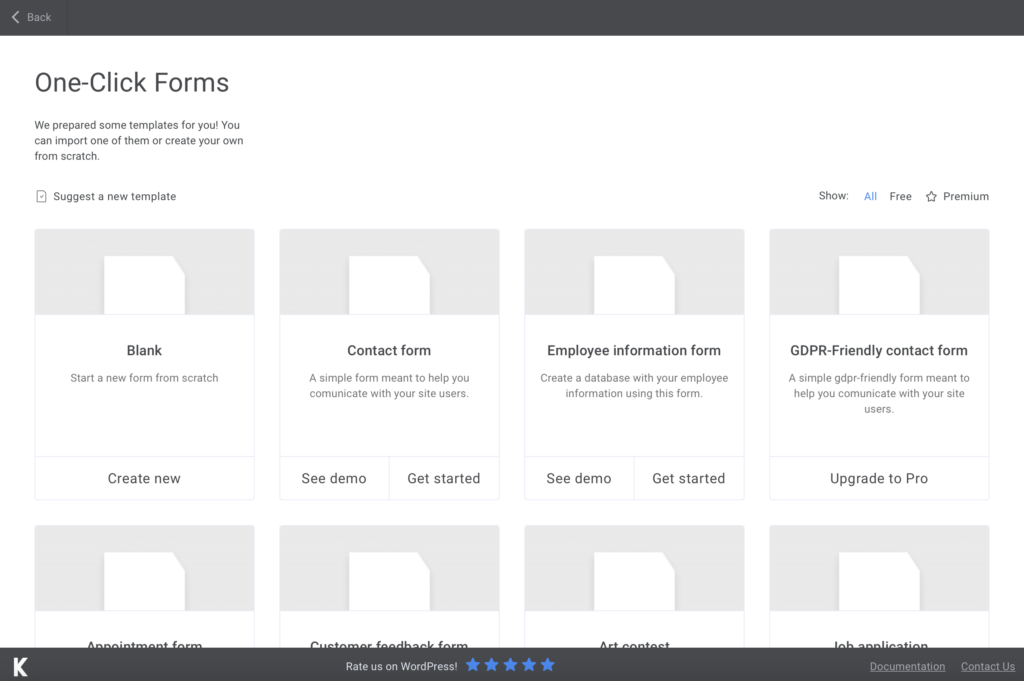
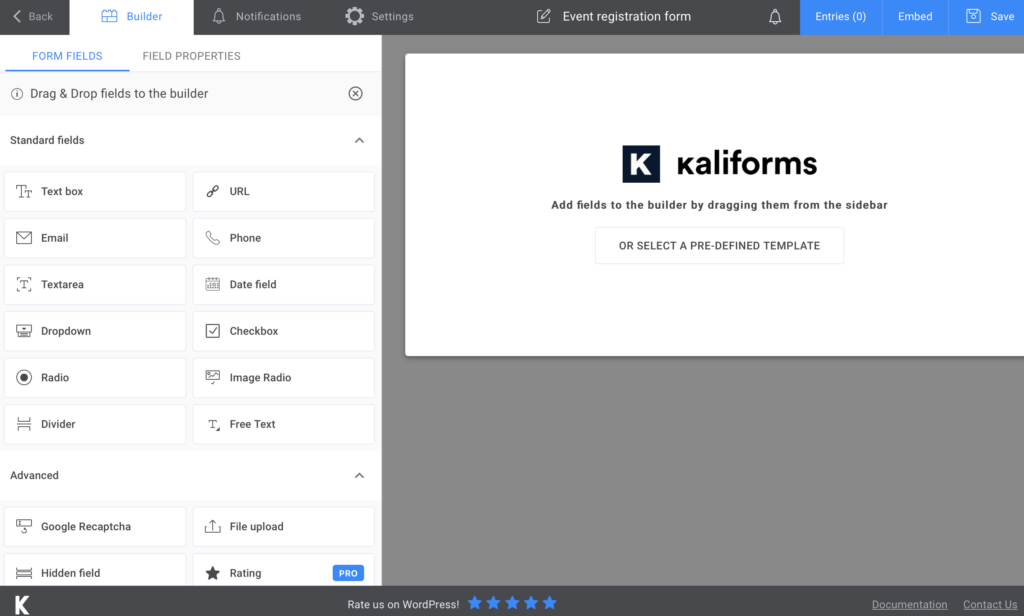
Once you press Add New, you’ll be redirected to a page with a few form templates. The event registration form template is not among them, so we’ll have to create it from scratch – press Create New and you’ll be redirected to the form creation page.
First of all, name your form. Mine is simply named ‘’event registration form’’, but you can choose whatever you think it’s appropriate for it.
Adding form fields
Let’s begin with a few of the benefits you have thanks to Kali Forms. When you start creating your WordPress event registration form, you’ll see that every option that you get (you can see them all in the menu that appears on the left) is customizable. To do so, you have to select a field, and after it appears in your soon-to-be form, click on it. Instead of the regular menu, you’ll have the customization one which allows you to perform multiple changes. Name your field, add a description or placeholder, make it shorter, and so on. Everything is there, so don’t worry.
You’ll get another round of customizable options in the Settings, but we’ll discuss that a bit later.
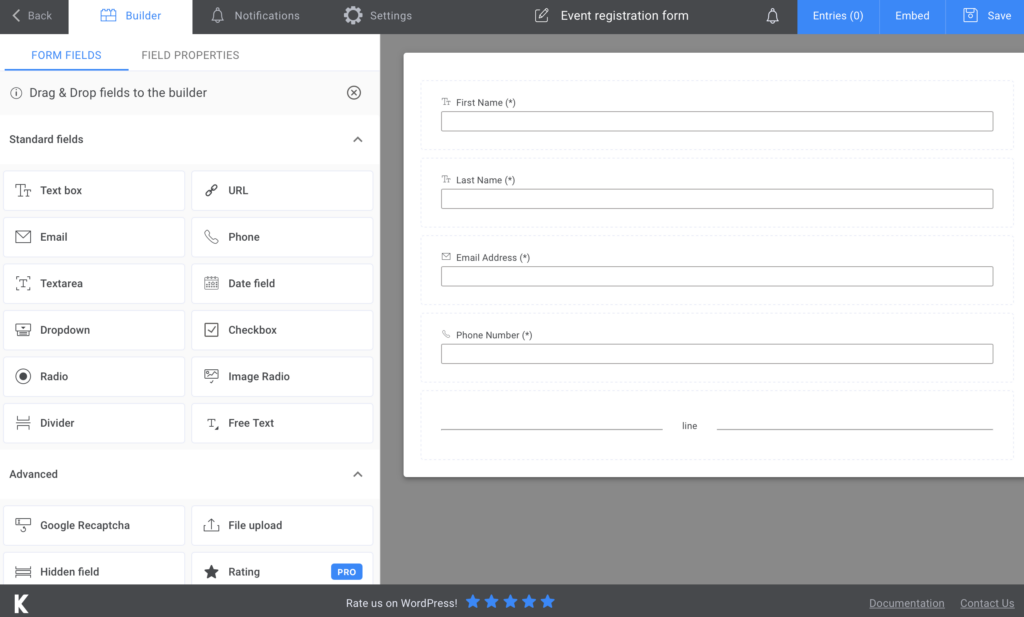
For this simple event registration form, right here, I chose two Text boxes for the person’s name and an Email and Phone one for obvious reasons. I also opted for a Divider to clearly separate between this and the next section of the registration form for events.
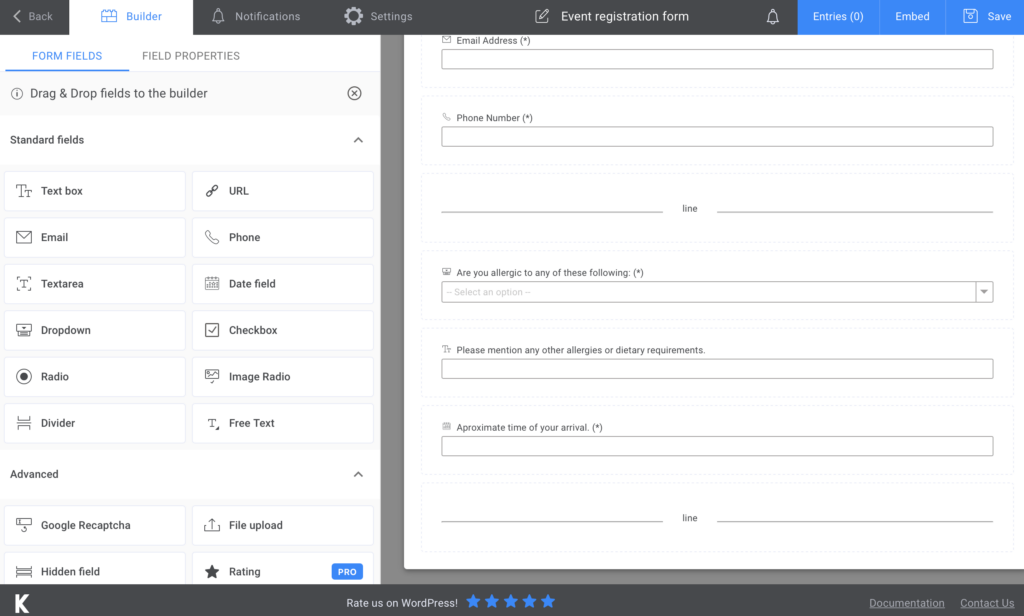
The next section is dedicated to finding out a few things that could make things a bit more difficult if this form was not online. For example, if your event includes a buffet, you should know if one of the participants has any allergies or preferences. Including this in the event registration form, you will know if and how many people have these special requirements. So I added a Dropdown for the ingredients that could cause allergies in the foods that are made for the event. Next, I went for another Text box for other things they are not able to eat and Data field for the approximate time of their arrival. Then, I added a Divider.
As you can see, we’ve created a free event registration form, but with PayPal, Stripe, Wire Fire, or Donation fields, you can also build an event registration form with payment.
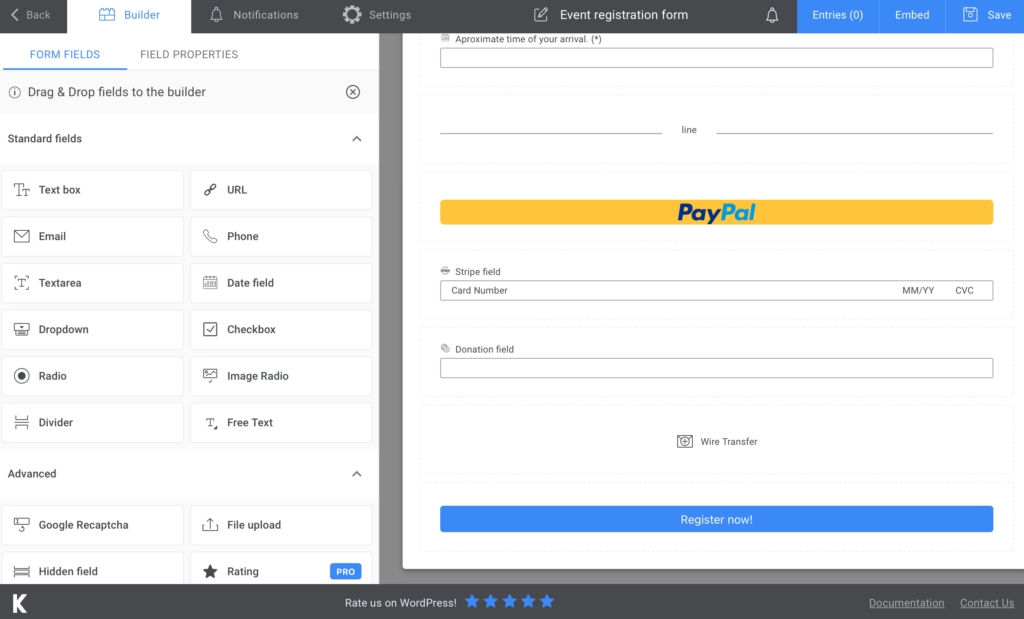
Lastly, I chose a Submit Button. This is a rather simple form because it has few pieces of information, and it can be created in minutes.
Additional features
To let the participants know that you received their form, you can go to Notifications and set up a confirmation e-mail. The whole process is thoroughly explained there. You can also send SMS notifications if you’re going for the pro version.

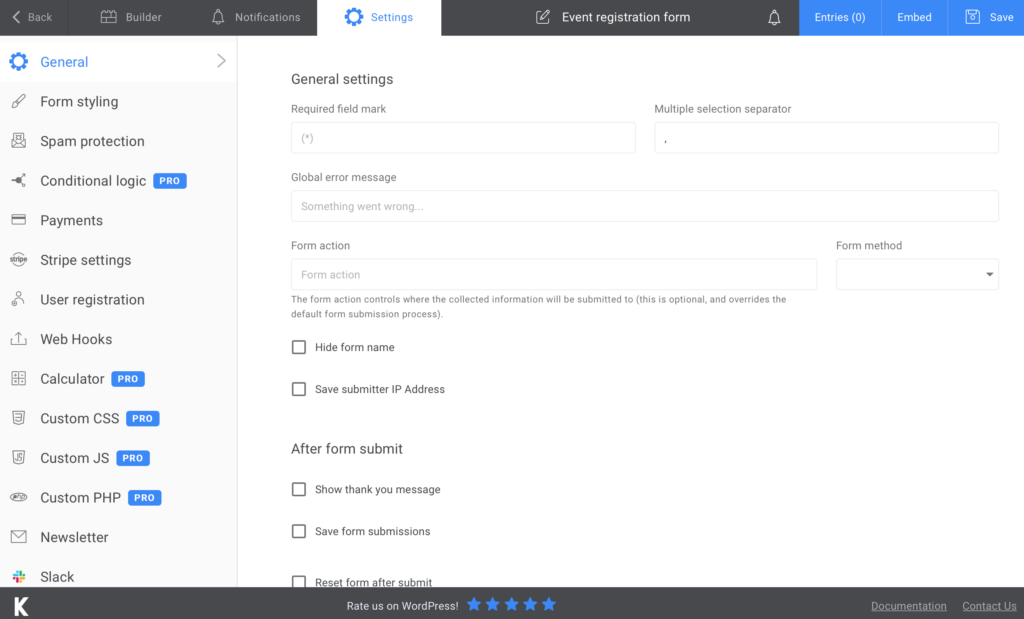
As I mentioned in the beginning, you can go to Settings in order to customize the final details. Here you can design the registration form – you can display a ‘’thank you’’ message or choose your Form style. There are other a bit more advanced features you can play with, so make sure you look over those too. Upgrade to premium and send newsletters by creating a Mailchimp event registration form in no minutes!
Add the event registration form to your website
Now that all the work is done, you just have to implement the form on your website. After you press Save, you’ll see that a shortcode is generated. All you have to do is copy that shortcode and paste it on a page on your website – you can insert it into an already existing one or create a new one.
Remember that I told you about storing your data? Well, Kali Forms allows you to export all the information to CSV or Excel, so make sure you take advantage of that and all the other features.
Summary
It’s mesmerizing how simple it is to create a free event sign-up form, I know! But everything happened thanks to this great plugin that I kept telling you about. Kali Forms is super useful, and the good thing is that you can repurpose it as much as you want. You can create forms for everything, so give it a go and see how it works for you!