
With the help of this integration you can start collecting subscribers for your ConvertKit list using a form built in Kali Forms.
This add-on is only available for Kali Forms Pro users.
Using the add-on
Before configuring the integration in your form there are a few steps that need to be taken from your ConvertKit account.
After creating your account at the ConvertKit site, you will also need to create your first form for collecting subscribers. This is done from the Landing pages&forms section, the setup is easy, just follow the instructions and you will have your form ready in no time at all.

In order to create additional custom fields for your form, you will first need to create a new subscriber if a demo one is not available. This is done from the Subscribers section. After adding your first subscriber, you can start adding extra fields, these will be applied to all your following subscribers. More information on this topic can be read in the official ConvertKit documentation.
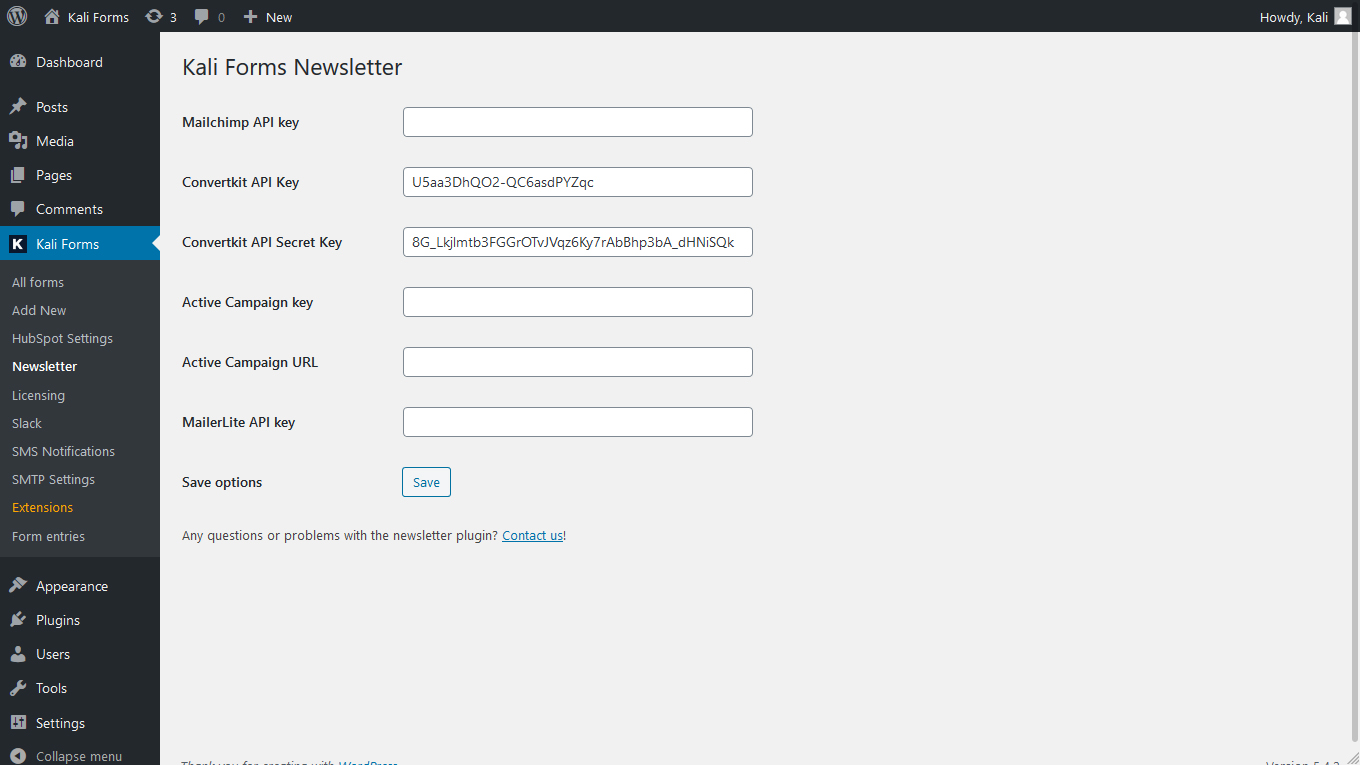
Next we will need to retrieve two API Keys so that we can connect our website form with ConvertKit, these can be found in Account Settings area: API Key and API Secret.

With the two API Keys, access your WordPress admin panel and add them in the Kali Forms > Newsletter > ConvertKit API Key / ConvertKit API Secret Key fields.
Now that the connection is established with your ConvertKit account we need to setup the form. You can use one of our available One-click import templates to get started, then make adjustments to the form for this specific use-case or use a new form and build this from the ground up. The ConvertKit configuration is available in the Settings > Newsletter tab of your form configuration.
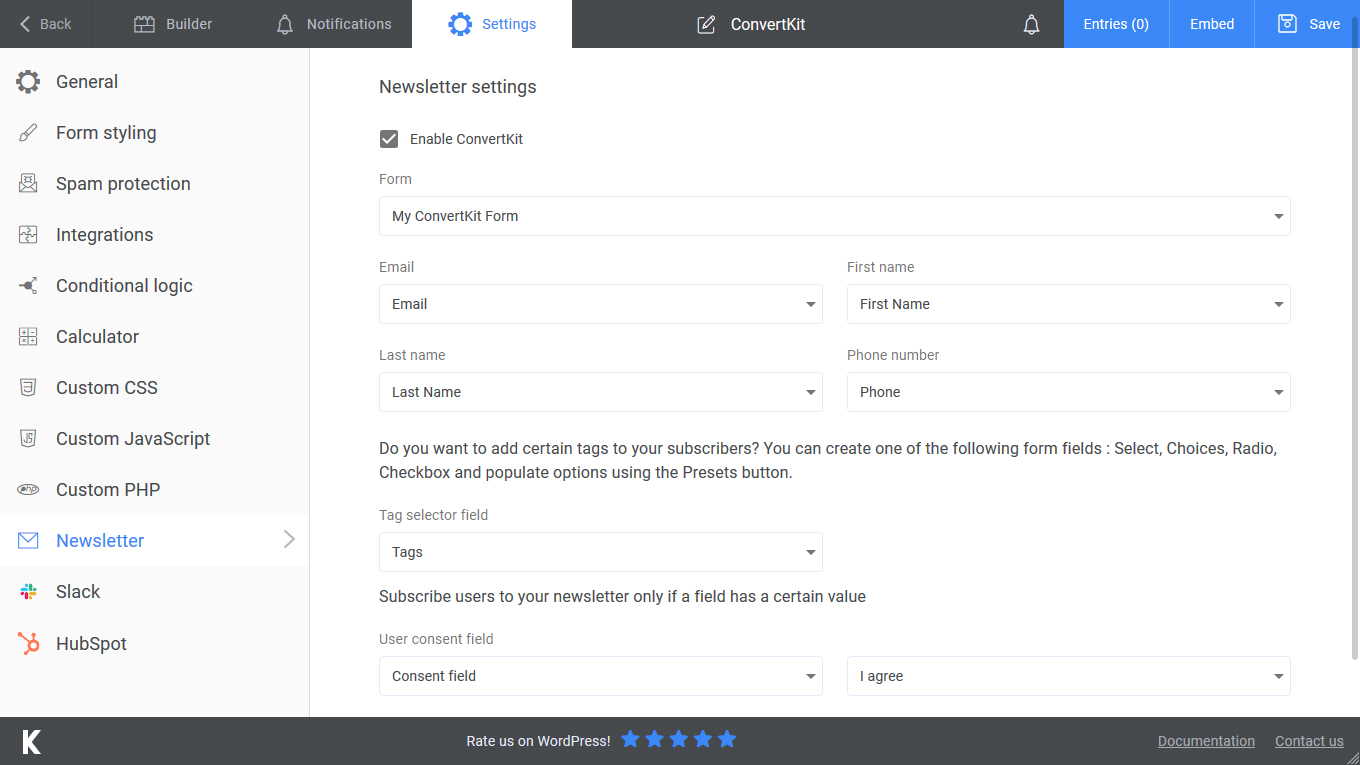
The information that needs to be sent to ConvertKit is determined by the fields you add for your form in your ConvertKit configuration as mentioned above. You will only need to select the form field for their corresponding field from ConvertKit.
Adding Tags to your subscribers
Tags are a way for you to label, or categorize, contacts based on information you have about them, this will improve the way you can engage with your subscribers.
In order to start using Tags for your subscribers you will need to:
- First define the tags that will be available for your subscribers from the Subscribers section over at the ConvertKit site;
- Then in your form, add a fixed selection field: Checkbox, Radio, Select, Choices;
- For values you can use the Presets option in order to directly add all your configured tags as values, a new option will be available: ConvertKit Newsletter Tags;
- Select the field in the Tags section available in the Newsletter configuration section.
Does ConvertKit support double opt-in?
Yes, this is a default setting in the ConvertKit form configuration. You can disable this option by navigating to Landing pages&forms > Your ConvertKit form, selecting the email tab in the right column and ticking the Auto-confirm new subscribers option.
Another way to disable the double opt-in is to uncheck the Send incentive email option, by removing this email new subscribers will be automatically approved.
Conditioning the subscription process.
You can condition the newsletter subscription process based on the user consent. By enabling this option if the consent field does not have the correct value you have configured the subscription to your list will not be made.