

Do you want to create an exhibitor registration form and don’t know how to start? You came to the right place!
Here you will find everything you need! Organizing an exhibition is really time-consuming, whether it is a virtual or a physical one. If you don’t own a location, you have to rent one, search for volunteers, hire the necessary people, and after all these, you will need exhibitors to bring their art products or services. Therefore, by creating an exhibitor registration form, you will make your event possible, and not only will it help you but also the exhibitor.
In this article, we will show you how to create an exhibitor registration form with the help of our intuitive plugin named Kali Forms.
Table of contents
Why you should create an online exhibitor registration form
As I said above, organizing an exhibition is certainly an exhausting process. It would help if you had an amazing organization to make things work the way you want and everything runs smoothly. Down below, I listed a few of the most significant reasons to create an online exhibitor registration form.
- Easy to share the form – If you want as many exhibitors as possible at your event, I advise you to advertise it online. You will reach many artists or companies that want to get their work recognized. There is no better way to do that than creating a registration form.
- Efficiency – An exhibitor form saves you a lot of time because you won’t have to talk privately with every company or individual.
- Protection – Having such an organized registration form will help you avoid scammers that can ruin your exhibition.
How to set up an exhibitor registration form
This is a simple process yet extremely efficient that will guide you through all the steps required to build this online exhibitor registration form. Creating a professional online application form such as the one we will create next, will give an amazing first impression to the participants who will enroll in your event and maybe create future collaborations. All that is required is a strong tool that will get the job done in minutes! In other words, give Kali Forms a try, and you won’t be disappointed.
How to install Kali Forms
Firstly, to install Kali Forms, you will need a functional website. If you do not have one, don’t worry. Just follow this tutorial on how to build a website. A site will always help you in so many different ways, such as marketing purposes or getting recognized by posting your portfolio. It is not hard creating one, and you don’t need any coding skills.
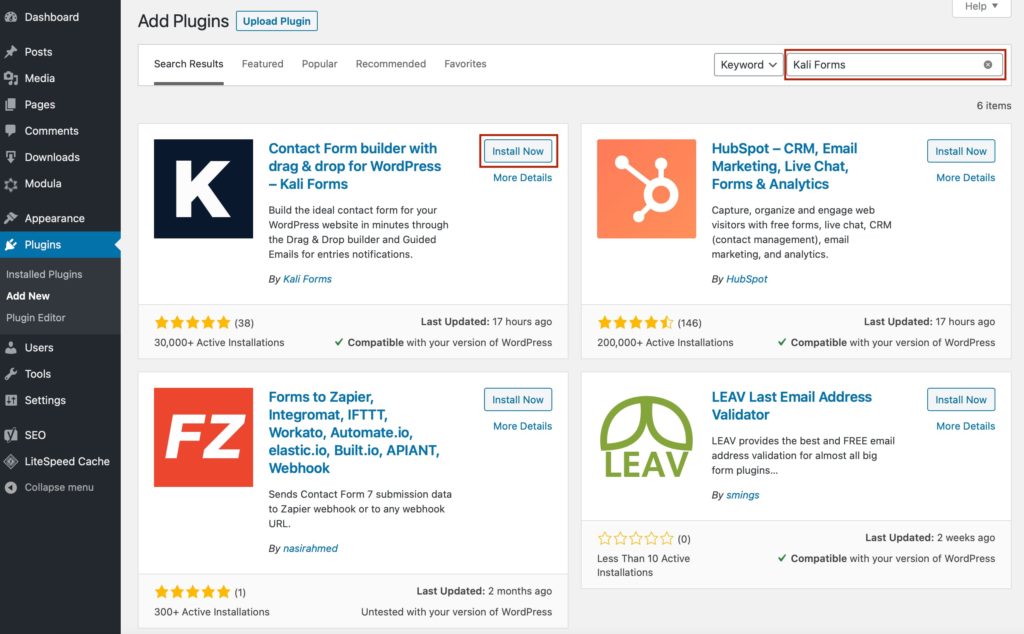
Once the site is build, go to WordPress dashboard > Plugins > Add New.
You will be led to a page with all the available WordPress plugins. In the top right corner, you will find a search bar. Type Kali Forms and then install it.
After the installation process is done, click on Activate.
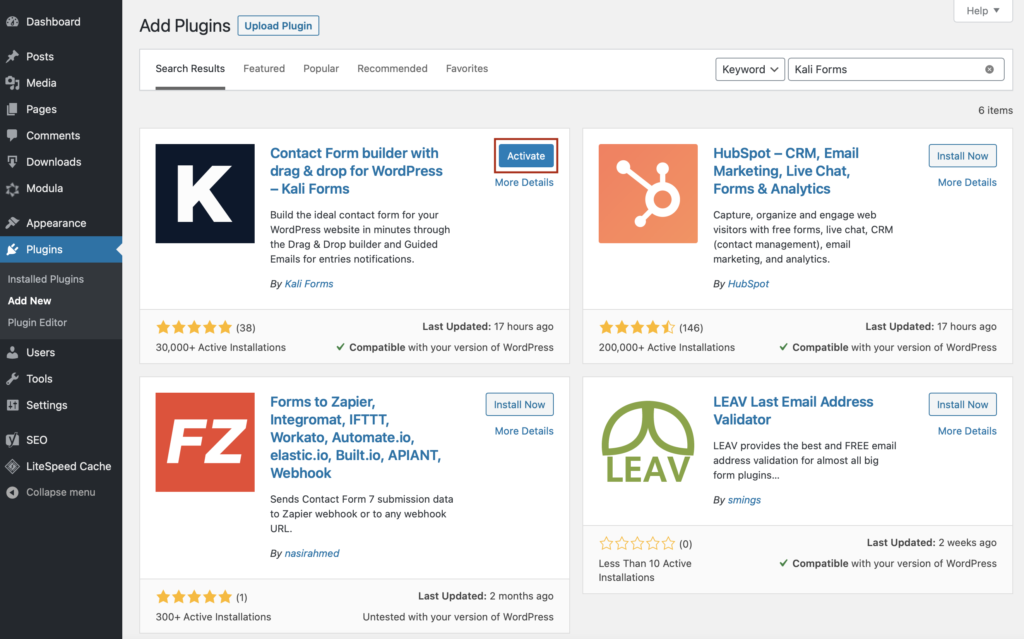
The plugin will appear on your WordPress menu.
Create a new form
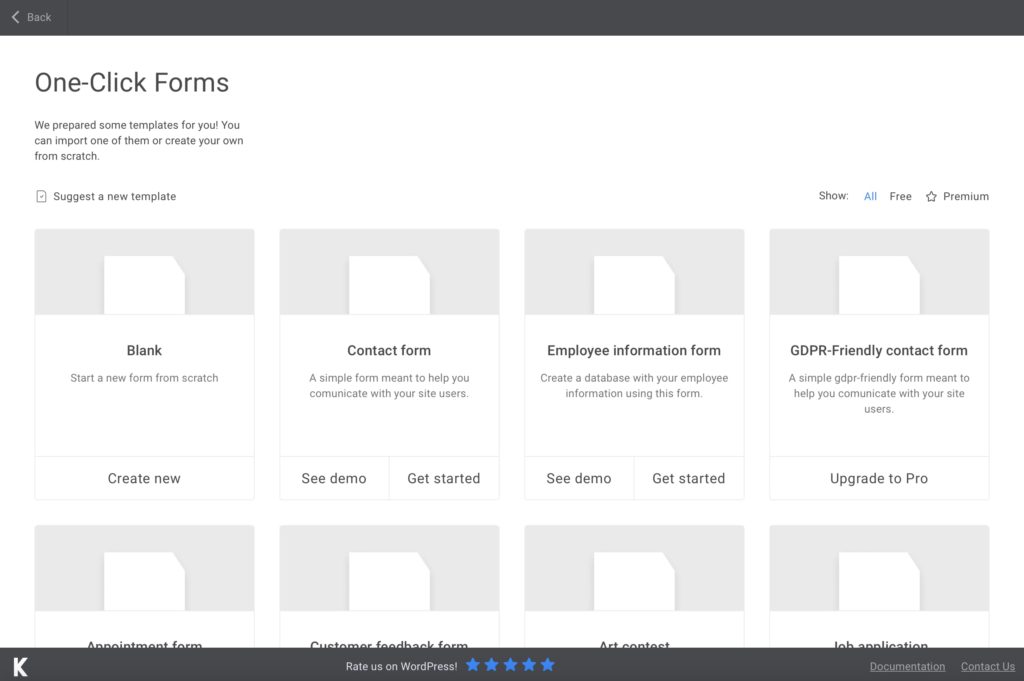
From now on, anytime you want to create a new form, go to your WordPress menu > Kali Forms > Add New.
You will be taken to a page with all predesigned templates. Since there isn’t a model for our exhibitor form application, we will create one from scratch to see how the plugin works. Let’s get started by clicking on Create New.
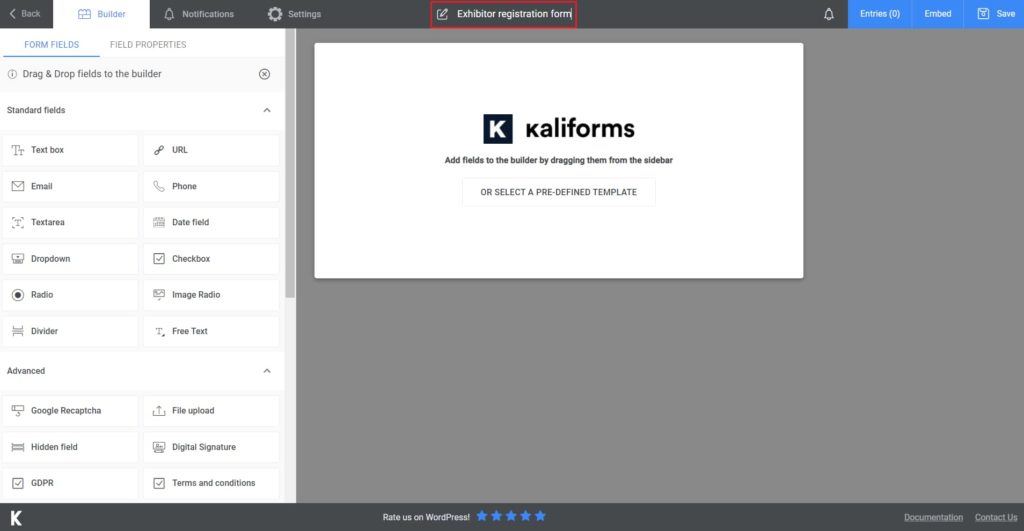
I advise you to start by giving name to your form to let your exhibitors know what they will be enrolling in.
Adding form fields
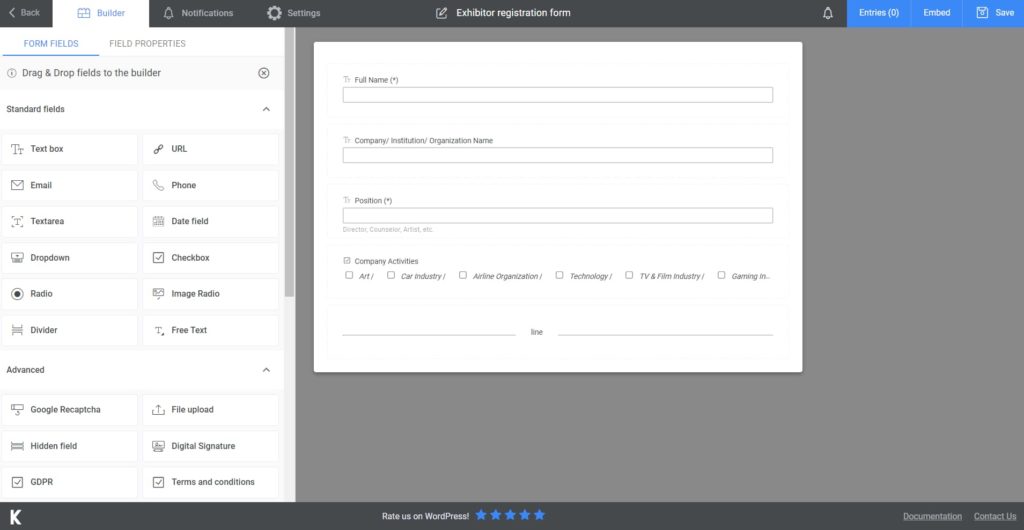
To begin with, you must understand that all the fields are customizable. You can find all the fields offered by Kali Forms in the menu located on the left side. Just drag and drop them into your form and start customizing each of them. Click on a field, and instead of the menu with all the fields, there will appear some tools that allow you to edit the fields the way you want.
For the first section of our exhibitor registration form, I added a Text Box field for the applicant’s name, one for his company/ institution/ organization name, and one for his position/ job title. After that, I placed a Check box for the company activities. In the end, I added a Divider to separate this section from the next one.
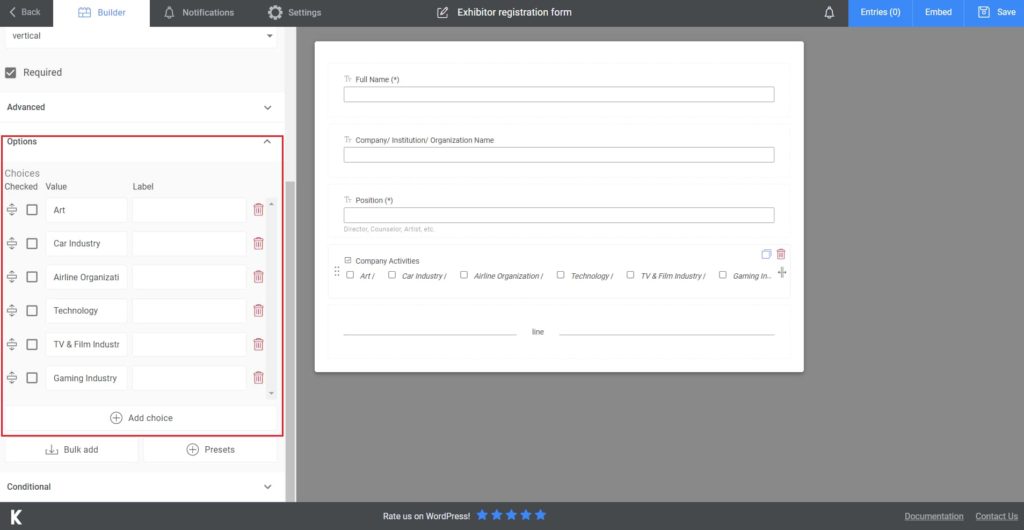
To add the activities, click on the Check Box field after you drop it on the form. It will appear a customization menu on the left side. Scroll down at Options, then press Add choices. You can add as many as you need.
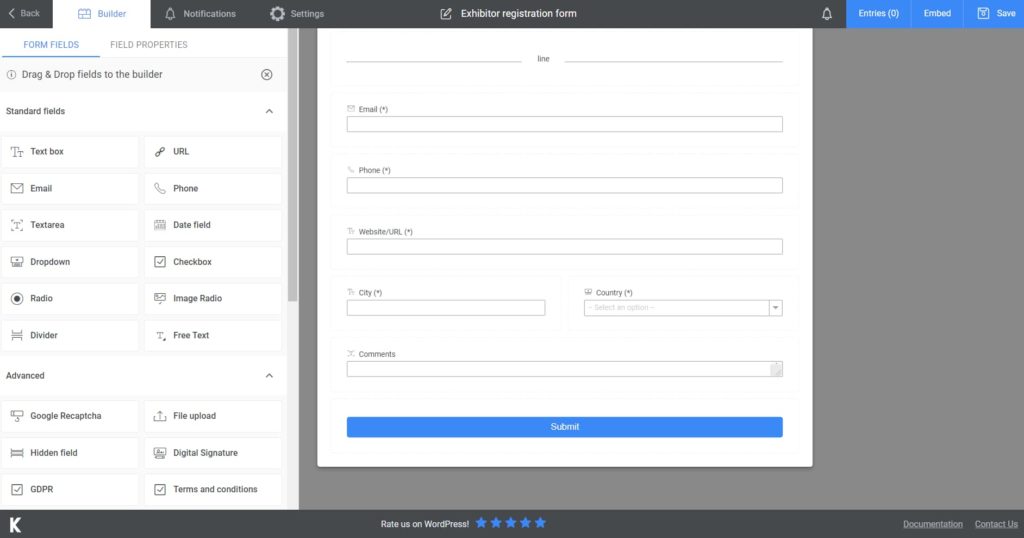
Next, I will add an Email field, followed by a Phone field, and a Text box for the company’s website. Moreover, we need a Text Box for the city where the applicant is living and a Dropdown for the countries. Finally, we will add a Textarea field for any comments the applicant might have and a Submit Button.
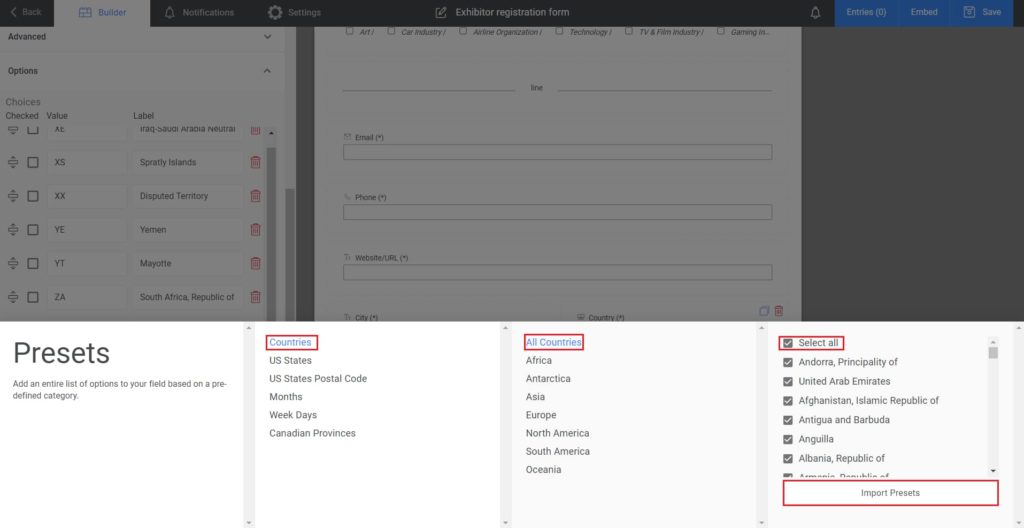
To add all the countries simultaneously, click on the Dropdown field, scroll down to Options > Presets > Countries > All Countries > Select all > Import Presets.
Additional features
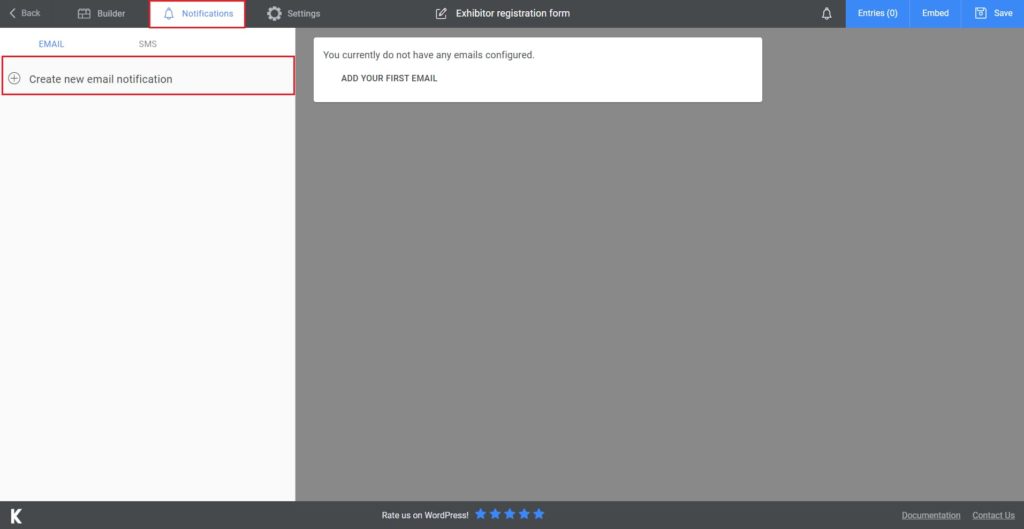
This is how you create an exhibitor registration form. If you want, you can send an email to your exhibitors to inform them that their application was successful. To do so, go to Notifications, and follow the instructions there step by step. Moreover, if you choose the premium version, you can send an SMS notification as well.
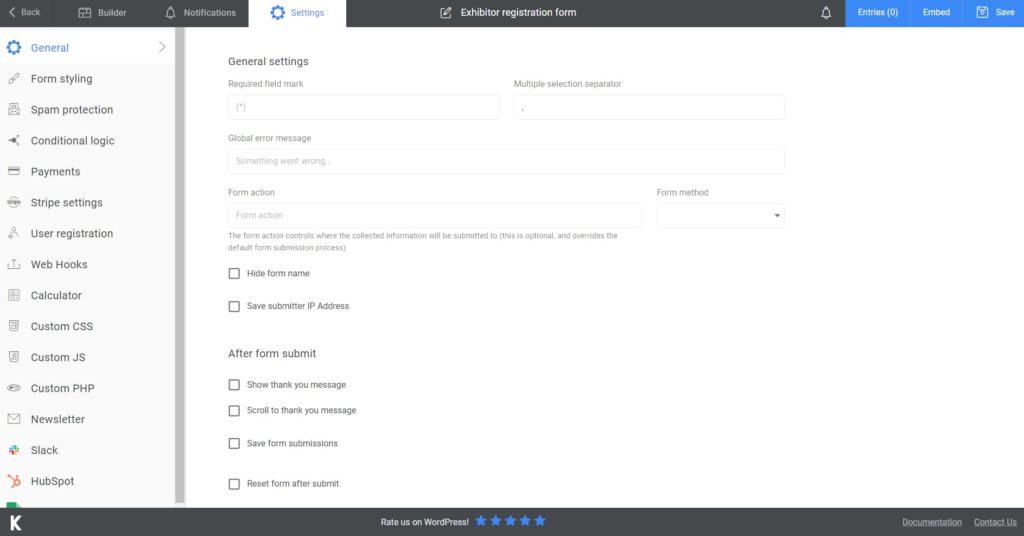
If you want to take advantage of all Kali Forms‘ amazing features, go to Settings. There, you will find a bunch of other customization tools to make your form look exactly the way you want – by selecting from over 10 different template styles to displaying a “Thank you for your submission” note. You can also add your form to Slack or HubSpot and submit newsletters if you upgrade to the premium version.
Add the exhibitor registration form to your website
Once you finished building and configuring your form, press Save. Kali Forms will create a shortcode that you can copy and paste into your website.
If you consider that your data is confidential, export it to CSV or Excel to keep it securely. It’s as easy as that!
Final thoughts
In conclusion, creating your exhibitor registration form can seem overwhelming at first, but it is actually effortless. Kali Forms makes it easier, and I’m confident you’ll have a fantastic exhibition.
So, learn about all the features and editing options available so you can build the most authentic online form possible.
Don’t get overwhelmed by all the required steps. It might seem unachievable to create a form but it’s really not. Kali Forms simplifies your work and helps you through all the steps in order to get the results that you want.


