
Let’s get started with creating our first form using the powerful Kali Forms plugin.
Step 1. Access your WordPress admin panel
You can access the admin section of your WordPress installation by adding /wp-admin to your website URL.

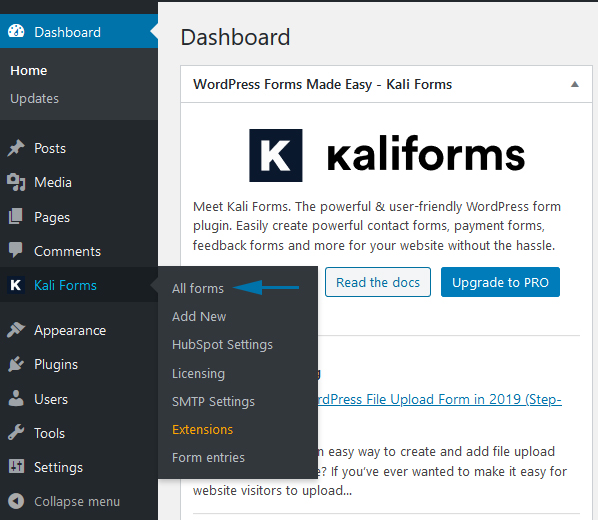
Step 2. Navigate to the Kali Forms page
Use the admin panel sidebar in order to navigate to the Kali Forms main section.
Step 3. Add a new form
Create a new form by clicking the Add new button.
Step 4. Set the general form options
Here you can choose to use one of our pre-defined form templates, these come with a complete configuration of the form fields, layout and email notifications. The current templates available are:
 Kali Forms Lite
Contact form, Employee information form.
Kali Forms Pro
GDPR-Friendly contact form, Appointment form, Customer feedback form, Art contest, Job application, Gaming tournament registration, Running calculator form, Donation form, Request quote form, Reservation form, Gym membership form, Simple Booking form, Simple Booking form with payment, Package delivery request.
After selecting the desired template you can also choose what information to import and set the general style of your new form.
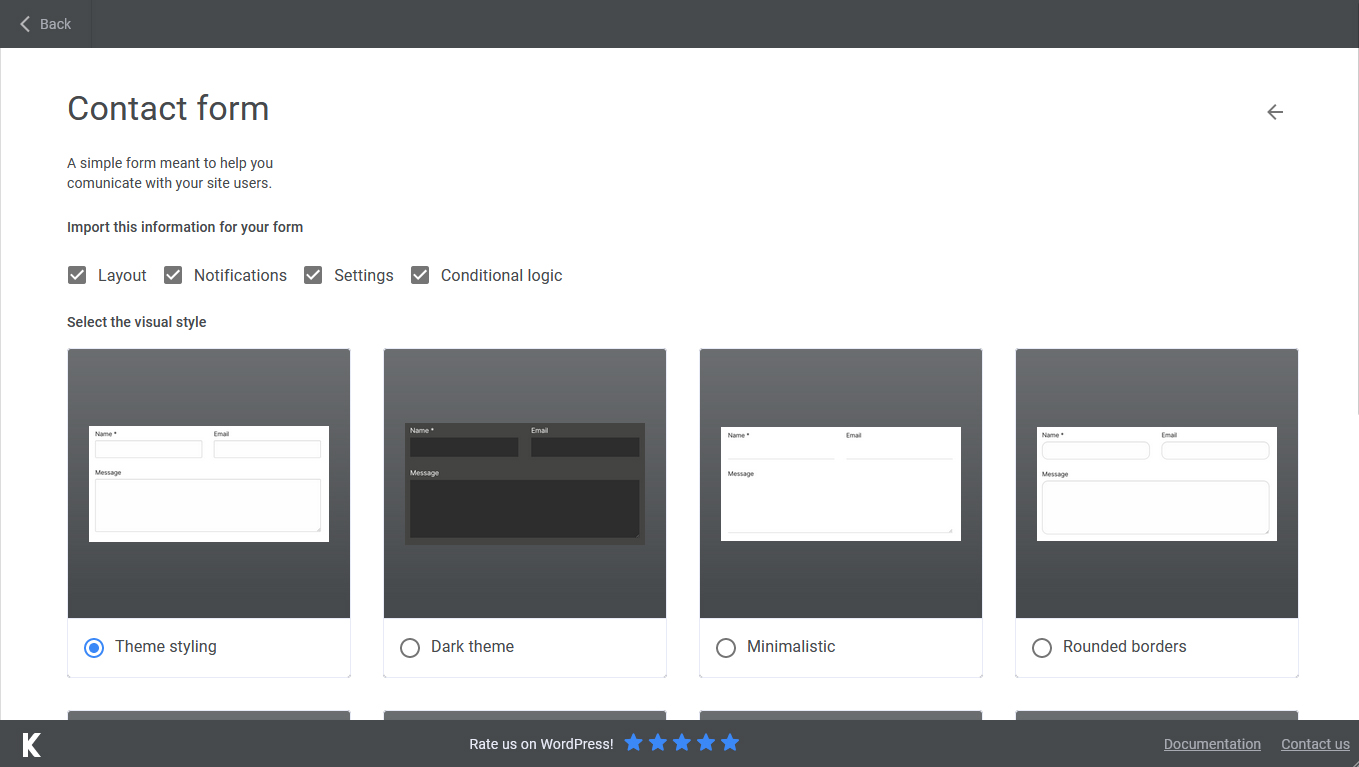 If these do not meet your needs, you can also opt to start building the form from scratch using the Blank form option.
The general form settings are:

- Required field mark: with this option you can control the sign used to highlight required fields, the most common mark being *.
- Multiple selector separator: when using fields that allow multiple options, for example checkbox groups, this will be used to separate the values.
- Global error message: a global message displayed when any validation error occurs. This message is separate from the field validation message.
- Form action: control the location your form data will be submitted to.
- Form method: choose between POST and GET methods.
- Hide form name: this option can help you easily hide the form name when you publish it in your pages.
- Save submitter IP Address: this will allow you to store the submitting user IP in your database.
- Show thank you message: choose to show the thank you message after the form is submitted.
- Scroll to thank you message: scroll to the section of the page where the thank you message is displayed.
- Conditional thank you message: you can display a different thank you message based on the user input by enabling this option.
- Thank you message: the message displayed after the form is successfully submitted.
- Save form submissions: you can opt out of storing form entries in your database with this option and only have the information send via the email notifications.
- Entries view page: the URL of the page that will display the form entries, these will be shown through the Something went wrong. shortcode.
- Delete entries after a certain amount of time (in days). Use 0 to never delete entries: this will allow you to configure the form so that submissions recorded are deleted after your desired number of days.
- Reset form after submit: this will reset the form input fields after the submission.
- Redirect URL: after submitting the form you will be redirected to the URL configured in this field.
- Form CSS ID: with this option you can add an extra CSS ID to your form.
- Form CSS Class: here you can add an extra CSS class to your form.
- Disable bootstrap grid: this will allow you to disable the loading of Bootstrap in the frontend.
Step 5. Add the form fields
You can easily start adding fields to your form through the Builder section.

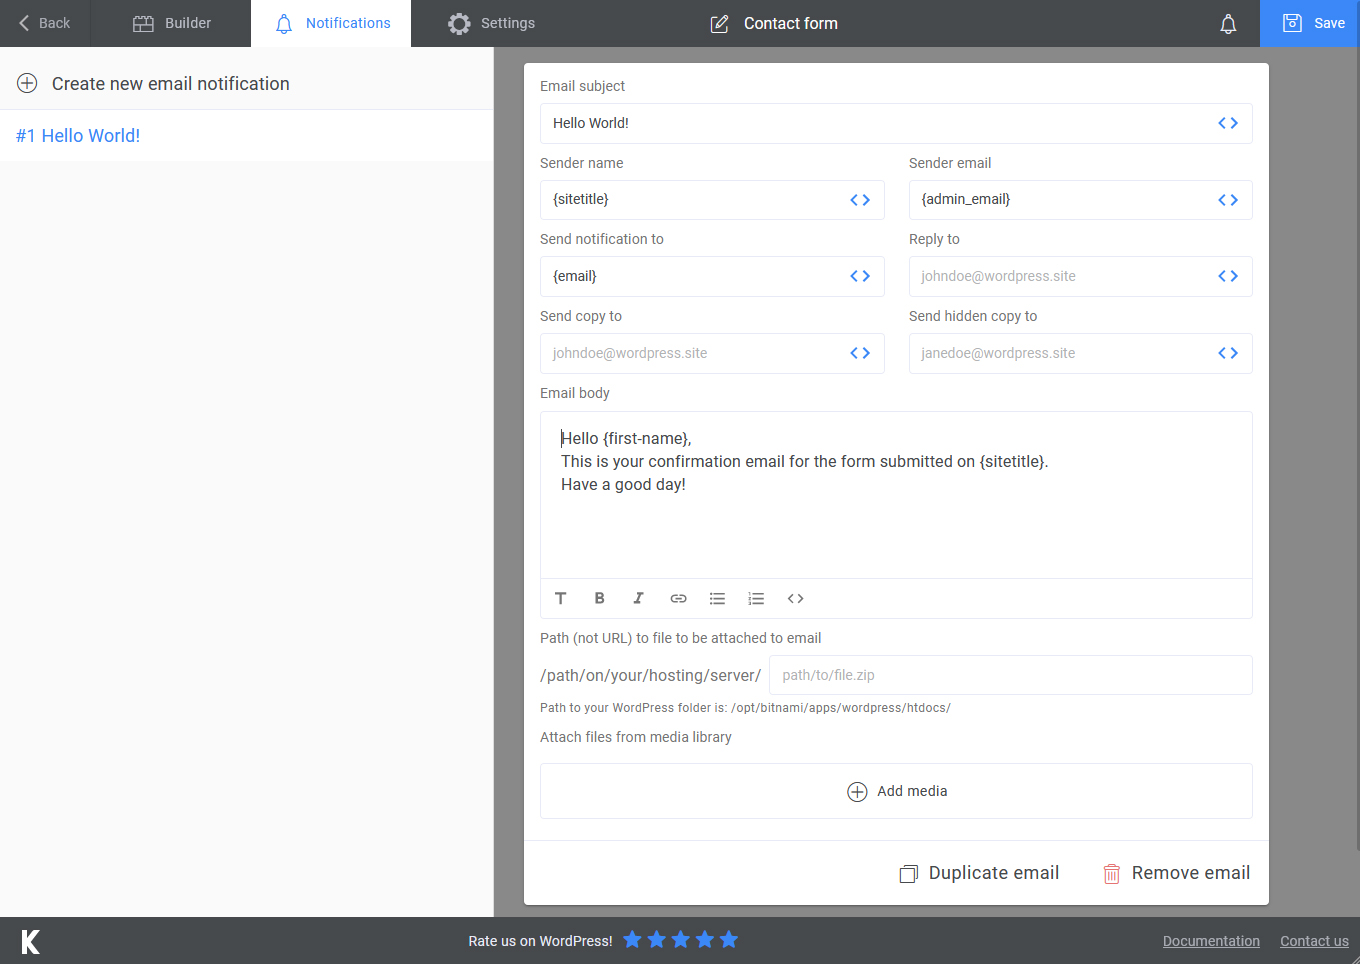
Step 6. Configure the email notifications
After setting up your form, you can enable one or multiple email notifications on each form submission. You can read an in-depth presentation of the email configuration in the following article.
Step 7. Save your first form
The most important action during the form creation process is to save your changes, it is recommended to do this after configuring each section of the form.