

A significant number of articles are written and submitted every day, either for their own use or for business purposes. Having an article submission form on your website will allow teachers, writers, commentators, and anyone else with writing skills to submit an article for publication.
Before publishing the article submission form on your website, I advise you to create some guidelines for the type and nature of articles allowed.
In this tutorial, we’re going to show you how to create an online article submission form that will make you say goodbye to handling a lot of the usual struggles. Let’s get to work!
Table of contents
Why should you use an online article submission form?
- Save time – Having everyone receive their form on paper, filling it in, giving it back, and making sure you don’t lose it in the process can be pretty messy. But if you opt for a digitalized version of it, everything will come down to a notification, a few clicks, and a submit button.
- Accuracy – An online form is structured in such a way that allows you to check if all the information is complete – you can make all the fields in your form required so that people won’t be able to submit it unless they fill everything.
- Protect data – Since the GDPR came in force, data loss can cause you many troubles. Going online will make everything safer by giving you the option to store the data in the cloud or directly on your computer.
- Easy storage – Using online forms, you can export all your data to CVS or Excel and forget about losing articles through your emails. You’ll have everything in one place, without any chance of not finding someone’s mail.
How to create an articles submission form
If you’re looking for an easy tutorial on how to create such a form that will guide you through all the steps, then you’ve come to the right place! With the help of a super intuitive tool called Kali Forms, you will save a great deal of time and increase your workflow.
Install Kali Forms
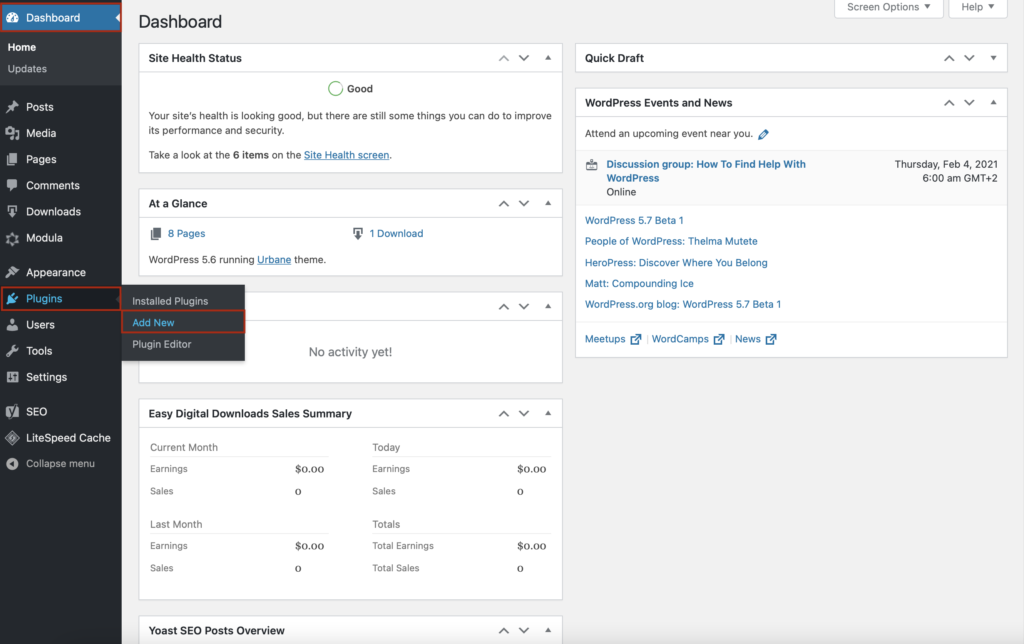
You probably already own a website – if you don’t, here’s a guide on how to create one. It’s a necessary element, but even if you don’t own a website, building it will take you a little extra time. So, go to your WordPress dashboard > Plugins > Add New.
It will pop up a page with all freemium WordPress plugins. Type Kali Forms in the search bar on the upper right corner and when you see it, click Install Now.
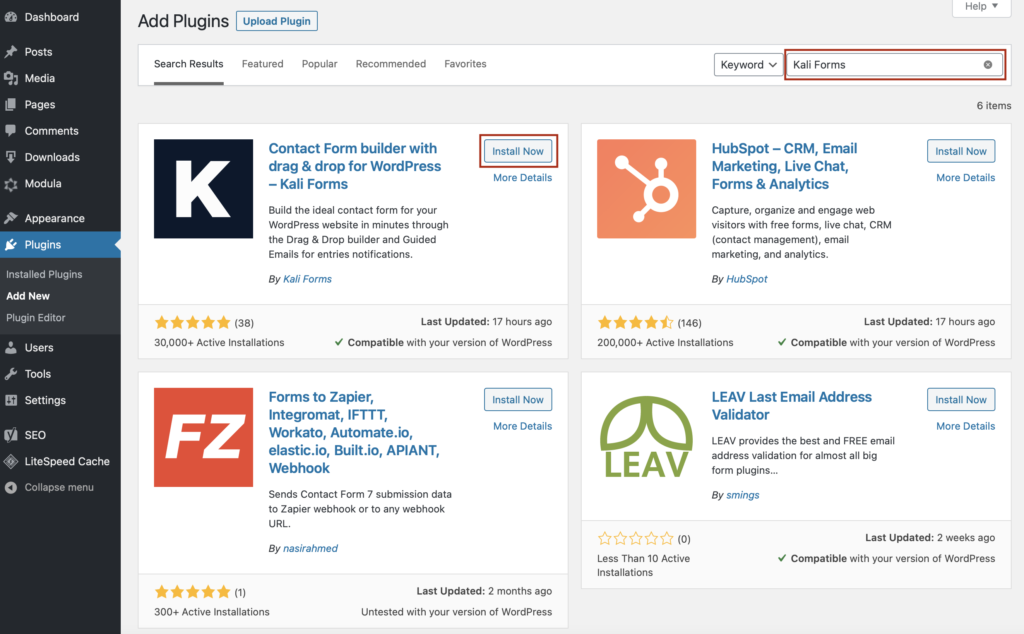
Just wait a couple of seconds, and then press Activate.

Creating a new form
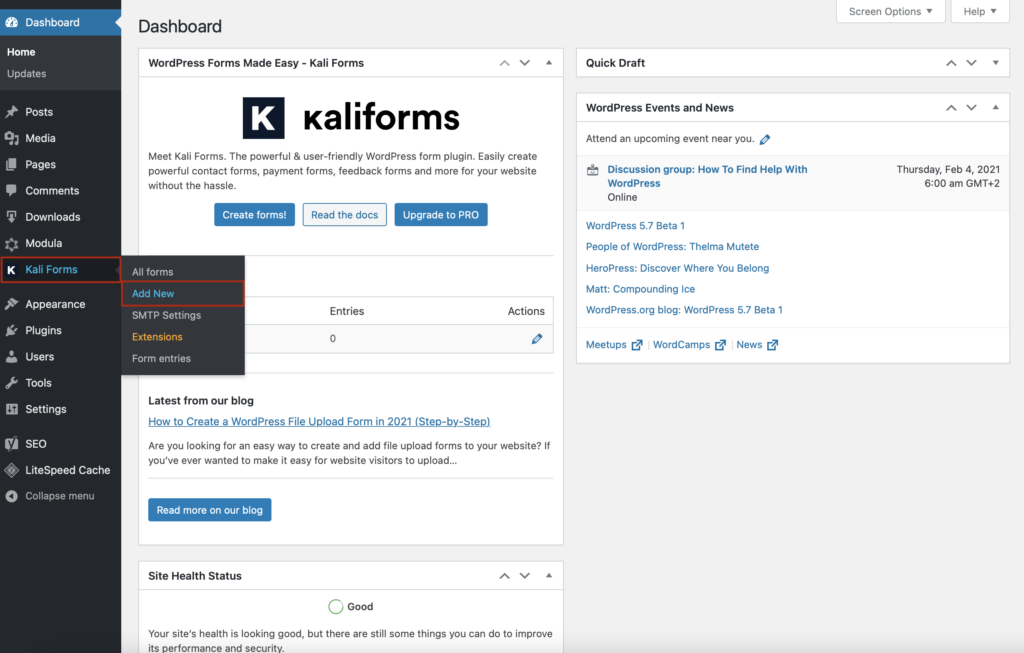
Now, you will see the Kali Forms plugin in your WordPress menu. So, every time you want to create a new form for your website, go to Kali Forms icon and press Add New.
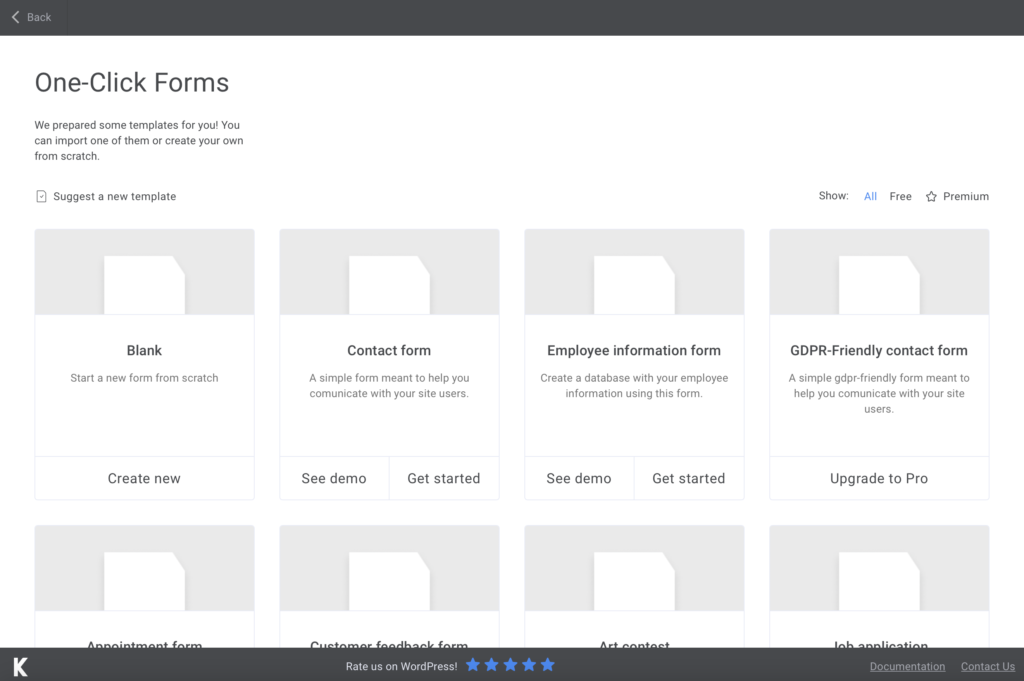
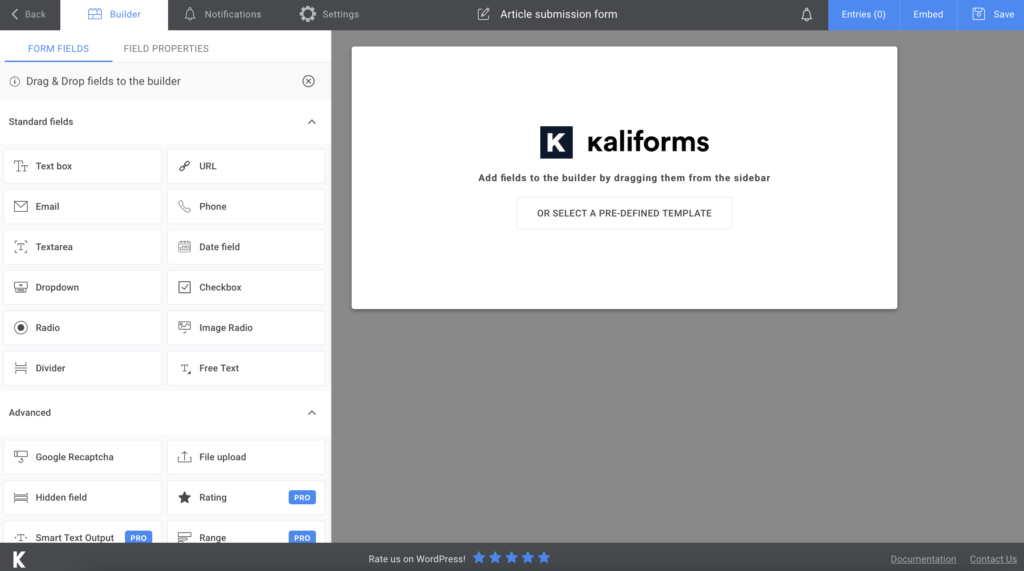
You will find yourself redirected to a page with some pre-made templates. You can use any of these if you need them, but right now, I’ll teach you how to build a form from scratch. So, press Create New.
I started by naming my form not to forget later and to inform my website visitors about the purpose of our article submission form.
Adding form fields
Let me start by telling you that you’re going to enjoy every slice of Kali Forms – everything here is customizable. Play around with it for a bit if you’re curious, and maybe you’ll find things you didn’t know you needed before.
To customize any of these options, add a field to your form and then click on it. Name your fields, add descriptions to them, and make them required. You can do pretty much here.
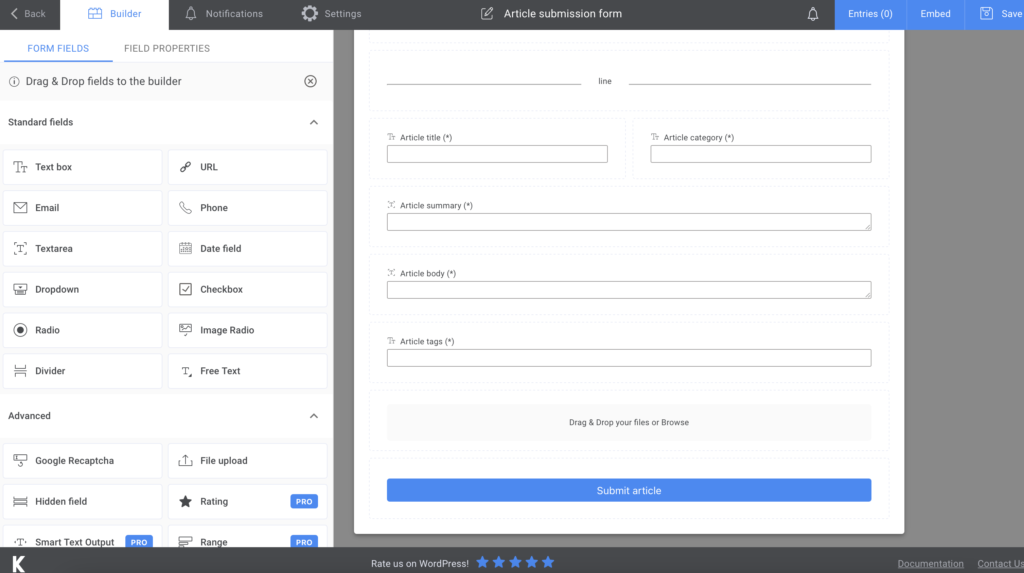
For our article submission form, I added two Text boxes (one for the writers’ full name, one for their job position), an Email field to have contact info, and a Textarea field to find out more information about the writers. Then, I added a Divider to separate this section from the other.

The second section of our article submission form includes:
- Three Text boxes – article title, article category, and article tags;
- Two Textarea fields – article summary and article body;
- A File upload field – to allow the writers to upload images, docs, ppts, etc.
- A Submit button – a button that allows your writers to submit the article.
As you can notice, I made all the fields require to field to ensure that all the necessary information is filled in.
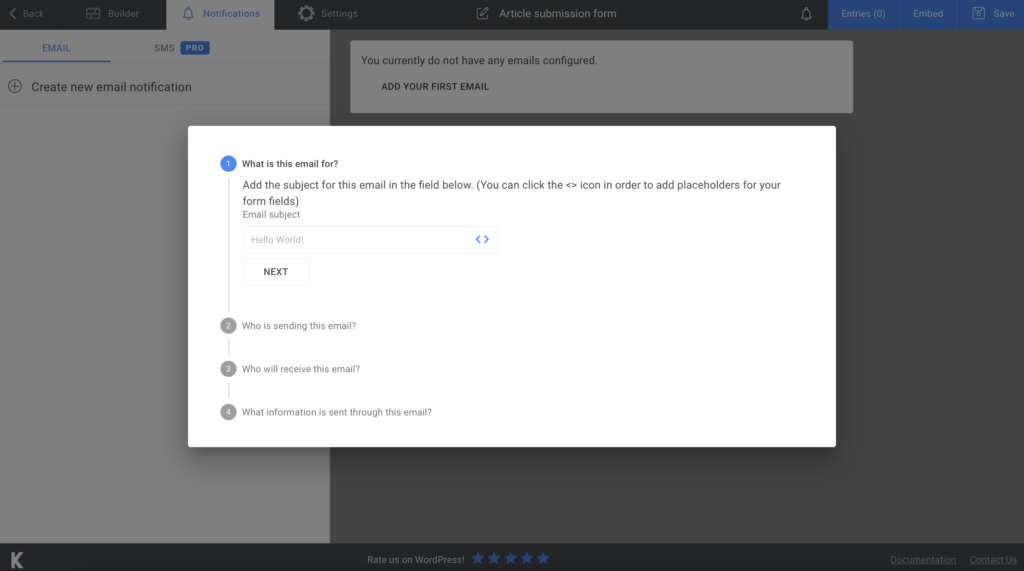
You can inform people that you received their submission by sending them an email. You can do this in the Notifications section by following all the steps presented here. If you upgrade to the premium version, you can also send SMS notifications.
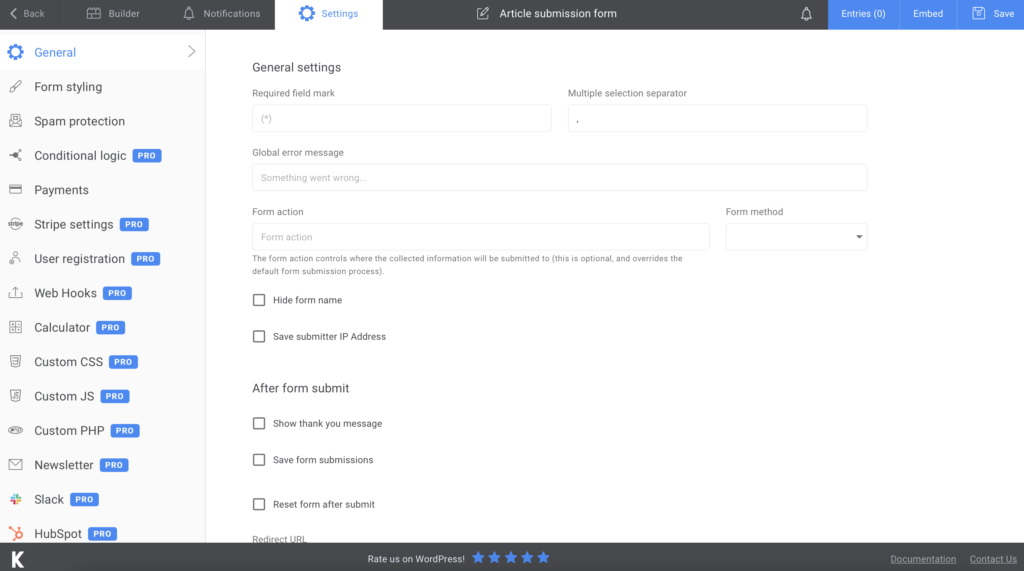
You also have the chance to customize some things from the Settings section. Choose your preferred Form Style or display a ‘’thank you’’ message after people press submit. There are other customization options you can play around with as well. The premium version allows you to send newsletters, create user registration form, and much more.
Add the article submission form to your website
Finally, we’ve reached the last part – adding the article submission form to your website. Once you’re done setting up your form, just click Save. Kali Forms will generate a shortcode with your article submission form.
All you have to do now is copy and paste the link into an existing page or post. You can also create a new one if you please.
Summary

Creating online forms with Kali Forms will make your job easier and increase your workflow. You can build unlimited forms and make your website more professional using this powerful tool. Give it a go and see much it has to offer.


