
If you are looking for a straightforward way to create a WordPress user registration form for your WordPress website, you are in the right place.
As an admin, you can allow others to connect to your WordPress website by creating accounts for other users. And you can easily do the user registration form in WordPress with Kali Forms, the most user-friendly form plugin.
In this article, we will show you how to create a custom user registration form in WordPress.
Table of contents
Why should you create a WordPress user registration form?
Whether you are a beginner or not, creating a user registration form for your WordPress website is necessary. Let’s see the most important benefits of creating such a form:
- Save time – You can create users and assign roles manually from the default WordPress settings, but it can be time-consuming. Well, if you take advantage of one of the WordPress form plugins, they will automatically create user accounts (assigning user roles as well) after the users submit the form.
- Customization – Most of these plugins are fully customizable so that you can create your custom user registration form in WordPress. You will have full control over the users’ information and your form’s appearance.
- Spam protection – These tools integrate features like anti-spam protection, so they keep user registration spams away from your WordPress website.
- User roles – You can specify various roles for your users by creating custom user registration forms such as: editor, guest, etc.
- More control – If you choose to create a custom user registration form, you will be able to post it on any page of your website. With that in mind, you will definitely enhance the user experience during the registration process.
How to create a custom user registration form in WordPress
Before we start creating a custom user registration form in WordPress, you will need to install the Kali Forms plugin.
Step 1: Installing the Kali Forms plugin
The best thing about Kali Forms is that everything here is customizable. You can add form fields, name them, add a description, or make the fields required to fill or not. There’s more. It provides a big bunch of features intended to beautify your form.
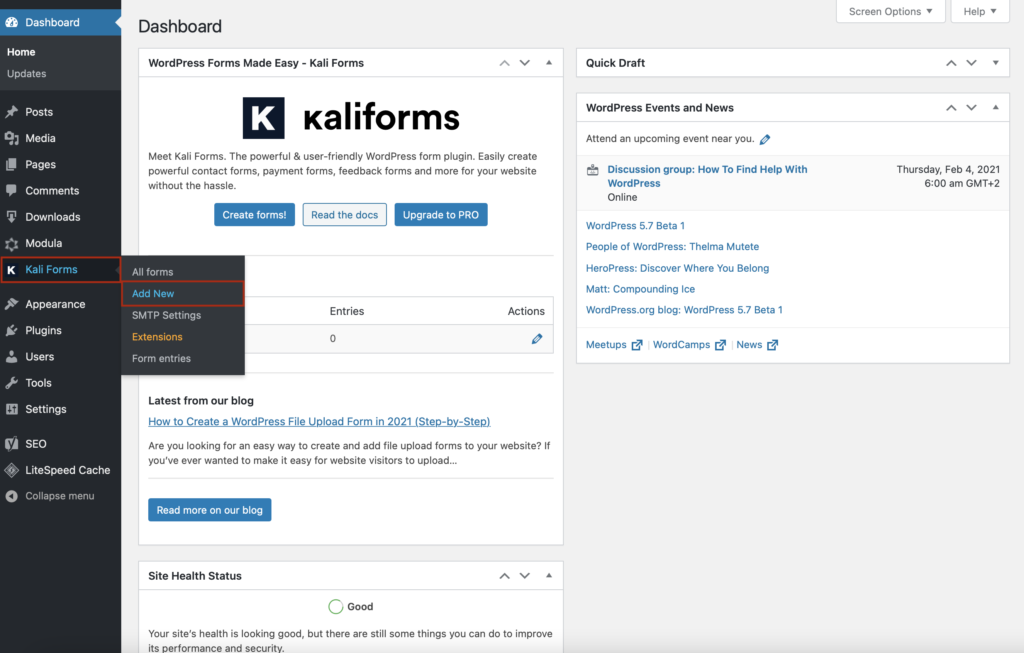
Go to your WordPress dashboard > Plugins > Add New. You will see in the upper right corner a search bar, so type Kali Forms. Once you find it, press Install.

Just wait a couple of seconds until the installation process is over, and then click on Activate.

The Kali Forms plugin will pop up in your WordPress menu, so every time you want to create an online form, click on it and press Add New.
Step 2: Create a new form
To create a user registration form with Kali Forms, you will need to upgrade to the PRO version. You can choose between the Small business and Agency pricing plans to benefit from this feature. Here you can find a tutorial on how to install the premium version of a plugin after you made the purchase.
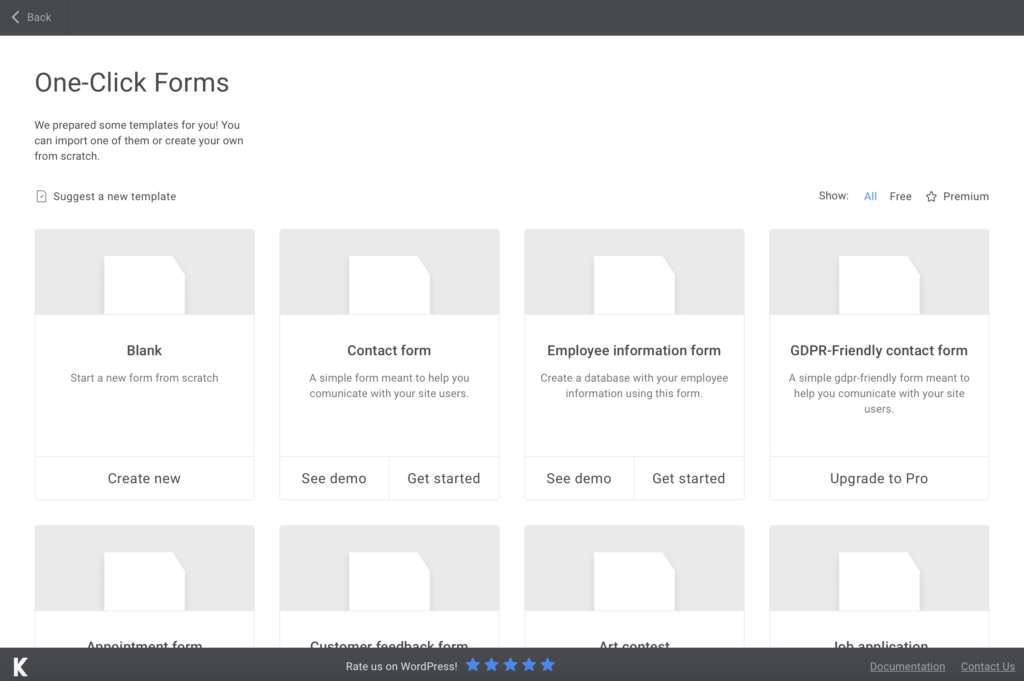
Once you have the user registration add-on installed, we can start creating our custom user registration form. After you click on Kali Forms > Add New, you will be redirected to a page with pre-designed templates. You can use any of these if you need, but we will create one from scratch right now, so press Create New.
Next, I advise you to name your form to let users know what they fill in.

Now, we will start adding fields to our form. First of all, I added 3 Text boxes for the users’ full name and username, an Email field for their email address, and another Text box for the password. Next, I attached a Textarea field to allow your users to add a short bio, and a Submit button.
As you can see in the picture below, I made most of the fields required to fill so as not to forget the users to fill in any information.

Step 3: Customize your form notifications
The best part about Kali Forms is that you can send email notifications to inform users that their account was created. Go to Notifications, and you can customize the email as you please, or you can follow this tutorial on how to do it.

Step 4: Configure your form settings
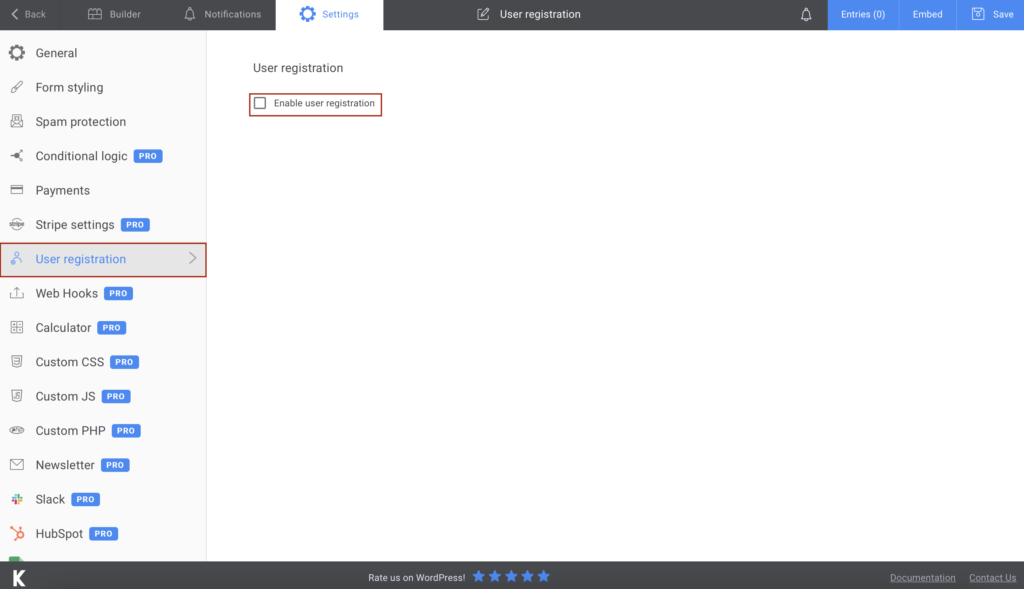
Go to the Settings > User registration. Now, you will have to enable this feature, and you can start configuring the form.
Now, you can select the fields we created for every custom box from this page.
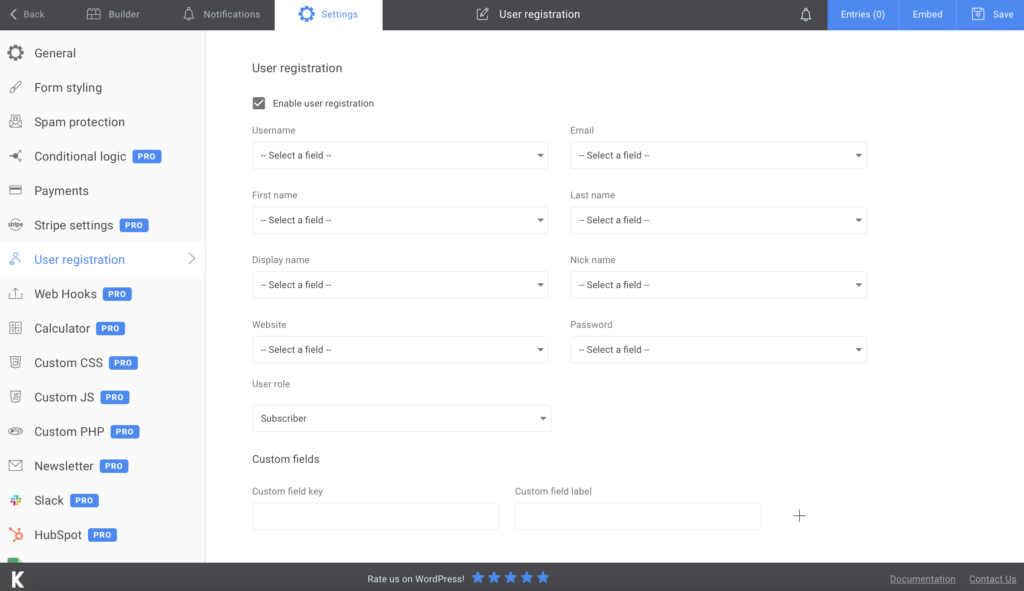
As you can see in the image above, if you want to create a more complex user registration form, you can add more fields for a nickname, display name, and website URL.
Moreover, whenever a new user fills in the user registration form, you will receive an email that a new account has been created.
Step 5: Add the form to your website
If you are happy with all the changes you made, click on Save. A shortcode with your form’s link will be generated, so copy and paste it wherever you need.
Remember that you can export your data to Excel or CVS to keep it stored somewhere safe.
Summary

Creating a custom user registration form with a powerful tool as Kali Forms has never been easier. Follow all these steps and take advantage of the bunch of features that will help you create the most professional forms.
Give it a try and convince yourself!


