

If you’re looking for a quick and simple way to make your product orders more efficient, then you’re in the right place
This solution is for the small businesses, rather than the huge ones that already have an order system. For young entrepreneurs, especially the ones that have online shops selling any kind of goods, it makes it very difficult to receive orders through different channels. Some have an Instagram or Facebook dedicated page and accept product orders through private messages or e-mail. And we’re not saying it’s not working, it’s just the fact that you can make it more efficient.
In this tutorial, we’re going to walk you through the whole process of creating such a form, with all the required steps and some tips. Let’s get to it!
| 1. Why should you use an online product order form? |
| 2. How to create a product order form |
| 3. Add the product order form to your website |
| 4. Summary |
Why should you use an online product order form?
Because it will make your work much more efficient. But let’s see some reasons for this, accompanied by an extensive explanation.
Save time
Saving time is the real struggle many people face these days. You might be trying to save some money on complicated websites or avoiding paying people to do something you’re not sure how much values. Having people message you or e-mailing their order can be time-consuming. You always have to check if you have every piece of information you need in order to send their products. Going back and forth with them will make everything harder.
Keep track of everything
Have you ever forgotten about someone’s order or you sent it too late because you have no tracking system? Well, having a form means that everything is in place, and you have the possibility to export all your data to CVS or Excel and have a clear organization of it.
Provide better customer service
Maybe for some of your clients, it is very difficult to make orders by sending you private messages. I know it sounds weird, but standardizing your process will make it more comfortable for your customers, with no need to directly interact. They will not have to wait for an answer from you or such things. They will fill in the form, and you’ll have everything served on a plate. Easy, right?
How to create a product order form
As I kept saying, it’s super easy to create a product order form. All you need is a plugin, called Kali Forms, that is going to basically do the job for you. Let’s see what are all the steps you have to take for this whole things.
Installing Kali Forms plugin
To begin with, you need a website. If you don’t own one, don’t worry. You can easily create one following this tutorial on how to create a WordPress website. Once you’re ready, go to your WordPress dashboard and look for Plugins. Then, click on Add New. It should redirect you to a page where you’ll find a search bar in the upper right corner. Type Kali Forms and after you find it, press Install.

The installation shouldn’t take more than a couple of minutes. After that, Activate your plugin.

Now you’re ready to start working on your first form. Find Kali Forms in your WordPress menu and press Add New.

Creating a new form
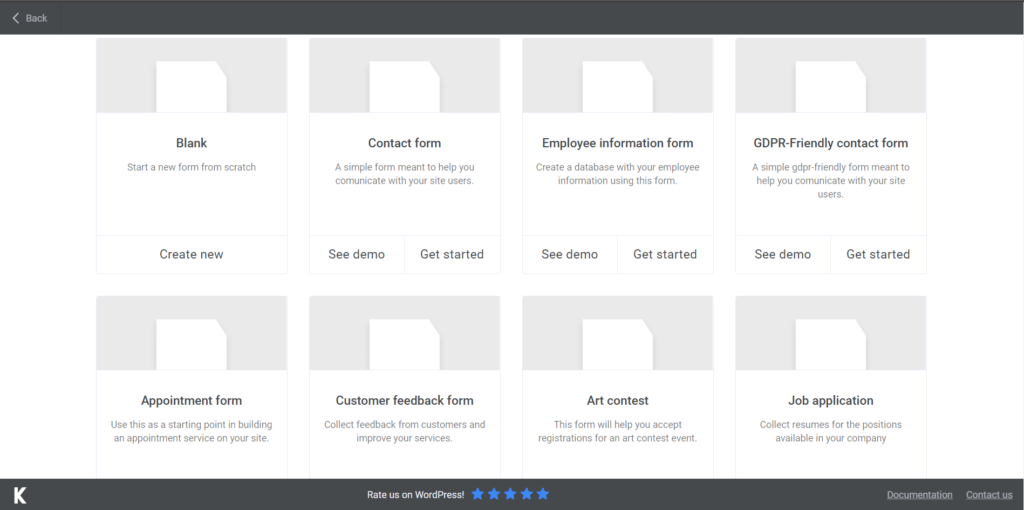
After you click on Add New, you’ll be redirected to a page with a bunch of templates. If you need them, feel free to use any. But for now, you need to press Create New, as we’re going to make one from scratch.
Start by giving your form an appropriate name, especially if you consider having multiple forms on your website. You don’t want confused clients that place orders in a feedback form, for example.
Adding form fields
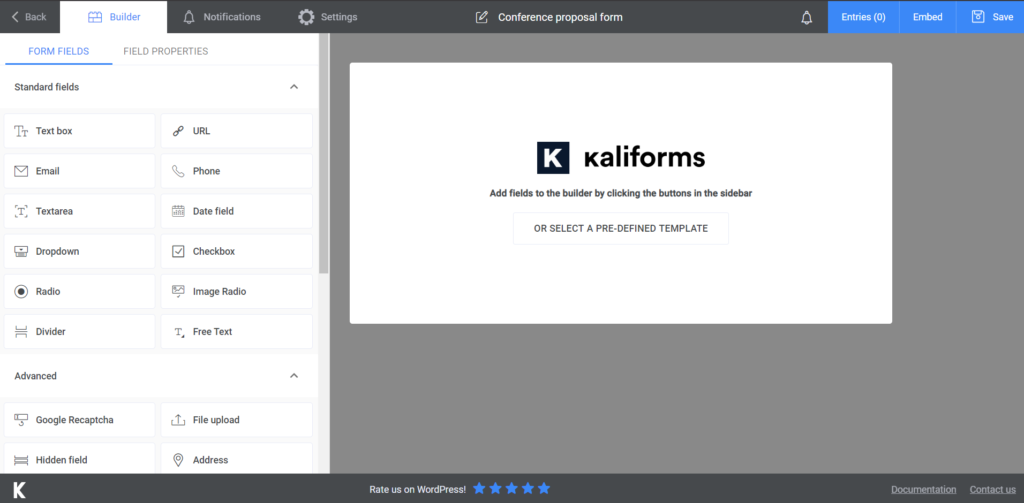
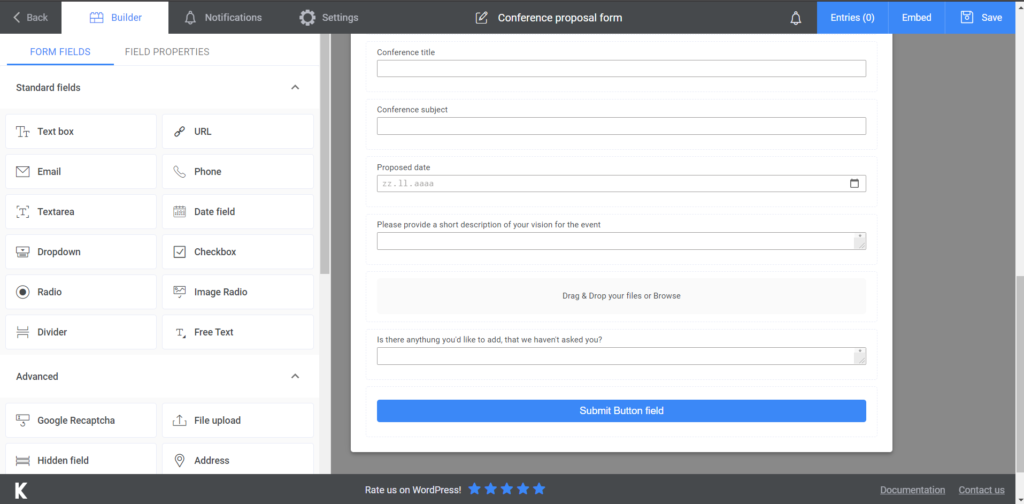
Firstly, you need to know that every feature included in this plugin is customizable. Once you click on Create New, you’ll see that you’ll be taken to a page where you can create your form. On the left you’ll find the menu with all the options you can include in your form.
If you want to customize any of the fields, after you added it to your form, click on it. Instead of the regular menu, the customization one will appear. Change the field’s name, add a description or placeholder to it, or make it required. Any of these options are there to make it super easy for you and your customers.
I started by adding a Text box for the person’s full name, Phone, E-mail, and Address field for the contact details and the billing and shipping address. To separate things, I chose a Divider, to make it clear between the personal information and the order.
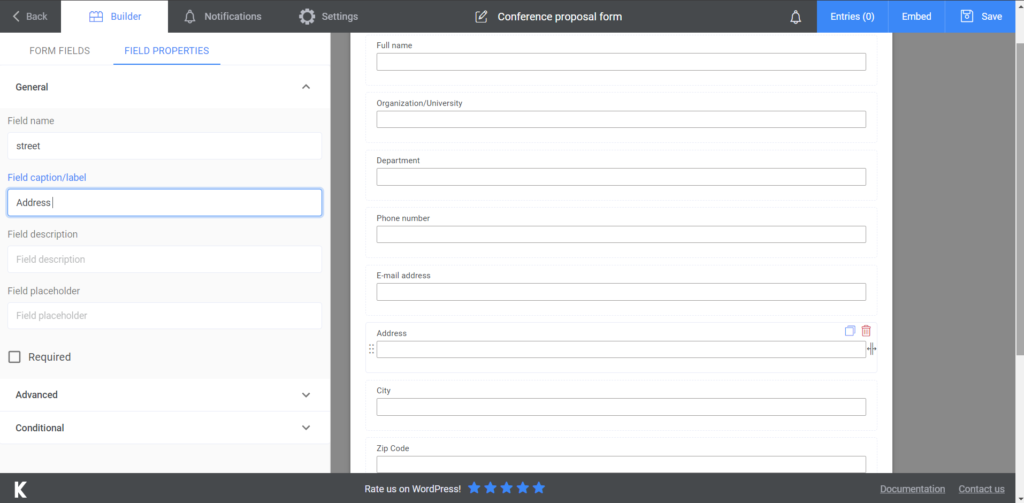
For the next part, I started with a Text box, so people can write there the code of the products they want. This way, you can easily find them and have their order prepared. I added a Choices field, with the ‘’yes’’ and ‘’no’’ options, so you can ask your client if the shipping address is the same as the billing one. Some people have them separate, so I opted for a Text box, so they can write the shipping address as well.
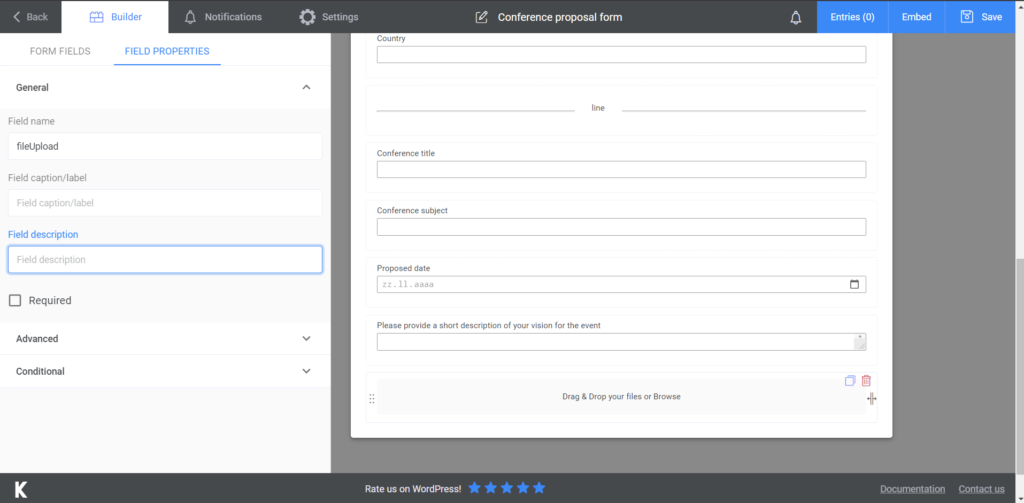
Lastly, I added a Textarea, in case there are any special instructions the customer wants for their products. I chose the payment method, which is PayPal and a Submit Button. We’re almost done with this.
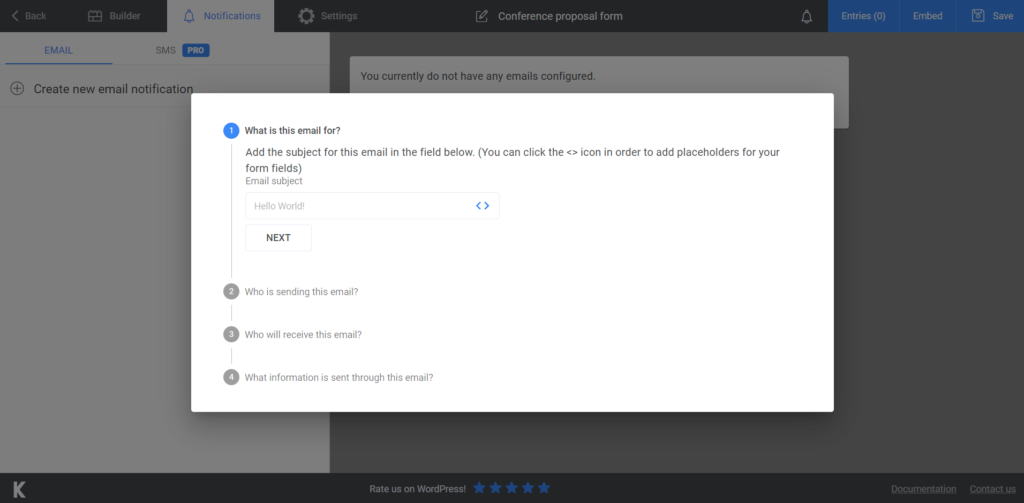
If you want your customers to receive a confirmation of you receiving their product order form, you can go to Notifications and set up the e-mails just as you please. To make everything easier, go premium and send SMS notifications as well.
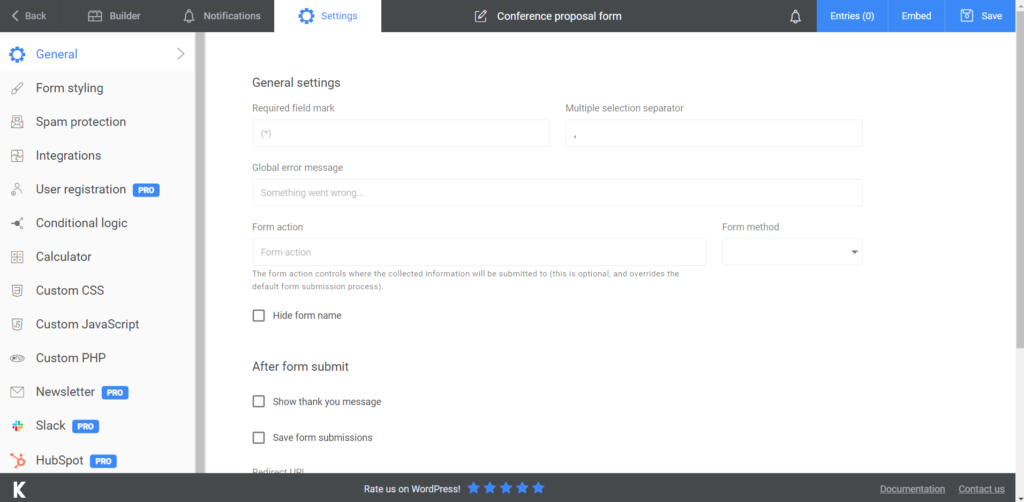
For the last part, if you want to further customize your form, go to Settings. You can choose your Form style or display a ‘’thank you’’ message after they submit their form. Make sure your customers stay informed by sending newsletters with Kali Forms PRO.
Add the product order form to your website
This is the last step you have to take in order to get it over with. Once you’re done with your form, press Save. A shortcode will be generated. All you have to do is copy it and paste it into a page on your website. It can be an already existing page, or you can create one just for this form. Now you’re ready to receive orders!
Summary

After all is said and done, we hope you’re now convinced of how easy it is to create a form with Kali Forms. It saves you a lot of trouble and helps you stay better organized – which is vital if you want to keep growing your business. Try it out and see how it works for you!


