

If you’re looking for a way to optimize the peer review process in your facility, then you’ve landed in the right place.
Peer evaluation forms have been around for a while, as it’s a very constructive way of involving everyone in the review process, especially for people who work closely together. It can be done at school, which is the most common case, but it can also function in the workplace. It’s a great way of seeing the dynamic of the team, how well they work together, and what exactly is missing in order for everything to be on the floating line.
This tutorial is meant to help you build a peer evaluation form so you can use it instead of the huge amounts of paperwork that are needed for such a thing. As I said, this kind of form can be used for multiple types of domains, but we’re going to focus on a peer review between co-workers. So let’s see what this is all about.
| 1. Why should you use an online peer evaluation form? |
| 2. How to create a peer evaluation form |
| 3. Adding the peer evaluation form to your website |
| 4. Summary |
Why should you use an online peer evaluation form?
There are several reasons behind this choice, and I’m going to list the most important ones below so you can see why this upgrade is necessary these days.
Save time
You can save both your and your employees’ time. The whole thing can be pretty messy – having everyone receive their form on paper, filling it in, giving it back, and making sure you don’t lose it in the process. If you opt for a digitalized version of it, everything will come down to a notification, a few clicks, and a submit button. Yes, it’s that easy.
Data protection
GDPR is a very sensitive thing these days, so you don’t want to take chances and lose some of those forms. They can end up God knows where, and the last thing you need is people complaining about this. Going online will make everything safer by giving you the option to store the data in the cloud or directly on your computer.
No storage needed
This is something that people from the digital era find very hard to deal with. Why bother with so much paperwork, that needs a lot of organizing and space? So forget about this and store everything safely on your computer and keep it for future reference.
How to create a peer evaluation form
This is a very easy creation process that will save you a great deal of time. With the help of an amazing tool called Kali Forms, you’ll be able to reduce the stress of this whole process in a matter of hours – and it will last. Kali Forms is a user-friendly, very intuitive, and responsive plugin that’s here to take some weight off your shoulders. So let’s see how it goes.
Installing Kali Forms Plugin
For everything to happen, you need a functional website. Most businesses nowadays have one for advertising purposes mostly, but there are no worries, as you can create one very easily. Creating a website with WordPress is actually a pretty enjoyable experience, as it’s simple and you learn how to do it along the way. Once this step is over, you need to go to your WordPress menu and look for the Plugins section. Click on Add New, and you’ll be redirected to a page with a search bar in the upper right corner. Type Kali Forms, and when you find the plugin, press Install.

The installation should be pretty quick, so after it’s over, Activate your plugin by pressing the button outlined below.

Now you’re ready to start working. Kali Forms can be found in the WordPress menu I told you about earlier, so each time you want to create a new form just click on Add New.

Creating a new form
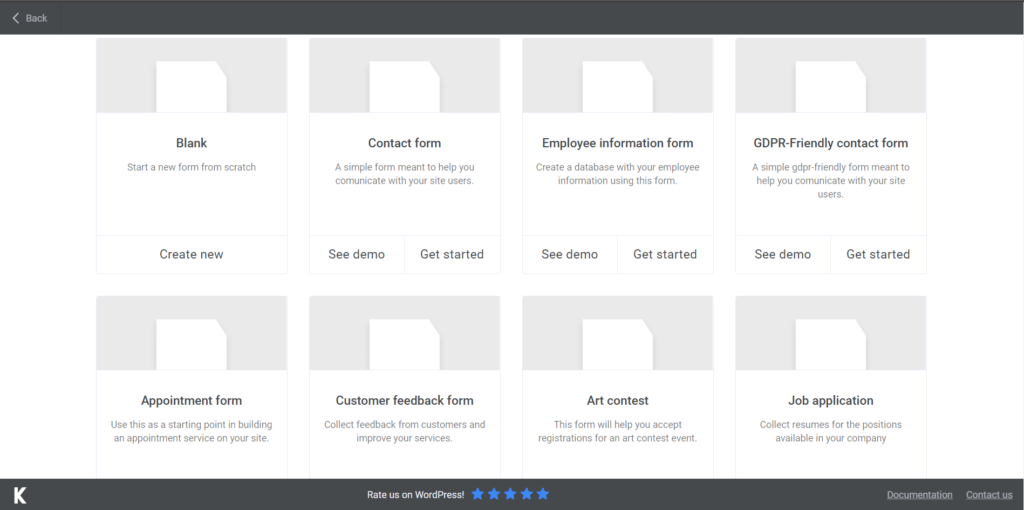
When you click on Add New you are automatically taken to a page with a bunch of form templates. We don’t need them right now, so press on Create New. We’ll start from scratch with this one.
The first step is to name your form. It’s important so that people know what they should be filling. I simply named mine ‘’peer evaluation form’’, but you can choose anything that you find appropriate.
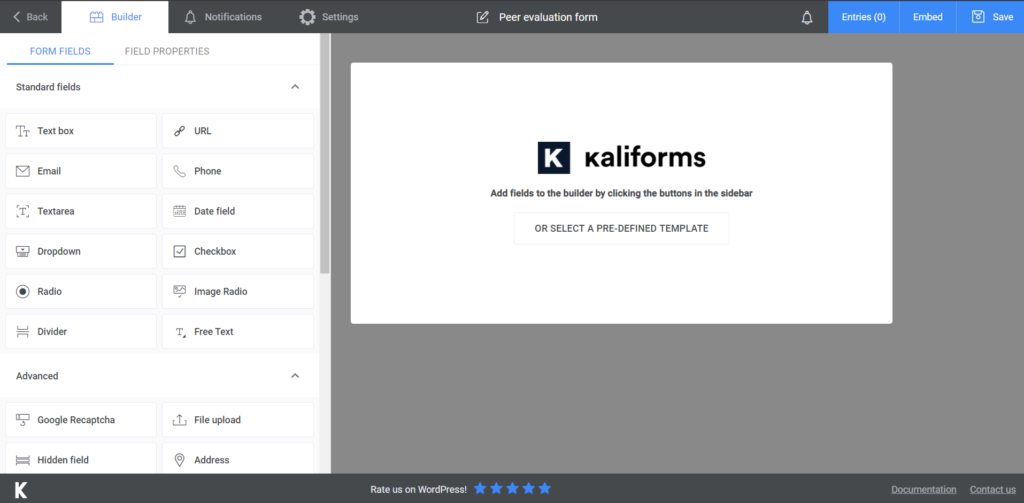
Adding form fields
Before we get to it, we have to tell you that all the options in your form are highly customizable. The menu with all the fields is on the left. In order to edit any of those fields, first, add it to your form, and after that click on it. Instead of the regular menu, you’ll see the customization one. You can name your fields, add descriptions or placeholders, or even make whichever fields you want required to fill. Play around with all these options so you can create the perfect form. Now let’s get to it.
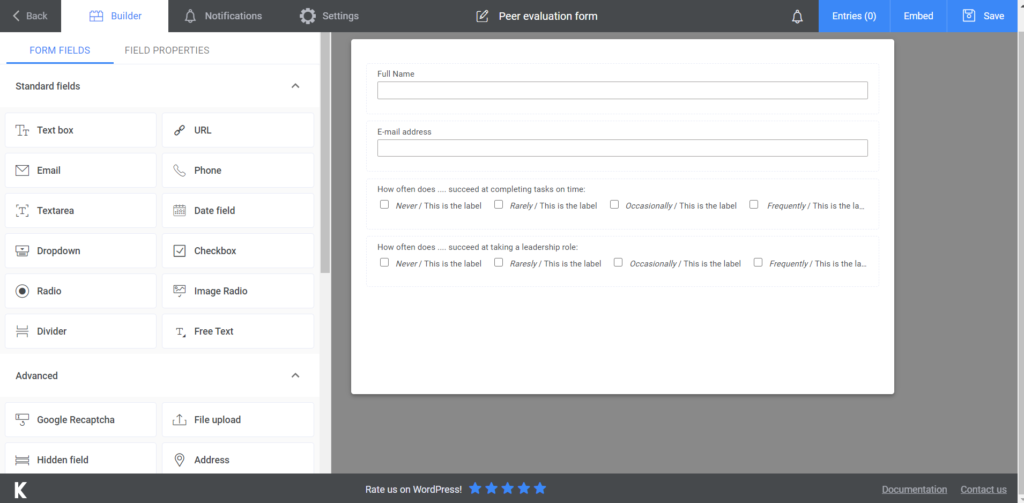
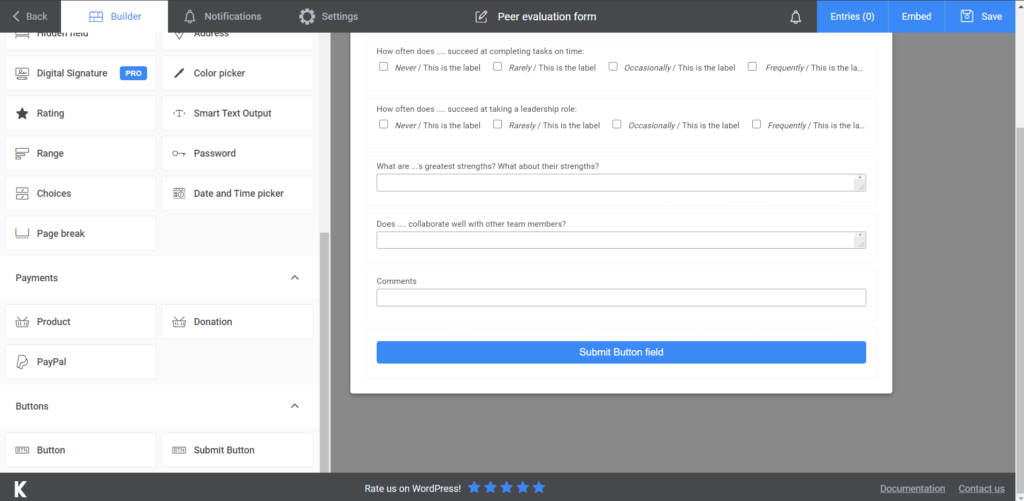
I started by adding a Text box, for the name of the evaluator. Next, I added an E-mail field. For the next questions (which can be as many as you want them to be) I chose a couple of Checkbox fields. I will only show you guys how it looks like, and you can add or take out anything. These checkboxes are useful for things that can be evaluated on a Likert Scale because you can put all the options in there and the person just has to tick one of the boxes.
Next, I chose a couple of Textareas, for open questions that can only be answered by longer pieces of text. You need to find out the most relevant things from your employees, so make sure your form is as complex as it needs to be.
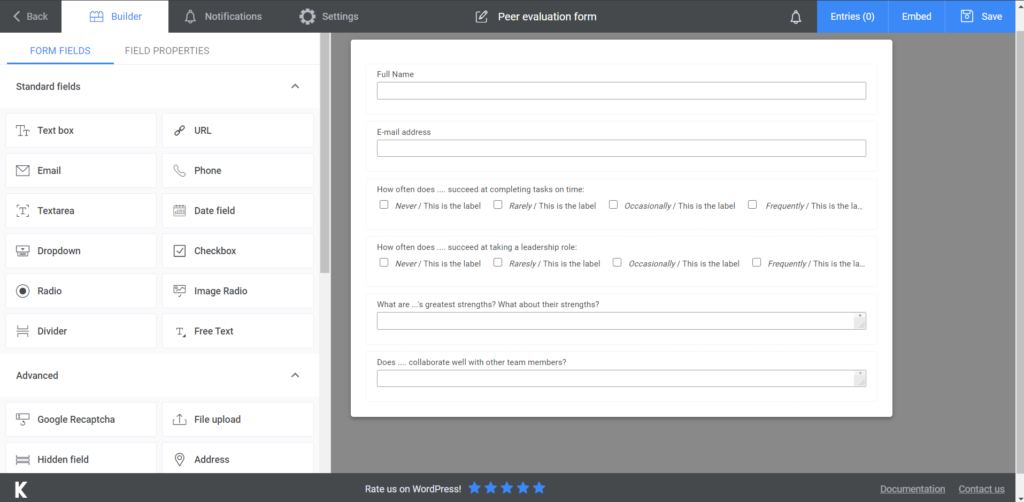
Lastly, I added a Text box for any other comments that the person wants to make and a Submit Button. We’re very close to finishing up!
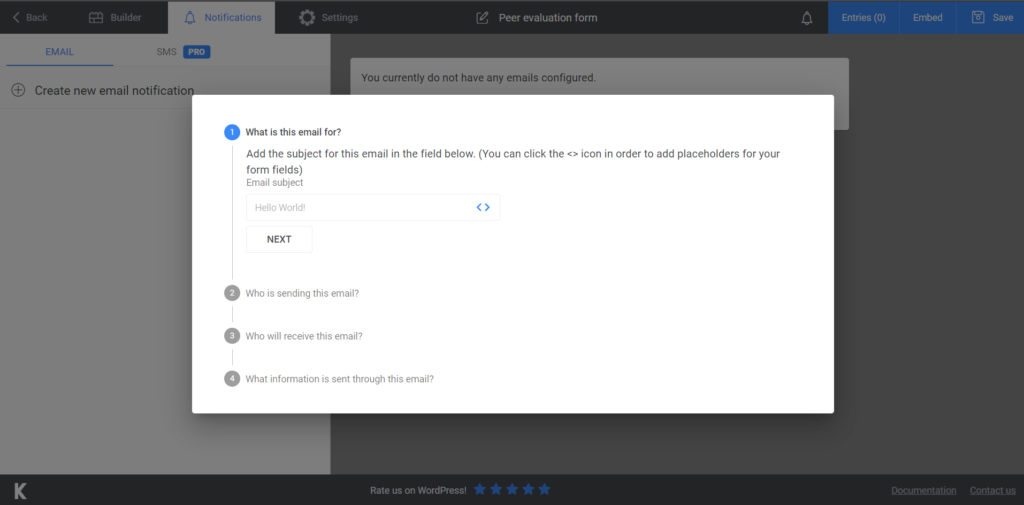
You have the option to send people e-mail notifications as reminders, so make sure you take advantage of this option. Just go to Notifications and everything is explained step-by-step. If you go for the premium version, you’ll have access to SMS notifications as well.
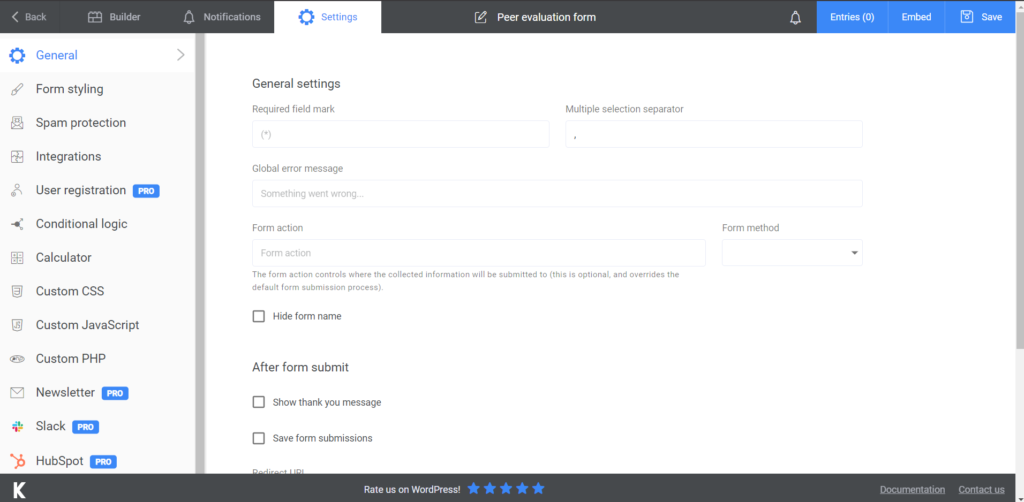
Don’t forget to go to Settings before you publish your form. You have a bunch of other options to customize – choose your Form Style or display a ‘’thank you message’’ after they submit the form. The premium version also allows you to connect your form to Slack, HubSpot, and send newsletters!
Adding the peer evaluation form to your website
The last step is to add the form to your website. To do so, you have to press Save once you’re done creating it. A shortcode will be generated. You just have to copy the shortcode and paste it wherever you want it to be on your website – create a new page or add it to an already existing one.
Don’t forget that you can export all your data to CVS or Excel, to keep it safe and sound from being misplaced.
Summary

Now that you know the steps and how easy it is to create a form with Kali Forms, you can start working on your first form. Think about all the benefits we’ve presented you with and start making your life easier today!


