

EU General Data Protection Regulation (GDPR) is a privacy law that sets way higher expectations than many companies were used to. Since this law appeared, many methods of getting consent are no longer valid. To ensure you are doing your work legally, you will need a GDPR compliant consent form for your site.
Whether you are based in the EU or not, as long as you sell or give away services or products to the EU citizens, GDPR law applies to you. If you are offering additional facilities besides the product or service you are promoting or selling, such as a newsletter or marketing emails, you are forced by GDPR to ask for consent.
In this article, we will present you how to apply GDPR in the right way in your forms and create with WordPress a GDPR registration form.
Table of contents
Things to consider when Creating a GDPR compliant consent form
- Be clear with your requests – Choose simple and clear phrases when explaining the reasons for consent. Please specify why you want the data to be collected and what you will do with it.
- Avoid pre-ticked checkboxes – The safest way to handle GDPR law is to be as clear as possible whether the person ticked the consent checkbox or not.
- Separate GDPR compliance consent from terms and conditions – Clarify what people are going to check. Never pack GDPR consent with terms and conditions and privacy policy because they are not the same thing.
- Give separate consent options – Customers should be able to consent to independent processing operations on the forms. Create an outline of each operation you have to help users have complete power over their consents and permissions.
- Make it easy to revoke the consent – Always include a visible unsubscribe link in your newsletter. Users have the right to withdraw their consent at any time, and you should definitely tell them how and where to do it.
How to create a GDPR compliant consent form
Now that we clarified why it is important to consider the GDPR law, it’s time to implement it in our form. The process is actually pretty easy and straightforward. All you need is the help of our plugin Kali Forms. This is the best online form builder for GDPR that will get the job done in minutes! We will start by installing this tool.
Install Kali Forms
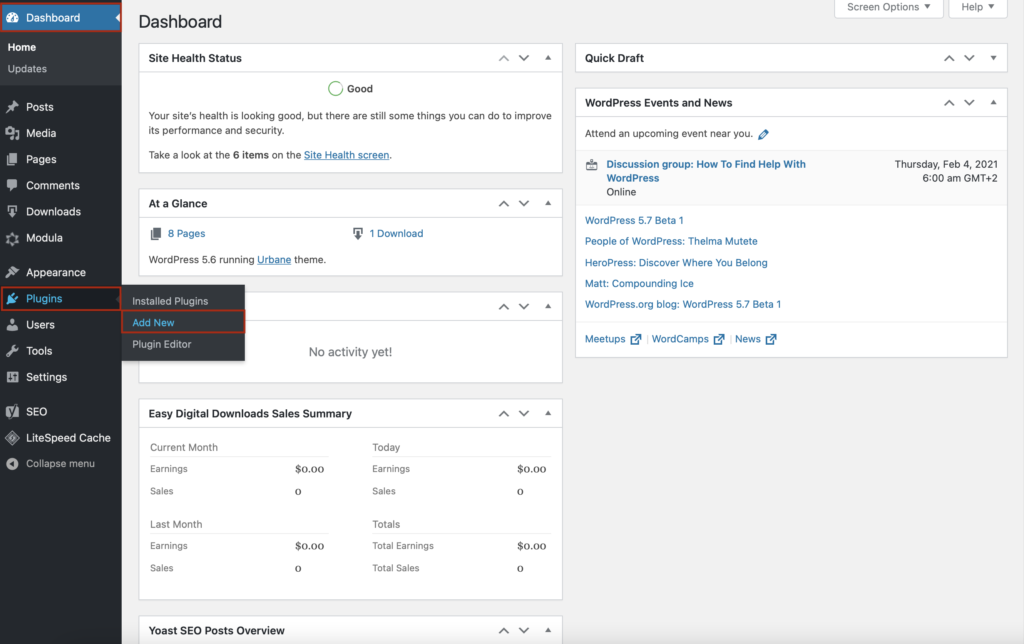
Presuming that you already have a website, all you’ll have to do is install Kali Forms from the page with all the available WordPress plugins. Don’t worry if you don’t have one, follow this guide on creating a WordPress website. Once you created your site, go to WordPress dashboard > Plugins > Add New.
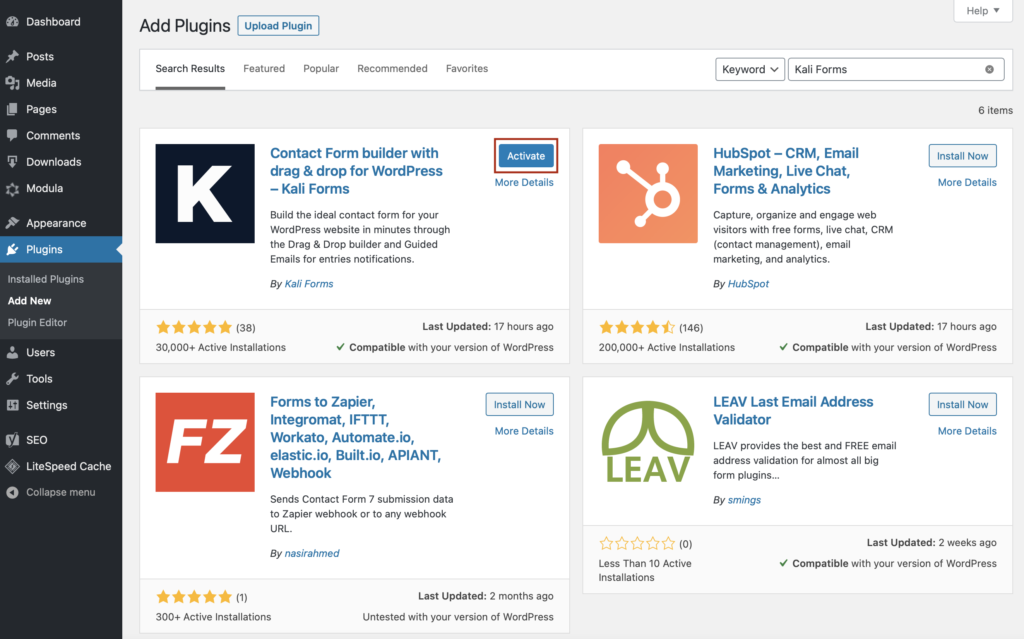
You will be redirected to a page with all the WordPress plugins currently available — type Kali Forms in the top right corner. When you find the plugin, click on Install.

Wait a few seconds until the installation process is done, then press on Activate.
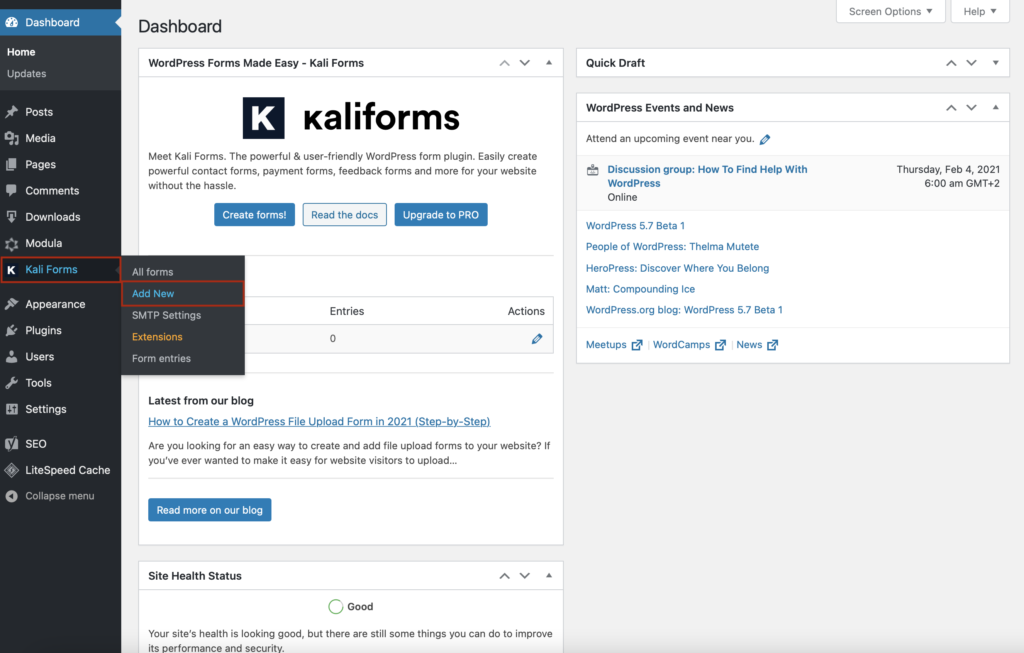
The plugin will appear on your WordPress menu located on the left.
Create a new form
From now on, anytime you want to create a new form, go to your WordPress menu > Kali Forms > Add new.
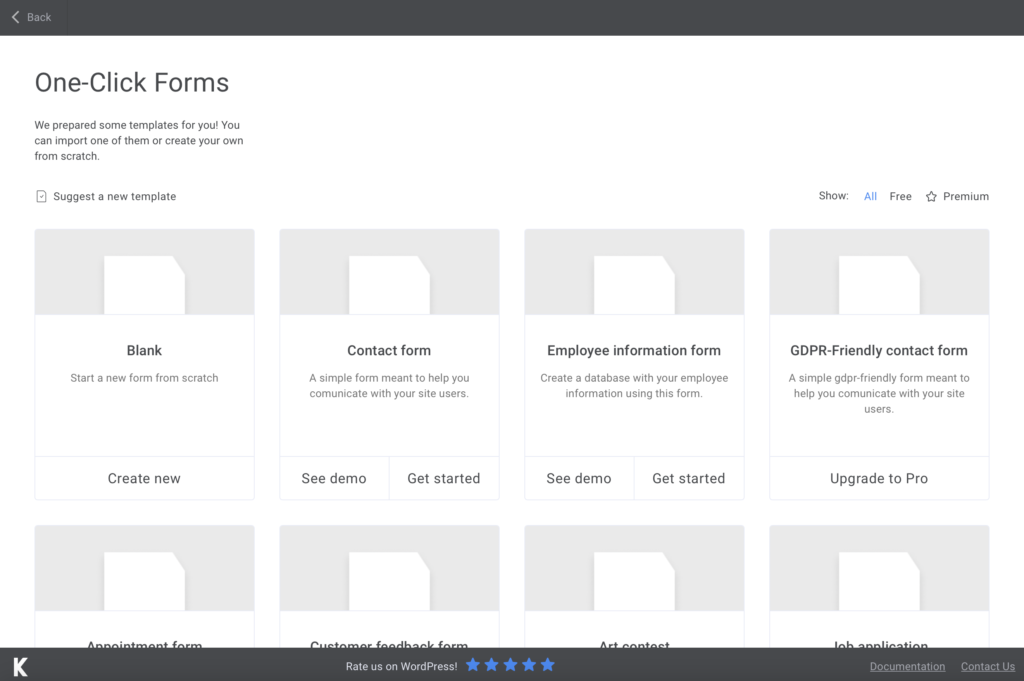
You will be led to a page with all the predesigned templates that Kali Forms offers. There is a template for GDPR already, so if you chose the premium version of Kali Forms, click on Get Started, select the style of the form, and then press Import. But let’s create one from scratch to see how the plugin works.
Start by naming your form to let people know what they are signing up for and to distinguish this form from the others.

Adding Form Fields
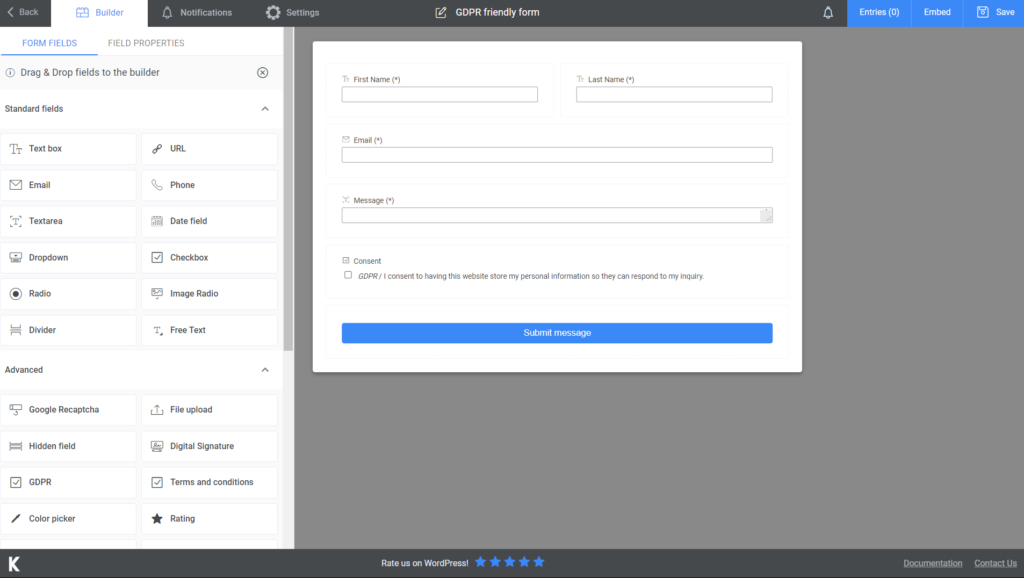
To clarify things from the beginning, all fields are customizable. You will find all the fields that Kali Forms has to offer on the left side of the screen. Drag and drop the desired field into your form and then click on it. Some customization settings such as field name, field caption, or field description will appear instead of the field menu. From there, you can design each field the way you want.
I started by adding a Text Box field for the first name and one field for the last name. After that, I added an Email field and a Textarea field for a message. After that, I made all the fields required to fill. Last but not least, I added a Checkbox field for the GDPR consent and ended the form with a Submit Button.
Additional features
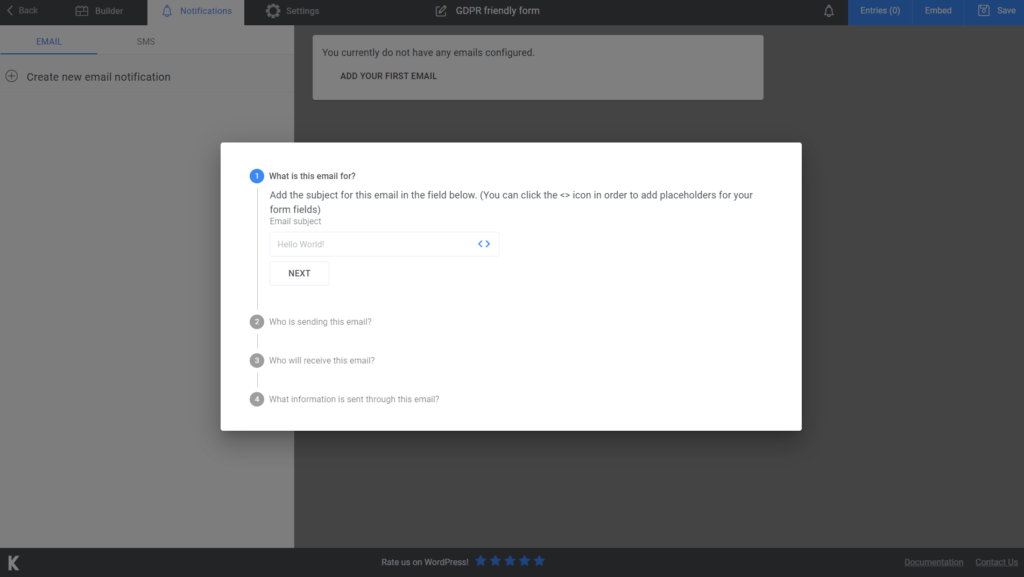
So, this is how you create a GDPR compliant consent form. If you want to send a confirmation email, go to Notifications and follow the instructions step by step. If you choose the premium version, you can send confirmation via SMS. It is all up to you.
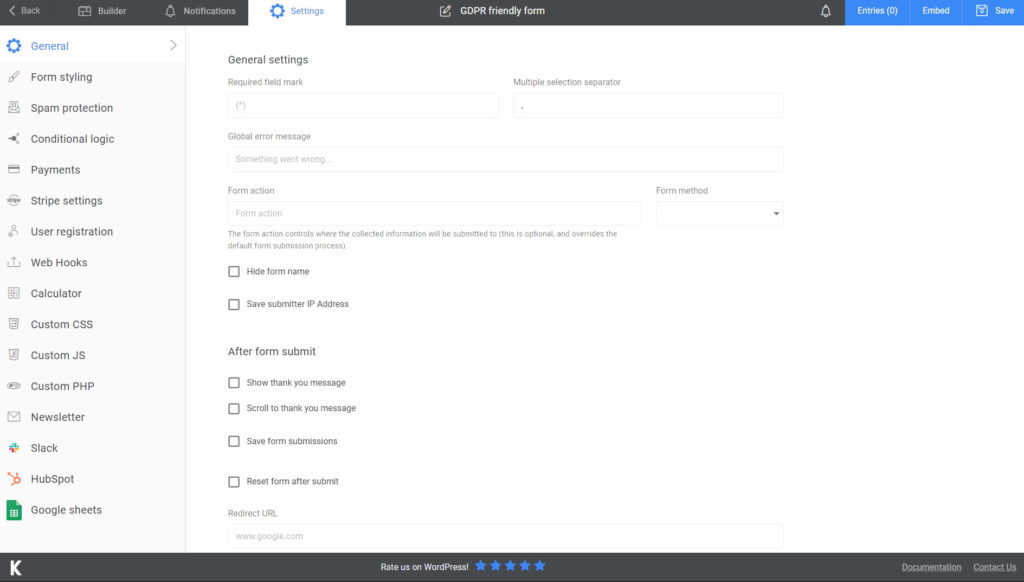
Further on, if you want to take advantage of all Kali Forms’ functions, go to Settings. You have many other customization options, such as selecting the form style or displaying a “Thank you for your message!” note. You can also connect your form to Slack or Hubspot if you choose the premium version.
Adding the GDPR compliant form to your website
After you finish building your form, press Save. Kali Forms will generate a shortcode to copy and paste into an existing page or a new one.
If you consider that your data is so important and want to keep it private, export it to CSV or Excel . It’s as easy as that!
Final Thoughts
Now that we have seen how important is a GDPR compliant consent form, I am sure you will implement it in all your future forms. It might seem hard to create one, but it’s really not. All you have to do is to follow the steps above.
Take time to know how Kali Forms operates and use it for your future forms. You won’t be disappointed by the results Kali Forms offers.


