

Are you looking for a way to optimize your onboarding process?
All medium and large-sized companies who hire new people need a straightforward onboarding process in order to integrate them and make them feel comfortable with the new working environment. Nowadays it’s even more difficult, with a lot of people working remotely. This is why it’s important to make this process as easy as possible, and we have the solution – an online employee onboarding form.
This tutorial is dedicated to showing you how simple it is to create a form that will get you rid of old, dull procedures. Let’s dig into it and see what this is about.
| 1. Why should you use an online employee onboarding form? |
| 2. How to create an employee onboarding form |
| 3. Adding the employee onboarding form to your website |
| 4. Summary |
Why should you use an online employee onboarding form?
The advantages are pretty convincing because it will get a lot of extra work off your back. It just takes a couple of hours to complete the whole process – after that, you can enjoy how much time and energy you’ve saved.
Save time
Instead of taking the new employee as well as someone else’s time to help them set up the details on the day of their arrival, you can just have them fill a form with all the necessary info. This way, they can spend that time properly meeting the team and everyone can have their details before even getting started.
GDPR
When they fill the papers with all their personal information, you have to make sure it doesn’t get misplaced or in the wrong hands. I know there are very slight chances that someone will mess around with other people’s details, but it’s better to be safe than sorry. You can export the data and save it on a computer, and you get rid of all that trouble.
Online office
If your company is hiring people who are supposed to work remotely, it’s pretty difficult to share details over an online meeting. This type of form should be your go-to option in this case – and for pretty obvious reason.
How to create an employee onboarding form
We promised you an easy-to-create form, so we’re ready to show you how it’s done. You will need no more than half an hour to go through this whole process, so prepare yourself to be amazed. All you need is the help of one tool – Kali Forms, a responsive and very intuitive plugin, with a user-friendly interface, that will be your number one ally when working on a form of any kind.
Installing Kali Forms plugin
In order to get started with this, you need a functional website. It doesn’t have to be something very fancy, since this form in something internal, not directed to the public. However, if you don’t have a website, you can easily create one by following this step-by-step guide. After this step, what you need to do is go to your WordPress menu and look for the Plugins section. Click on Add New and type Kali Forms is the search bar that appeared in the upper right corner. Once you find it, press Install and wait a couple of minutes.

When the installation is over, you have to Activate your plugin, so press the button I highlighted in the picture below.

Now everything’s up and running. You’ll find Kali Forms in your WordPress menu, so each time you want to create a form, press on Add New.

Creating a new form
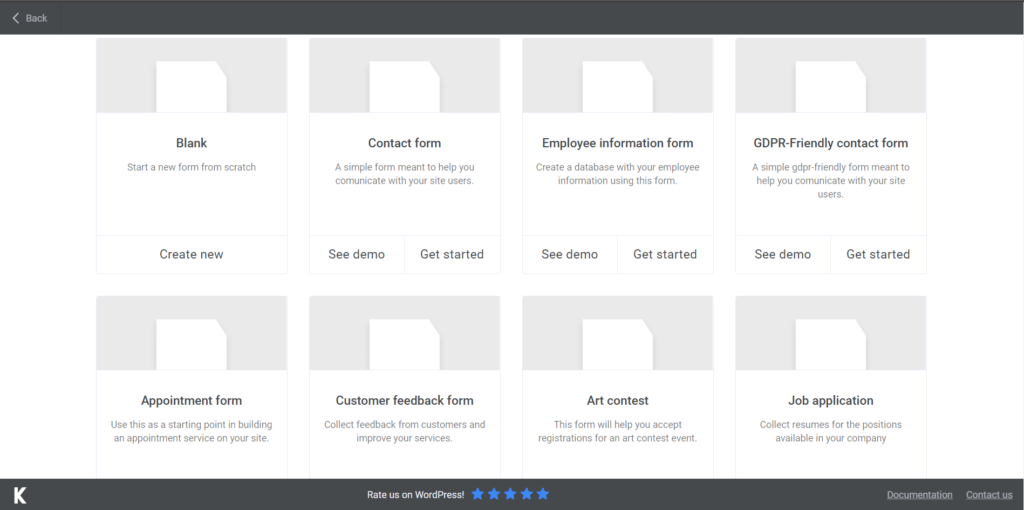
After clicking on Add New, you’ll find yourself on a page with a bunch of form templates. We don’t need any of them right now, but you can put them to use anytime if you want. In order to start creating our employee onboarding form, you need to press on Create New.
First things first, give your form a proper name. I simply named mine ‘’employee onboarding form’’, but you can choose anything more specific or appropriate for this.

Adding form fields
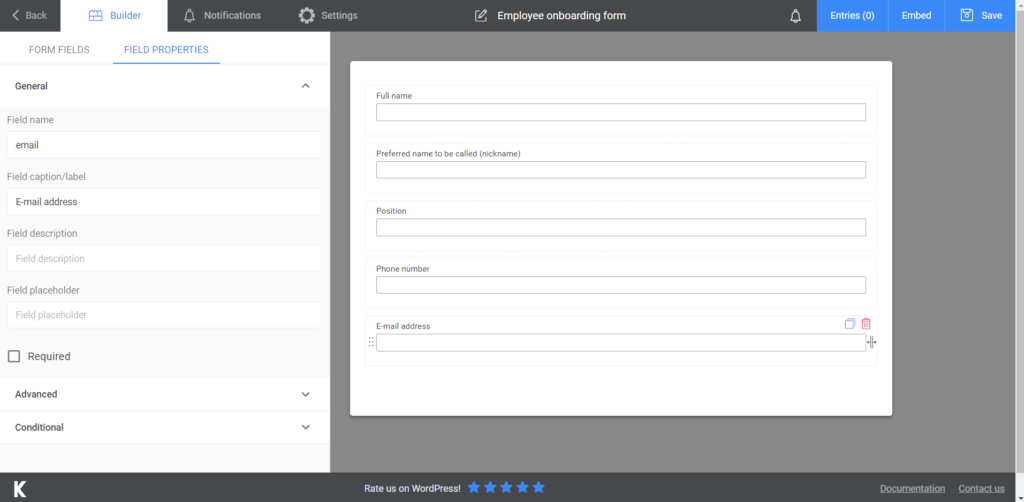
Before we move on to creating the actual form, there are a few things you should know. First of all, all the form fields are customizable. After you press on Create New, you can see an empty space waiting to be filled with fields from the menu, which you can find on the left. To customize any of these features, add them to the form and then click on them. Instead of the regular menu, the customization one will appear. You’ll be able to name your fields, add descriptions, placeholders, or make them required.
I started my form by adding three Text boxes – one for the full name, one for their nickname or how they’d like to be called, and one for the position they’ve been hired for. Next, I chose Phone and E-mail fields, so everyone in the new employee’s team can have their contacts.
Now that we’re done with the personal details, we can move to the office set-up one. I’m not sure how your onboarding process is going. But this is an employee onboarding form template, so it’s not mandatory to use it as it is. You can definitely use it, but you can also recreate your own. For the next part, I went for three Checkbox fields, so they can choose their preferred tools to work with. For this section, I also added a File Upload field, so they can send a picture of themselves for the badge.
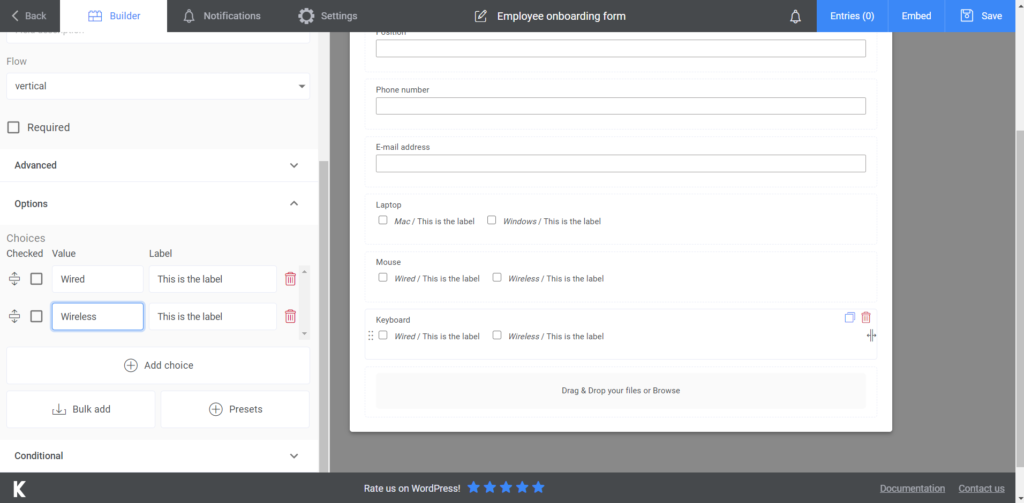
The last section is made up of other Choices field. This is meant to ask the new employee if they’d like a person to explain to them all the policies or they want to receive the documents and read them on their own. Lastly, don’t forget to add a Submit button and you’re done.

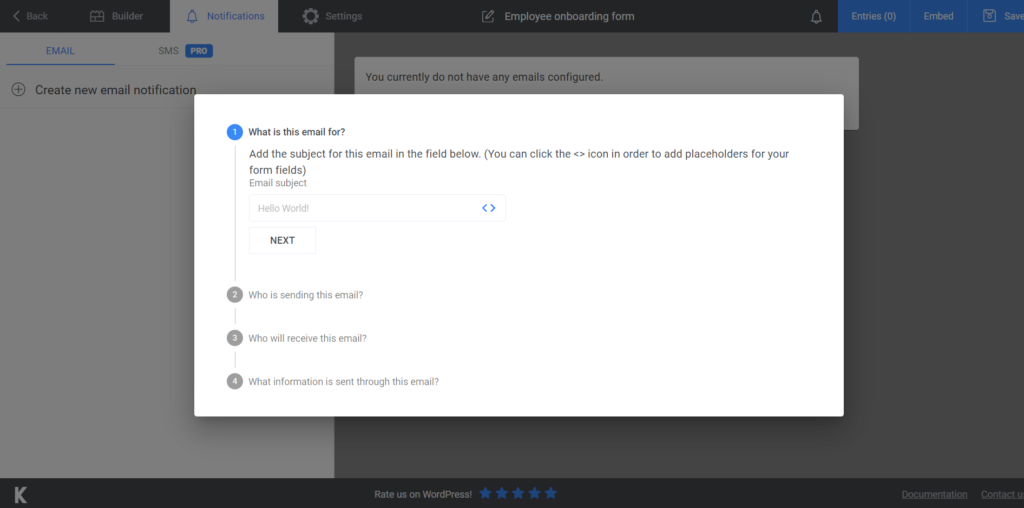
If you want to send e-mail notifications regarding this form, you can do so by going to the Notifications section and set up the e-mail there. The whole process is explained, so don’t worry. If you want the premium version of the plugin, you’ll be able to also send SMS notifications.
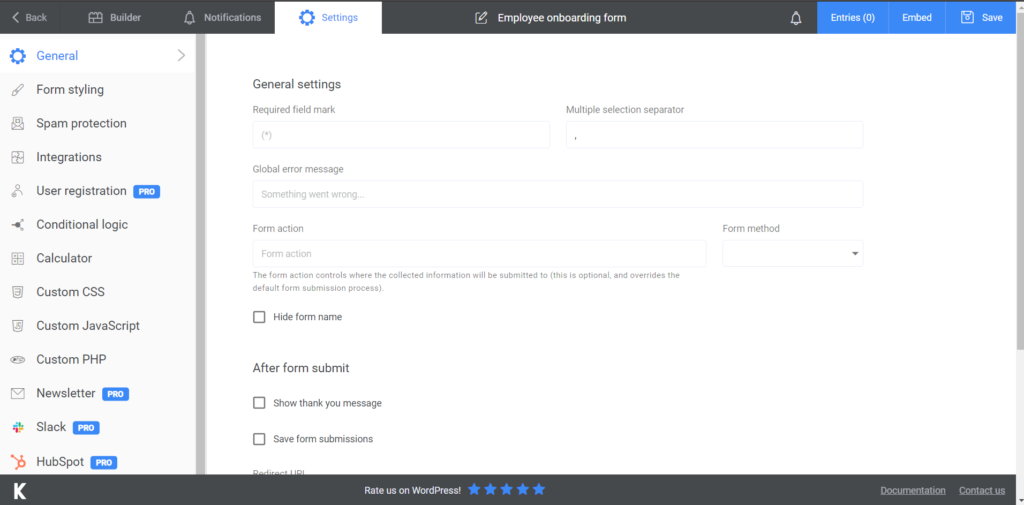
The last customization part happens in the Settings section. You can choose your Form Style, display a ‘’thank you message’’ after the form is submitted. The premium version allows you to send newsletters and connect your form to HubSpot or Slack.
Adding the employee onboarding form to your website
The last step of this tutorial is to integrate the form into your website. To do so, press Save when you’re done creating it. A shortcode will be generated. Copy and paste it into a page on your website. It can be an already existing page or you can create one just for this form.
Remember that you can export all your data to CVS or Excel, in order to store it in a safe place and save it for future reference.
Summary
Hopefully, everything is clear and you’re now aware of how important, as well as easy it is to create an employee onboarding form. It’s a big step towards making your processes more efficient and saving a lot of time that can be directed to other activities. Remember that Kali Forms is by your side and you can repurpose this plugin for as many things as you’d like.


