
Are you looking to optimize your patient intake process?
We’re here to help you with that. We’ll teach you the step-by-step process of creating an online patient intake form, so you can save yourself and your patients a lot of time. There are a few things in life that happen very rarely, and one of them is a patient coming at least 20 minutes earlier for the appointment to fill out the intake form and check it thoroughly before giving it back.
So let’s speed up this process and make everything way easier than it is right now. It’s important to take care of every aspect that can help you do your job better.
| 1. Why should you use an online patient intake form? |
| 2. How to create a patient intake form |
| 3. Add the patient intake form to your website |
| 4. Summary |
Why should you use an online patient intake form
There are several things you’re going to benefit from if you’re moving this process online. And we’re not talking advantages only for you, but for your patients as well.
Security
Nowadays, personal information is something people are very careful with. This domain had to follow these rules way before GDPR and all that stuff, so people’s data won’t be spread around and generate a lot of fuss. Having an online form means getting rid of all those papers that you have to carefully stack somewhere, so they are safe and easy to find. Instead of looking through hundreds of records, you can just be a few clicks away from finding what you need – and they can be all stored in a computer.
Save time and paper
As I said earlier, you get to save a great amount of time by digitalizing this process. First of all, the appointment will run way smoother if the patient fills and sends the papers before coming there. Time will be saved for both of you and you won’t have to worry about buying and storing paper anymore.
Accuracy
Because you have to fill a form right before your appointment, and let’s face it – how many people come earlier for this?, you’ll be forced to hurry. Many times this means that you don’t have the time to properly check your information and this can lead to accuracy problems. And this is something you don’t want to mess around with. Having the form beforehand to be filled in at home, people will have as much time to fill it as they want.
Patient satisfaction
Because the workflow becomes smoother, patients will not experience the frustration of wasting time and cutting time from their appointment because of a piece of paper. They will see improvements in the practice and acknowledge the fact that you truly care for their wellbeing.
How to create a patient intake form
We talked a lot about how much this online form is going to help you, so the process of creating the actual form shouldn’t be much harder. In fact, it is so intuitive and easy to follow that you’ll be wondering why didn’t you think of this before. You just need the help of a great plugin, Kali Forms, that will basically do half of the job for you. Let’s see what this is all about.
Installing Kali Forms plugin
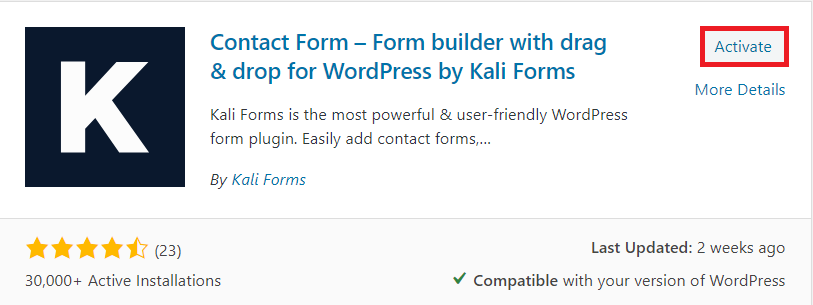
The majority of the professionals in this field have a website nowadays. However, if you don’t already own one, it’s super easy to create it, just as we accustomed you all along this article. Here you can find a complete guide on how to do it. After this step is over, all that’s left is to go to your WordPress dashboard and find the Plugins section. Click on Add New and look for Kali Forms – you’ll see a search bar in the right upper corner.

Now that you found it, click Install and wait for a couple of minutes. The next step is to press Activate, and you’re almost done.
Once the plugin is installed and activated, all that’s left to be done is adding a new form.
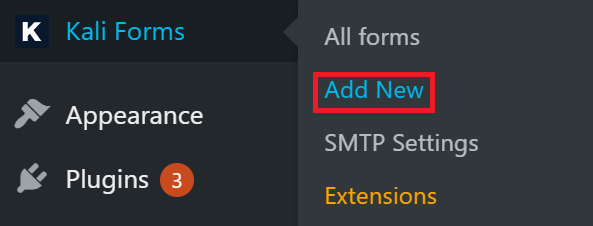
Creating a new form
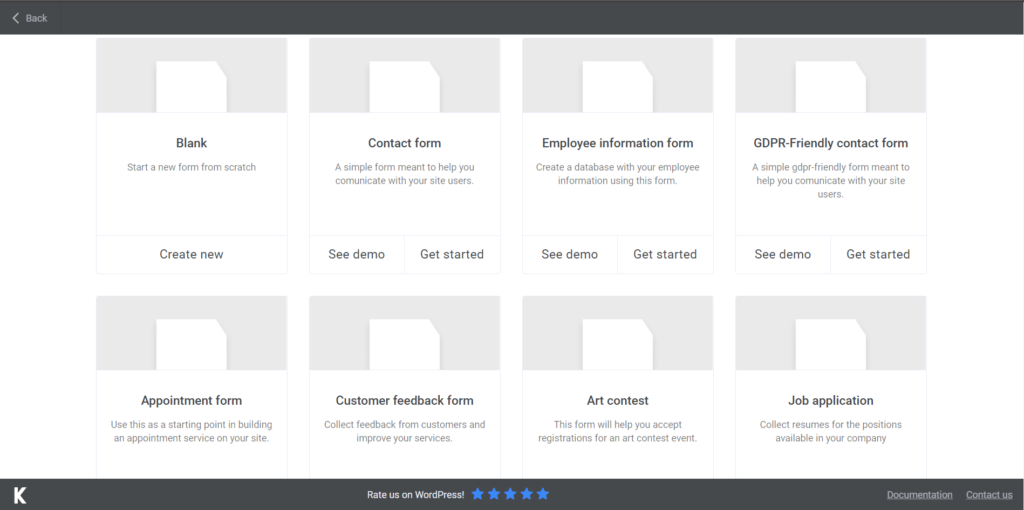
After clicking on Add New, you’ll be redirected to a page with a bunch of templates. You may put them to use, but right now we’re going to create a patient intake form from scratch. So click on Create New.
Start by giving a name to your form, so people know what they’re supposed to fill in. I named mine simply ‘’Patient intake form’’, for our intake form template.
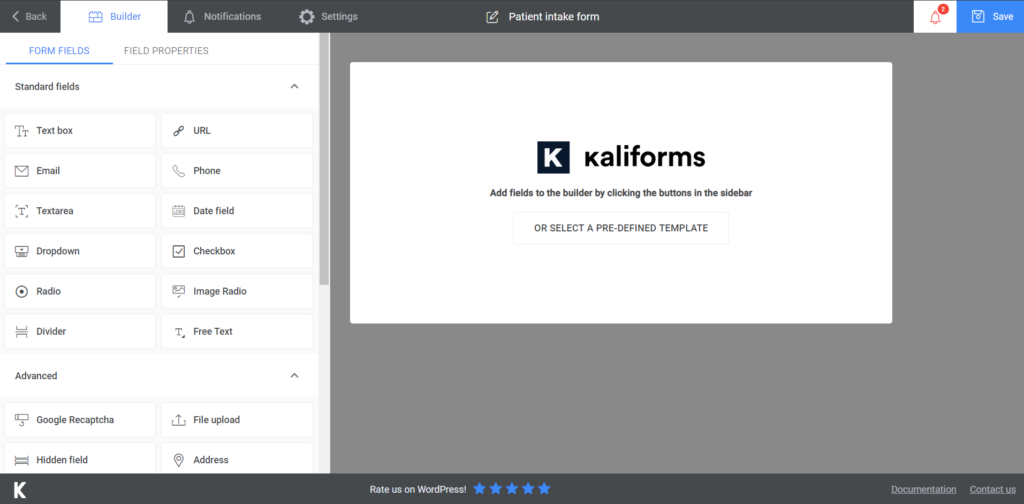
Adding form fields
You can take an old form that you have around and start filling your medical intake form with those fields you know are needed. Remember that we’re going to create a patient intake form template, but it’s not necessary to use ours. You can go about your business, but we want to provide you with the full experience.
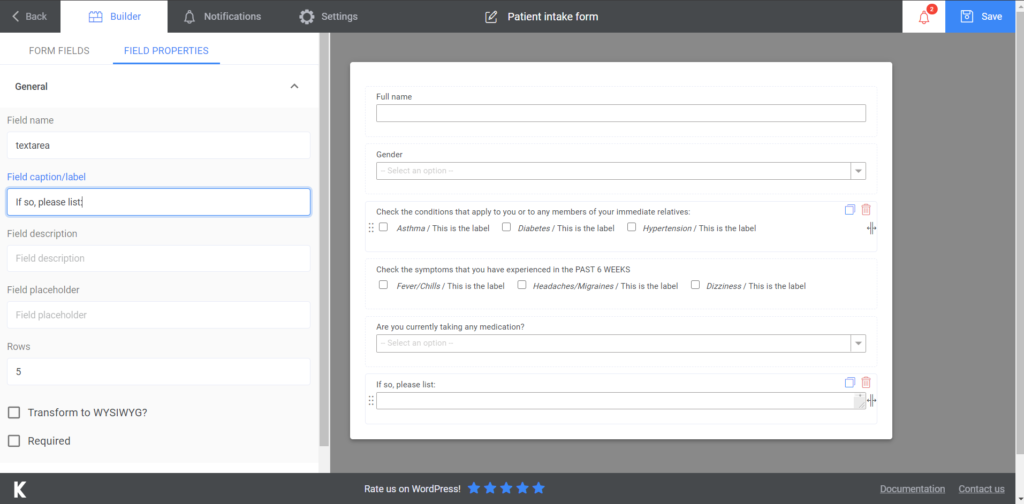
First of all, you need to know that all fields are customizable. On the left, there’s a menu with all the types of fields you can include in your patient form. To customize one field, you have to click on it in the menu, and it will appear in the form – click on the box that appeared, and instead of the menu, you’ll see all the customization options for that specific field.
You can name them, add descriptions to make it clear about what information is requested. You can even add examples in the filling field itself, with the field placeholder option. Also, if you know there are required pieces of information, you can make the fields required. This way, patients will not be able to skip anything, because it will be necessary to fill them all to submit it.
Now let’s start creating our first patient intake form. Firstly, I added a Text box, for the full name of the patient, and a Dropdown to choose the gender. Next, I added two Checkbox fields for conditions that may run in the family and symptoms that they have experienced over the past 6 weeks. I will list a few options, but you can fill it with whatever you feel is necessary. I also opted for a Choices field, so they can state if they are currently taking any medication or not and a Textarea where they can say what are they taking if that is the case.
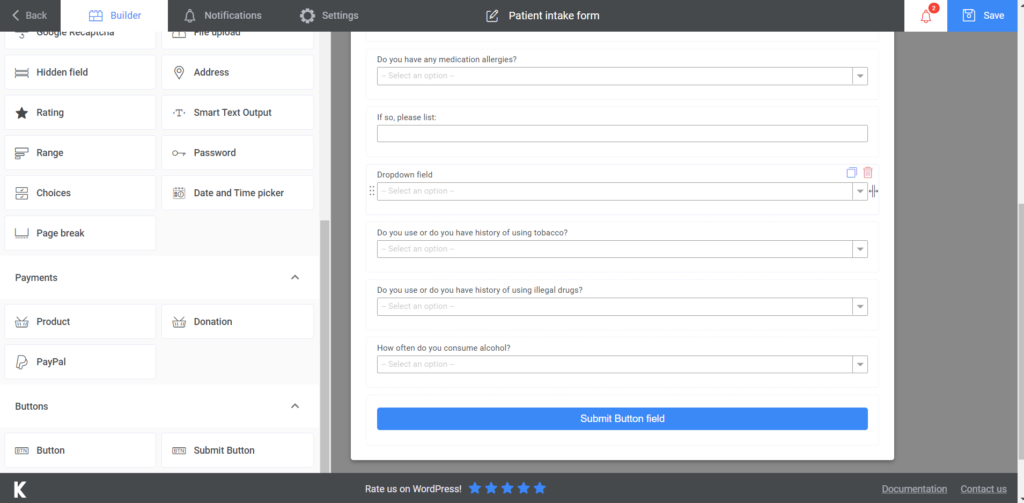
For the last part of the patient intake form, I’m going to use 4 Dropdown fields, for the following: medication allergies – and here I’m going to add a Text box so they can state what they’re allergic to, tobacco, alcohol, and drug usage. Last but not least, I added a Submit button. This was it with building the patient intake form – easy, right?
For the sake of making sure people know that their medical form was submitted, you can go to the Notifications section and create an automated confirmation e-mail. Some people may not feel comfortable not knowing if their form has reached you, so this is a simple way of reassuring them everything is fine. If you’re not sure how to do it, the steps are pretty self-explanatory – however, we also have a tutorial for that too. Take things to the next level and upgrade your subscription – you’ll be able to send SMS notifications as well.
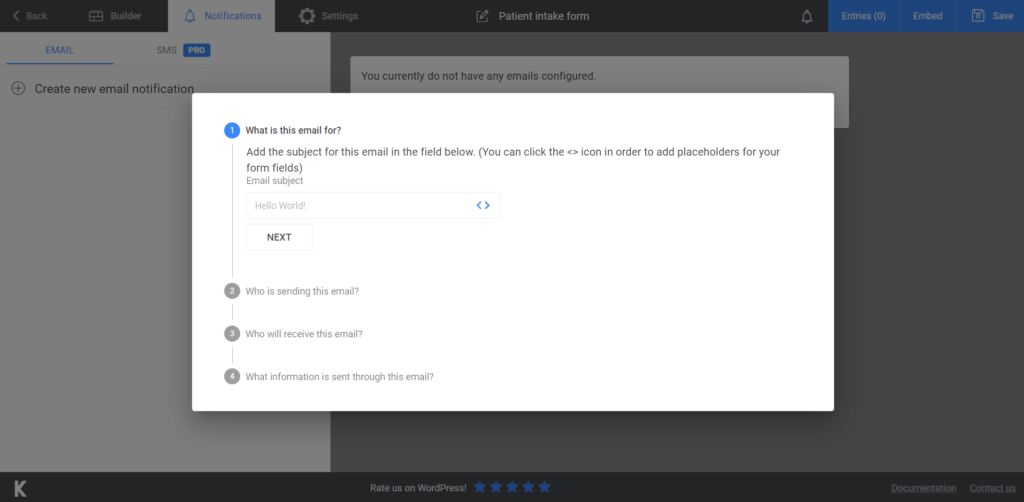
E-mail notifications
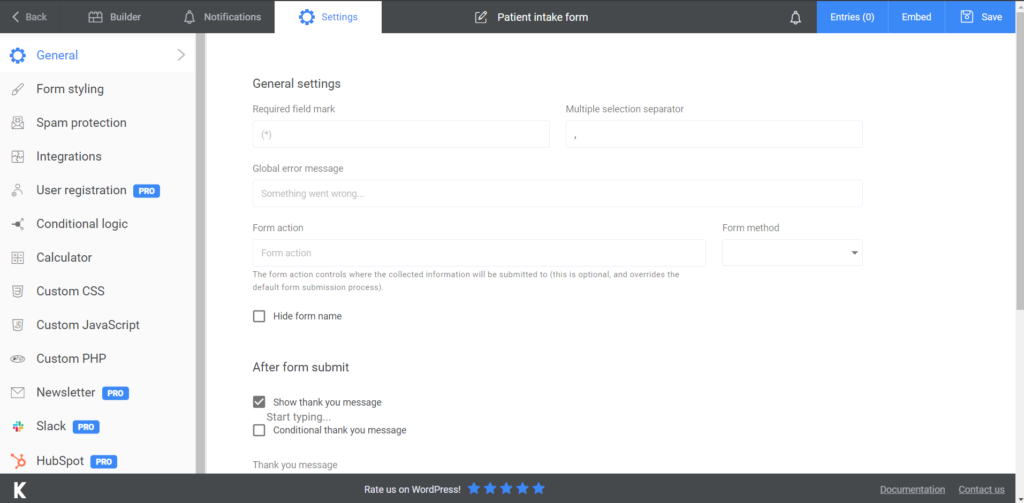
If you want to customize the appearance of your intake form or change any other things, go to the Settings section. There you’ll find a bunch of options to play around with.
Add the patient intake form to your website
The actual final step is to add the form to your website. You can create a new page just for it or you can integrate it in an already existing one. It’s your choice. Just copy the shortcode that appears after you Save the form and paste it on the page you want it to be. You’re now good to go!
You can export your submissions to CVS or Excel and keep them somewhere safe and easy to access.
Summary

There’s nothing left to do now than just getting started with Kali Forms and creating your patient intake forms online. It’s a simple and efficient way that will save you much more than you can think of right now. Give it a try and see how it totally transforms your workflow!