

Wondering if there’s a way to create a contact form in WordPress?
As you might already know, WordPress doesn’t provide a built-in contact form by default, so you will need a powerful tool to help you easily add a contact form to your website.
If you want to enhance your website, give your customers the possibility to contact you through these forms. This way, visitors can quickly get in touch with you and your services.
WordPress comes with a significant number of plugins, each of them intended to make your work easier.
I’ll walk you through a contact form tutorial using Kali Forms, the most user-friendly WordPress form builder. So, let’s dive right in!
Table of contents
Why your website needs a contact form?
Indeed, it might seem easier to add an email address on your contact page than creating a contact form. However, if you want to grow your business and provide professional customer services, I strongly advise you to make such a form.
However, why are contact forms necessary? Let’s see some of the benefits of adding a contact form to your website:
- Secure your website – If you create a contact form for your visitors, you won’t have to put your email address on your website and receive unwanted emails. People will fill in the form and ask for your help.
- Act like a pro – Having a contact form on your website will allow your visitors to get in touch with you. This way, you will provide professional customer service and gain happy clients. It also shows that you take your business seriously.
- Information collected – When using a contact form, you can add various fields for specific information that you want to collect. Through emails, people won’t send the information you might need.
- Database – You can take advantage of contact forms by creating a database with your customers. With that in mind, you can send emails to your customers about your products, articles from your blog, email campaigns, and much more.
Therefore, having such a form on your website comes with a big bunch of benefits. Let’s see how you can create the most straightforward contact form using Kali Forms.
How to create a contact form in WordPress
Creating a contact form in WordPress is super easy. You only need the help of a powerful tool that will make this process easier. So, take advantage of Kali Forms, the most user-friendly, responsive, and intuitive form builder. Let’s see how it works.
Step 1: Installing Kali Forms plugin
To achieve this step, you will need a running website. If you don’t own a website, you can follow this easy-peasy tutorial on how to create a WordPress website. Then, go to your WordPress dashboard > Plugins > Add New.
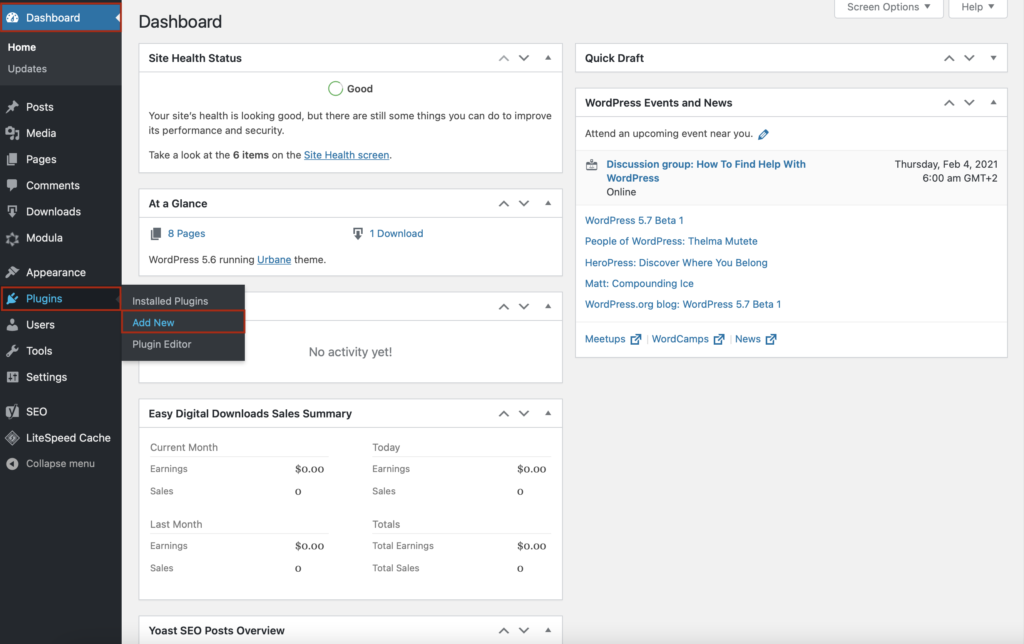
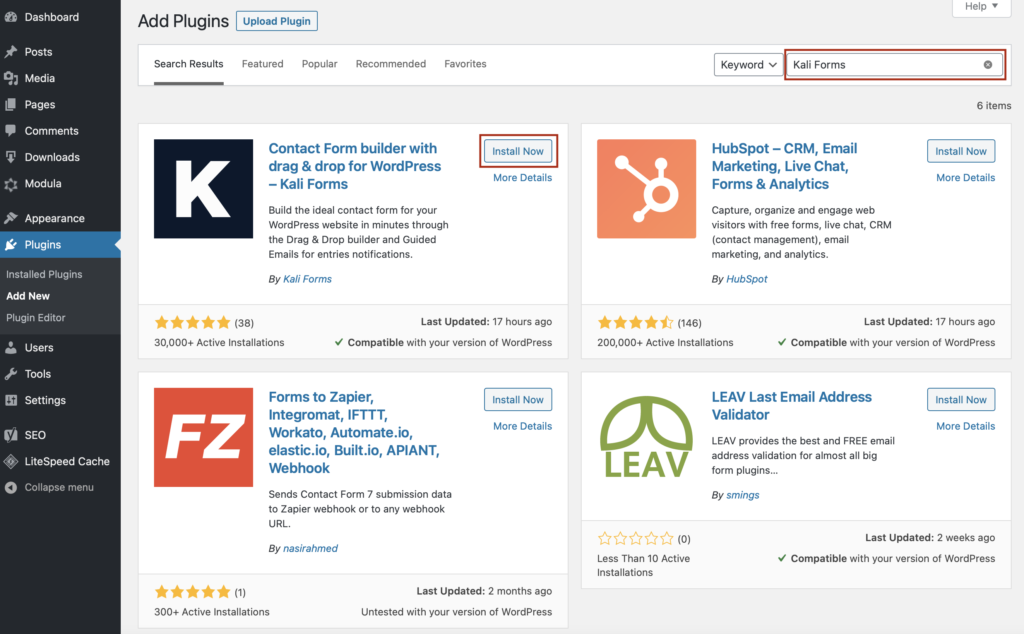
In the upper right corner, you will see a search bar. Type Kali Forms, and when you find it, press Install.
Once you have installed the Kali Forms plugin, you have to activate it. So, click on Activate, and the plugin will pop up in your WordPress menu.

From now on, every time you want to create an online form, go to the Kali Forms icon and click Add New.

Step 2: Creating a new form
You will find yourself redirected to a page with a bunch of pre-designed templates. As you can see, there is a contact form template, so you can use it and customize the fields. However, I will show you how you can create one from scratch – press Create New.
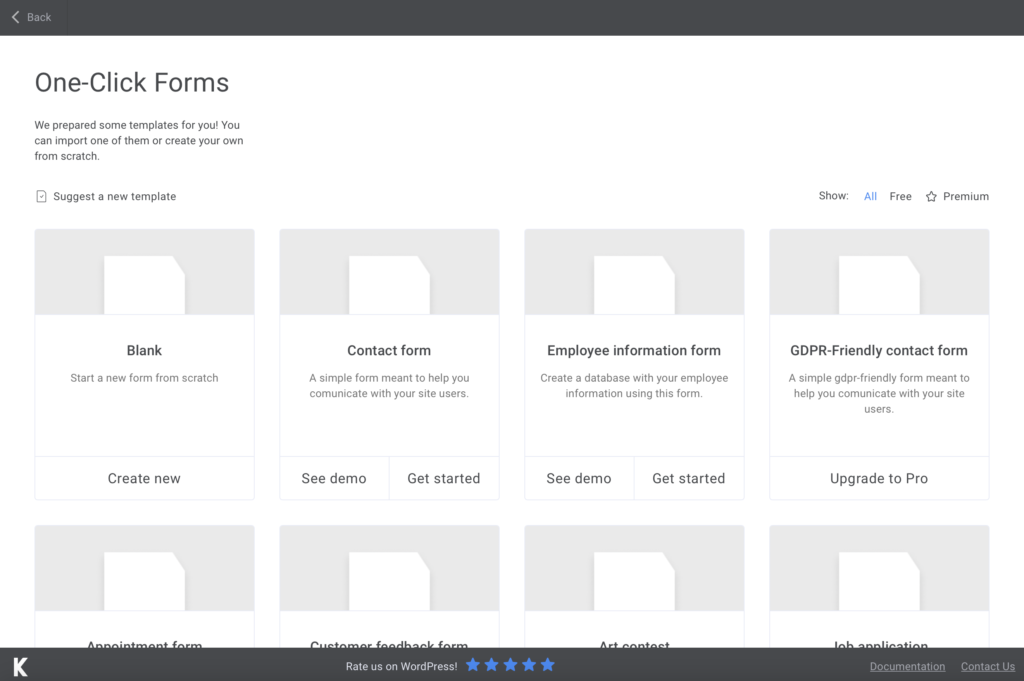
I advise you to name your form to differentiate it from the others.
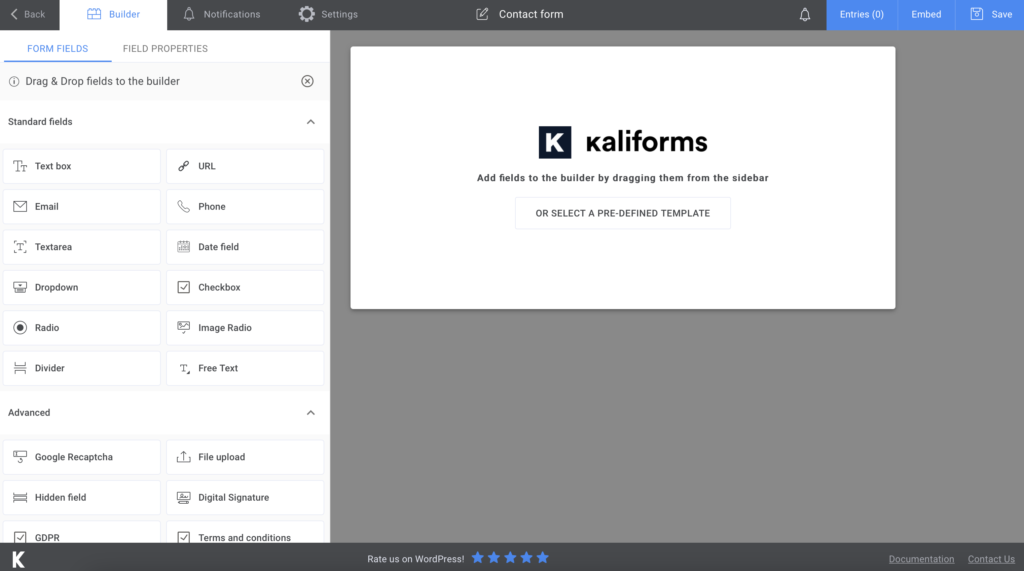
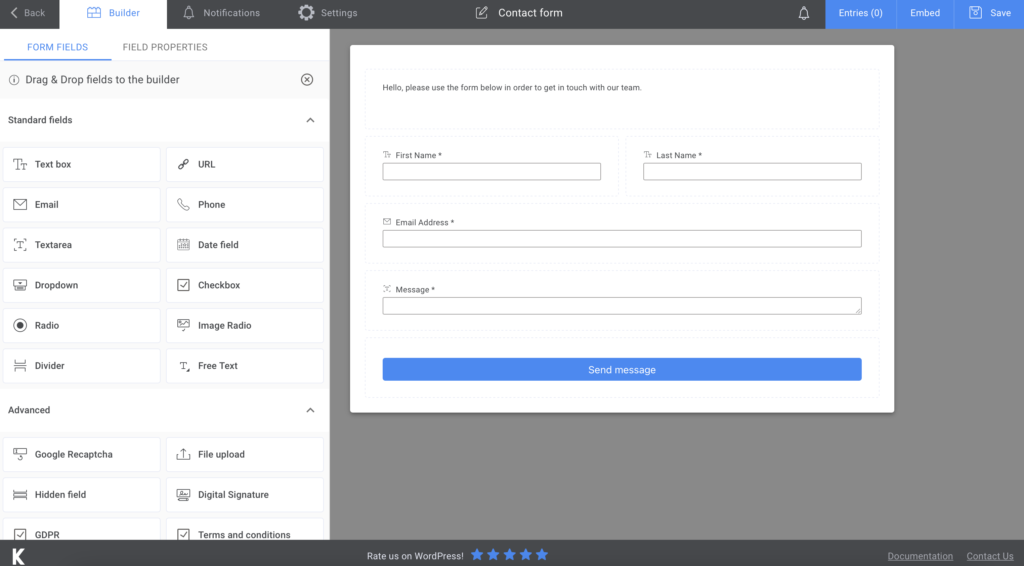
Step 3: Adding form fields
First of all, I want to let you know that everything here is customizable – name your fields, add a description or placeholders, make fields required to fill or not. You will see a lot of options and features on the left side of your page.
For our contact form, I will add a Free Text field where I type an introduction message, two Text boxes for your visitors’ first and last names, an Email field, and another Textarea field for their message.
In the end, I added a Submit button. You can also notice that I’ve made all the fields required to fill to ensure that you will gather all the necessary information.
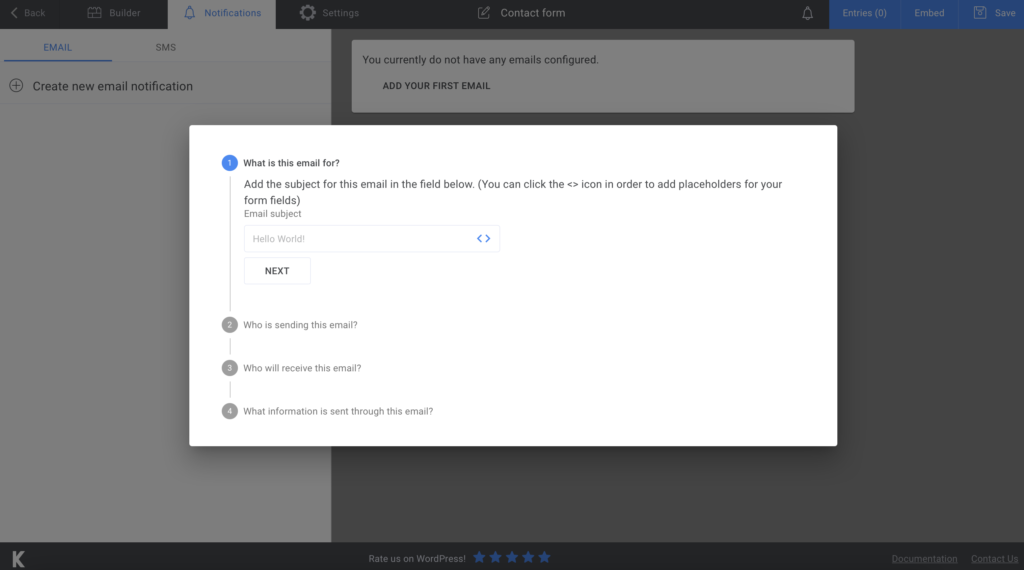
If you want to let your visitors know that you received their message, go to Notifications and set up a confirmation mail. However, if you upgrade to the premium version, you can even send SMS notifications.
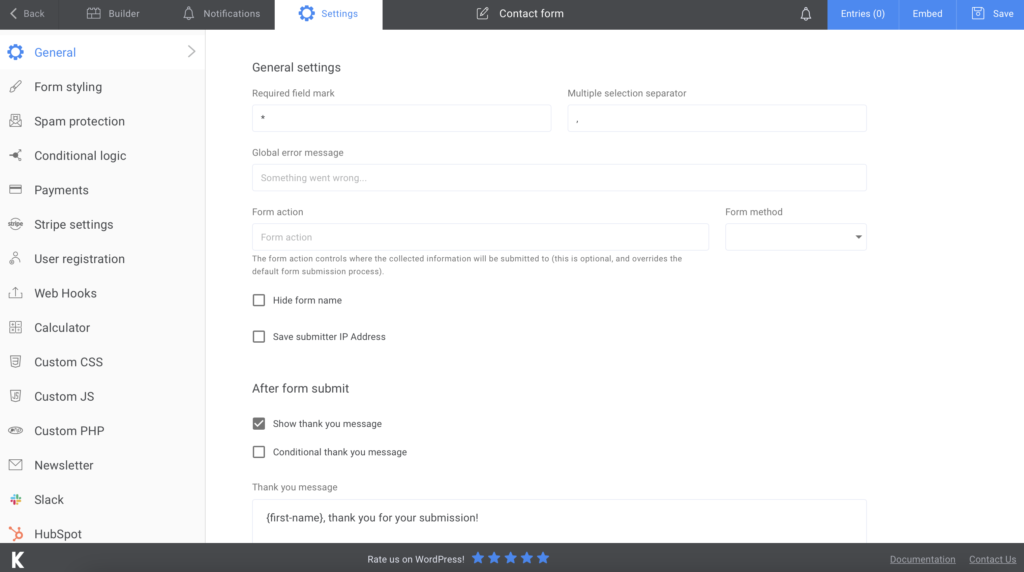
You can also customize your form details by going to the Settings section. You can display a “thank you” message and personalize it or choose your preferred Form Style. There are more advanced features – the premium subscription provides user registration or sending newsletters, so make sure you check those out too.
Step 4: How to add a contact form in WordPress
Now, let’s see how to put a contact form in WordPress. All you have to do is attach the form to your website. So, press Save if you are happy with your form. You will see that a shortcode will be generated with the copy link. So, copy and paste it into a page on your website.
One more significant feature that this WordPress contact form tool provides is to export all the information to CVS or Excel. Now you will have a database with your visitors’ registration, so store it somewhere safe.
Summary

Creating a contact form for your website has never been easier! Now that you know all the steps and how easy it is to create an online form with Kali Forms, you can start working on multiple forms and enhance your website. Take advantage of each feature provided by this tool and increase your workflow!


